
Related Manuals for Yardworks 060-2365-6


Summary of Contents for Yardworks 060-2365-6
- Page 1 Grass Trimmer model number 060-2365-6 | contact us: 1.866.523.5218 3025736 Certified to CSA Std. C22.2 No.147 Conforms to UL Std. 82 IMPORTANT: Instruction Read and follow all safety rules and operating Manual instructions before using this product.
- Page 2 060-2365-6 | contact us: 1.866.523.5218...
-
Page 3: Technical Specifications
060-2365-6 | contact us: 1.866.523.5218 Technical Specifications General Safety Rules Know Your Grass Trimmer Accessories Exploded View Parts List Assembly & Operation Maintenance Symbols Warranty TECHNICAL SPECIFICATIONS Voltage 120 V~ 60 Hz Rated Current No Load Speed 8000/min Cutting Diameter 14”... - Page 4 060-2365-6 | contact us: 1.866.523.5218 FOR ALL APPLIANCES When using an extension cord, be sure to use one heavy enough to carry • Avoid Dangerous Environment - Don’t the current your product will draw. An use appliances in damp or wet locations.
- Page 5 060-2365-6 | contact us: 1.866.523.5218 • Disconnect Appliance - Disconnect Table 1 the appliance from the power supply Minimum gauge for extension cords when not in use, before servicing, when Volts Total length of cord changing accessories such as blades, and the like.
- Page 6 060-2365-6 | contact us: 1.866.523.5218 • Replacement Parts SAVE THESE INSTRUCTIONS When servicing use only identical replacement parts. • Polarized Appliance Connections To reduce the risk of electric shock, this appliance has a polarized plug (one blade is wider than the other) and will require the use of a polarized extension cord.
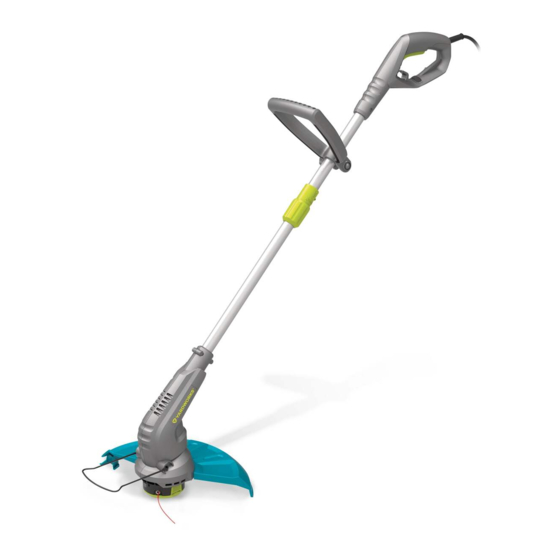
- Page 7 060-2365-6 | contact us: 1.866.523.5218 Auxiliary Handle Cutting Head Assembly On/Off Switch Flower Guard Extension Cord Retainer Line Cutter Safety Guard Safety guard Flower guard Auxiliary handle...
- Page 8 060-2365-6 | contact us: 1.866.523.5218...
- Page 9 060-2365-6 | contact us: 1.866.523.5218 Item Description QTY. B-Self Tapping Screw Power Cord B-Self Tapping Screw Cable Protector Left Housing Self Tapping Screw Ball Bearing 607 Cord Clamp Rotor Switch Brush Holder Compression Spring Ball Bearing 608 Trigger...
- Page 10 060-2365-6 | contact us: 1.866.523.5218 ASSEMBLY AND OPERATION 1. FITTING THE GUARD (See Fig. A) Attach the safety guard to the trimmer head. Align the guard so it slides into the slots located on the trimmer head. Turn the tool over and secure the safety guard onto the trimmer head with the screw (a) provided.
- Page 11 060-2365-6 | contact us: 1.866.523.5218 ADJUSTING THE ANGLE (Fig. F) 5. MAINS SUPPLY CABLE STRAIN RELIEF (SEE FIG. D1 D2) In order to reduce strain on the cable inlet, form a loop and locate the cable around the strain relief arm.
- Page 12 060-2365-6 | contact us: 1.866.523.5218 7. MANUALLY FEEDING THE LINE (Fig. F) Replacing spool & replacing line To remove the cap Press and hold in the two latches. (See Fig. H1-H3) Pull cap away from the spool holder. When refitting the spool cap keep all areas of the cap and spool holder clean.
-
Page 13: Automatic Line Feed System
060-2365-6 | contact us: 1.866.523.5218 8. TRIMMING (Fig. I) To switch on the trimmer, If you find that the nylon line is too short follow the instruction as in ‘Automatic line feed system’ or “To manually feed the line”. Hold the bottom of the trimmer head about just above the ground and at a slight angle. - Page 14 060-2365-6 | contact us: 1.866.523.5218 10. MANUALLY WINDING THE LINE (SEE FIG. K, L, M, N) Take approximately 16’ (5 m) line and insert 5/8” (15 mm) of line into one of the holes in the upper section of the spool (Fig. M). Wind the line in the direction of the arrows on the top of the spool (Fig.
- Page 15 060-2365-6 | contact us: 1.866.523.5218 After use, disconnect the machine from the mains and check for damage. Your power tool requires no additional lubrication or maintenance. There are no user serviceable parts in your power tool. Mains powered trimmers should only be repaired by an authorized repairer use only manufacturers recommended replacement parts and accessories.
- Page 16 060-2365-6 | contact us: 1.866.523.5218 Symbol Name Designation/Explanation Volts Voltage Amperes Current Hertz Frequency (cycles per second) Watts Power Minutes Time Alternating Current Type of current Direct Current Type of current Class II Construction Double-insulated construction /min Per Minute Revolutions, strokes, surface speed, orbits etc., per minute...
- Page 17 060-2365-6 | contact us: 1.866.523.5218 TWO-YEAR LIMITED WARRANTY HOW TO OBTAIN SERVICE Warranty service is available by calling For Two (2) Years from the date of purchase the toll-free helpline, at 1.866.523.5218. within Canada, YARDWORKS CANADA The factory will not accept the return of a...
Need help?
Do you have a question about the 060-2365-6 and is the answer not in the manual?
Questions and answers
What is the part number for #34 in the 0602365-6 yardwork grass trimmer. Please ship me 2.
I am looking size or part number for spool cap for this particular trimmer