Table of Contents
Advertisement
Quick Links
Advertisement
Table of Contents

Related Manuals for Brinkmann Pro 2610


Summary of Contents for Brinkmann Pro 2610
- Page 1 This Owner's Manual is provided and hosted by Appliance Factory Parts. Brinkmann PRO SERIES 2610 Owner's Manual Shop genuine replacement parts for Brinkmann PRO SERIES 2610 Find Your Brinkmann Grill Parts - Select From 1001 Models -------- Manual continues below --------...
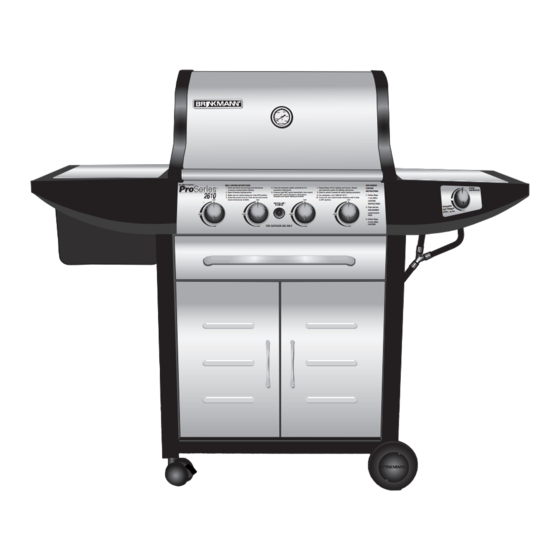
- Page 2 Gas Stainless Steel Outdoor Grill OWNER’S MANUAL ASSEMBLY AND OPERATING INSTRUCTIONS SAVE THIS MANUAL FOR FUTURE REFERENCE WARNING HAZARDOUS EXPLOSION MAY NOTICE TO INSTALLER: RESULT IF THESE WARNINGS AND LEAVE THESE INSTRUCTIONS INSTRUCTIONS ARE IGNORED. READ WITH THE GRILL OWNER FOR AND FOLLOW ALL WARNINGS AND FUTURE REFERENCE.
-
Page 3: Important Safety
IMPORTANT SAFETY WARNINGS WE WANT YOU TO ASSEMBLE AND USE YOUR GRILL AS SAFELY AS POSSIBLE. THE PURPOSE OF THIS SAFETY ALERT SYMBOL IS TO ATTRACT YOUR ATTENTION TO POSSIBLE HAZARDS AS YOU ASSEMBLE AND USE YOUR GRILL. WHEN YOU SEE THE SAFETY ALERT SYMBOL PAY CLOSE ATTENTION TO THE INFORMATION WHICH FOLLOWS! READ ALL SAFETY WARNINGS AND INSTRUCTIONS CAREFULLY BEFORE ASSEMBLING AND OPERATING YOUR GRILL. - Page 4 WARNING • Never use natural gas in a unit designed for liquid propane gas. • Never use charcoal briquets or lighter fluid in a gas grill. • Leak test all connections before first use, even if grill was purchased fully assembled and after each tank refill.
-
Page 5: Installation Information
WARNING • FOR OUTDOOR USE ONLY. DO NOT operate indoors or in an enclosed area such as garage, shed or breezeway. • Use your grill OUTDOORS in a well ventilated space away from dwellings or other buildings to prevent dangers associated with gas accumulation and toxic vapors. We recommend your grill be situated at least 10 feet from buildings. - Page 6 The cylinder must also be equipped with: • A shut-off valve terminating in a Type 1 gas cylinder valve outlet. • A Type 1 valve that prevents gas flow until a positive seal is obtained. • An arrangement for vapor withdrawal. •...
-
Page 7: Filling The Lp Gas Cylinder
240°F to 300°F (115°C to 150°C). If this should happen, remove the entire regulator assembly and dispose of properly. A replacement regulator assembly can be purchased by contacting Brinkmann at 1-800-527-0717. The cause of the excessive heat should be determined and corrected before using your grill again. - Page 8 • DO NOT attempt to adjust or repair the regulator. A replacement regulator can be supplied by contacting Brinkmann. The regulator is designed to operate at a maximum output pressure of 11 inches of water column (2.74 kPa). During assembly and/or replacement of the gas cylinder, keep the gas supply hose free of kinks and/or damage.
-
Page 9: Leak Testing
DANGER LEAK TESTING: To prevent fire or explosion hazard: • DO NOT smoke or permit ignition sources in the area while conducting a leak test. • Perform test OUTDOORS only in a well ventilated area. • Never perform a leak test with a match or open flame. •... -
Page 10: Pre-Start Checklist
6. Check each place listed (A -K) for growing bubbles which indicates a leak. 7. Turn OFF gas supply at cylinder valve. 8. Turn on control knobs to release gas pressure in hose. 9. Turn control knobs to OFF position. 10. -
Page 11: Lighting Instructions
WARNING LIGHTING INSTRUCTIONS: Follow the instructions exactly. 1. OPEN THE GRILL LID before attempting to light a burner so that fumes do not accumulate inside the grill. An explosion could occur if grill lid is down. 2. Check that all burner control knobs and the cylinder valve are turned to the OFF position. 3. -
Page 12: Lighting The Side Burner
LIGHTING THE SIDE BURNER: 1. Open lid to the side burner before lighting. 2. Turn on the side burner by pressing in and rotating the control knob to the HIGH position. 3. Press and hold the igniter button on the main control panel for 3-5 seconds until the burner ignites. - Page 13 WARNING OPERATING THE GRILL: Never use Charcoal or Lighter Fluid inside your Gas Grill. Read and follow all warnings and instructions contained in the preceding sections of this manual. BREAKING IN YOUR GRILL: • In manufacturing and preserving the components of your grill, oil residue may be present on the burner and cooking surfaces of your grill.
-
Page 14: Rotisserie Cooking
ROTISSERIE COOKING: • Your grill was pre-drilled from factory to include mounting holes for a Brinkmann rotisserie (sold separately). Do not use a rotisserie not specifically manufactured for this grill. • Read and follow all instructions provided with the rotisserie. Save instructions for future reference. -
Page 15: Transporting And Storage
Place a protective cap cover on the LP tank and store the tank outdoors in a well ventilated area out of direct sunlight. • If storing the grill outdoors, cover the grill with a grill cover for protection from the weather. A grill cover can be purchased by contacting: The Brinkmann Corporation at 1-800-527-0717. -
Page 16: Cleaning And Maintenance
CLEANING AND MAINTENANCE: • For safe grilling and peak performance of your grill, perform these checks at least twice per year or after extended periods of storage. HARDWARE • Be sure to tighten up all hardware (nuts, bolts, screws, etc.) at least twice per year. CASTINGS •... -
Page 17: Troubleshooting
See section on Connection to the LP Cylinder. • Grill is Too Hot 1. Excess grease build-up causing grease fires. 2. Damaged or faulty regulator. Replace with Brinkmann parts. 3. Cook on a lower temperature setting. -
Page 18: Proper Care And Maintenance
• To protect your grill from excessive rust, the unit must be kept clean and covered at all times when not in use. A grill cover may be ordered directly from Brinkmann by calling 1-800-468-5252 or 1-800-527-0717. • Wash cooking grills and heat shields with hot, soapy water, rinse well and dry. Lightly coat cooking grill with vegetable oil or vegetable oil spray. -
Page 19: Parts List
READ ALL SAFETY WARNINGS & ASSEMBLY INSTRUCTIONS CAREFULLY BEFORE ASSEMBLING OR OPERATING YOUR GRILL. WE RECOMMEND TWO PEOPLE WORK TOGETHER WHEN ASSEMBLING THIS UNIT. The following provided tools are required to assemble this Brinkmann Pro Series 2610 Grill: • Flathead Screwdriver • Hex Nut Wrench... - Page 20 FOR MISSING PARTS, PLEASE CALL CUSTOMER SERVICE AT 1-800-527-0717. (Proof of purchase will be required.) Inspect contents of the box to ensure all parts are included and undamaged.
- Page 21 PARTS CARD CONTENTS Make sure you have all items listed under PARTS LIST and PARTS BAG CONTENTS before you begin the installation process. Your Parts Bag will include: Qty. Qty. Wheel washers M6 X 12mm bolts M6 X 20mm bolts Wheel axle bolts 14 M6 X 60mm bolts Screwdriver...
- Page 22 Choose a good, cleared assembly area and get a friend to help you put your grill together. Lay cardboard down to protect grill finish and assembly area. Step 1 Assemble bottom cart panel and right side cart panel assembly by using four M6 X 60mm bolts (hand tighten only at this point).
- Page 23 Note: With the help of a friend, turn the cart over, try to minimize the stress to the side panels. Step 3 Install the wheels as illustrated, by inserting the wheel axle bolts through the wheels, washers and right side panel axle holes. Tighten axle bolts securely using hex nut wrench provided in parts pack.
- Page 24 Step 6 Attach back cart panel by using six M6 X 60mm bolts. Note: Leave bolts hand tight until Step 11. Tank Tray Assembly Center Cut-out Wing Bolt Step 7 Place tank tray assembly over vent holes in bottom cart panel and secure using four M6 X 12mm bolts.
- Page 25 Step 8 Install door bracket using the four #10 X 1/2” self taping screws. Make Door bracket sure door stop is set toward back of cart. Step 9 Insert right side door over lower Spring Pin pivot (on bottom cart panel) then align door with cart frame.
- Page 26 Step 10 Attach the grease tray bracket onto the back cart panel by inserting the three tabs into the slots on the back cart panel. Grease Tray Bracket Note: When performing Step 11, Lift grill body from front and rear panels to avoid injury to hands and fingers.
- Page 27 Step 12 Attach side burner assembly to grill body assembly by inserting four M6 X 20mm bolts through the holes in the side burner assembly and into holes of grill body assembly. Tighten all four bolts. Install side burner grate and control knob.
- Page 28 Step 15 Attach side table/ice bucket assembly to grill body assembly by inserting four M6 X 20mm bolts through the holes in the side table/ice bucket assembly and into holes of grill body assembly. Tighten all four bolts. Side Table Screw Holes Step 16 Insert tool drawer into front opening...
- Page 29 Step 17 Insert grill bottom into opening on backside of grill. Make sure to slide tray onto tracks as illustrated. Grill Bottom Grease Tray Step 18 Slide grease tray into grease tray bracket located under grill bottom on backside of grill. Stopper Drain Rubber Gasket...
- Page 30 Step 21 Warming Rack Place the stainless steel heat Cooking Grills shields on lower level of grill body assembly directly above burners. Stainless Steel Heat Shields Step 22 Place stainless steel cooking grills on support ribs directly above stainless steel heat shields. Step 23 Place warming rack in slots above stainless steel cooking grills.
- Page 31 ACCESSORIES RIB RACK PROFESSIONAL SHISH-KABOB SKEWERS Chrome-plated rack can greatly increase the cooking These heavy-duty, 18" shish-kabob skewers are extra-long for fabulous capacity of your grill. Holds ribs, chicken halves, restaurant style kabobs. Made of rust resistant stainless steel to last for years. potatoes and corn vertically to triple cooking capacity.
- Page 32 Restaurant-style aluminum fry pan with nickel plated wire straining basket is an essential tool for frying fish, chicken, french fries, onion rings and more. Strainer basket holder helps drain excess oil. Use outdoors with the Brinkmann Backyard Kitchen and avoid the mess and odor of frying indoors.
-
Page 33: Warranty
• This warranty does not cover surface scratches, rust or heat damage to the finish, which is considered normal wear. • The Brinkmann Corporation may elect to repair or replace damaged units covered by the terms of this warranty. • This warranty extends to the original purchaser only and is not transferable or assignable to subsequent purchasers.
Need help?
Do you have a question about the Pro 2610 and is the answer not in the manual?
Questions and answers