Advertisement
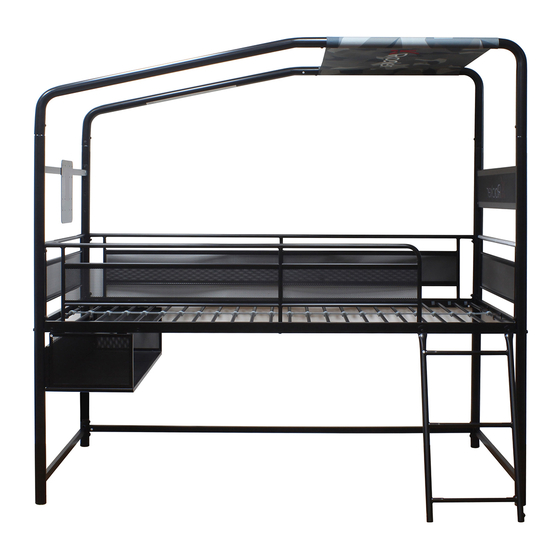
CONTRA MID-SLEEPER GAMING BED
WITH TV MOUNT
PLEASE READ this sheet prior to assembly to familiarize yourself with the
various stages of construction.
Carefully open the pack supplied and check the contents against the parts
and fittings check list. Do not destroy any of the packaging until you are
certain that you have all the necessary parts for the assembly.
CAUTION: There are small components used in the construction of this unit.
These items should be kept away from young children whilst assembling your
unit to avoid danger of choking.
2113001
SIZE: 78 X 51 X 75IN
TOOLS REQUIRED
# OF PEOPLE
1.5 HOUR SET UP
Page 1
NEED SUPPORT?
xrockergaming.com/pages/support
JZ00-20230327
Advertisement
Table of Contents

Related Manuals for XROCKER CONTRA


Summary of Contents for XROCKER CONTRA
- Page 1 CONTRA MID-SLEEPER GAMING BED WITH TV MOUNT NEED SUPPORT? xrockergaming.com/pages/support SIZE: 78 X 51 X 75IN PLEASE READ this sheet prior to assembly to familiarize yourself with the various stages of construction. Carefully open the pack supplied and check the contents against the parts and fittings check list.
- Page 2 Safety and Care Advice Read Before Beginning Assembly Call 866-969-2603 if you need assistance. Work in a spacious area and near where the unit will be used, preferably on a carpet, or use a piece of the cardboard packaging to protect your floor and product. Recommended # of people needed for assembly: 2 (however it is always better to have an extra hand).
- Page 3 Safety and Care Advice WARNINGS Follo w the information on the warnings appearing on the upper bunk end structure and on the carton. Do not remove warning label from bed. Always use the recommended size mattresses or mattress supports, or both, to help prevent the likelihood of entrapment or falls.
- Page 4 WARNINGS This bed with TV Mount is intended for household use. It is intended for use only with flat panel TV equipment meeting recommended size and weight limits. Use with other equipment or equipment heavier than the maximum weights indicated may result in instability causing possible injury. Fits most flat panel TVs up to 32'.
- Page 5 WARNING: In order to avoid risk of injury caused by scenarios where the user incorrectly uses the TV to leverage themselves onto the bed base, or the TV causes an obstruction to the user when accessing the bed base, DO NOT assemble the ladder, console tray and TV mount on the same side as illustrated below.
- Page 6 Safety and Care Advice Avant de commencer l'assemblage Si vous avez besoin d'aide, appelez notre num ro de service 866-969-2603. Travaillez dans un endroit spacieux et pr s du lieu o l'unit sera utilis e, pr f rablement sur un tapis, ou sur un morceau de l'emballage, afin de prot ger le plancher et le produit.
- Page 7 Safety and Care Advice Avertissements Suivre les informations indiqu es sur les avertissements paraissant au bout de la structure du lit superpos et sur la bo te. Ne pas enlever l' tiquette d'avertissement du lit. Utilisez toujours la dimension recommand e de matelas, ou de support de matelas, ou les deux pour aider pr venir les risques possibles de coin age ou de chute.
- Page 8 Avertissements Ce lit avec support TV est destin un usage domestique. Il est destin tre utilis uniquement avec un quipement de t l vision cran plat respectant les limites de taille et de poids recommand es. L'utilisation avec d'autres quipements ou des quipements plus lourds que les poids maximaux indiqu s peut entra ner une instabilit pouvant entra ner des blessures.
- Page 9 AVERTISSEMENT : Afin d viter tout risque de blessure caus par des sc narios o l utilisateur utilise incorrectement le t l viseur pour se tirer parti de l empattement du lit, ou le t l viseur cause une obstruction l utilisateur lors de l acc s au sommier, NE PAS assembler l chelle, le plateau de console et le support TV du m me c t comme illustr ci-dessous.
- Page 10 Safety and Care Advice Lea antes de comenzar a ensamblar Llame a nuestro n mero 866-969-2603 si necesita asistencia. Trabaje en un rea espaciosa y cerca de donde su producto ser utilizado, preferiblemente sobre una alfombra o utilice el cart n del empaque para proteger su piso y su producto. El n mero de personas recomendadas para el montaje de este producto es: 2 (sin embargo es recomendable contar con ayuda adicional).
- Page 11 Utilice siempre las barandillas en ambos lados largos de la cama superior. Si la litera es colocada contra la pared, la barandilla lateral debe ser colocada de igual forma contra la pared para prevenir quedar atrapado entre la cama y la pared.
- Page 12 Precauc ones Esta cama con soporte para TV est dise ada para uso dom stico. Est dise ado para usarse nicamente con equipos de TV de pantalla plana que cumplan con los l mites de tama o y peso recomendados. El uso con otros equipos o equipos m s pesados que los pesos m ximos indicados puede provocar inestabilidad y posibles lesiones.
- Page 13 ADVERTENCIA: Para evitar el riesgo de lesiones causadas por escenarios en los que el usuario usa incorrectamente el televisor para apalancarse en la base de la cama, o el televisor causa una obstrucci n al usuario al acceder a la base de la cama, NO monte la escalera, la bandeja de la consola y el soporte del televisor en el mismo lado que se ilustra a continuaci n.
- Page 14 PARTS...
- Page 15 Panels Post 02 x 1 Post 03 x 1 Post 04 x 1 Post 01 x 1 7a End Guard Rail x 1 End Guard Rail x 1 Side Rail 02 x 1 Side Rail 01 x 2 13 Rear Guard Rail x 1 Ladder Side Rail x 1 Front Guard Rail x 1...
- Page 16 Panels 1 4a Plastic Plug x 48 Slat Spacer x 23 Slats x 24 Ladder x 1 30 Wall Bracket x 2 33 Bolt Hole Plug x 4 Ladder Connector Bar x 1 Bracket x 4 Connector 01 x 1 Connector 02 x 1 Connector 03 x 1 Connector 04 x 1...
- Page 17 Panels Right Mesh Panel x1 Bottom Mesh Panel x1 Left Mesh Panel x1 Rear Mesh Panel x1 TV Mount x 1 Headboard x 1 Cable Fixing Ribbon Fabric canopy x 1...
- Page 18 Fittings (T00012400B00) 65mm M6 Bolt x 2 M6 Plastic Washer x 7 M8 Plastic Washer x 2 33mm M6 Bolt x 4 22mm M6 3 in 1 Bolt x 11 M4 Metal Washer x 4 4MM Allen Key x 1 17mm M6 Bolt x 72 65mm M8 Bolt x 3...
- Page 19 Warning label on 7b must be oriented on the same side as the side rail holes. Warning label on 7a must be oriented on the same side as the side rail holes.
- Page 20 100%...
- Page 25 100%...
-
Page 27: Build Options
BUILD OPTIONS OPTION 2 OPTION 1 Pages 25-38 Pages 11-24 OPTION 4 OPTION 3 Pages 53-66 Pages 39-52... - Page 28 BUILD OPTION 1...
- Page 29 12.2 12.1 100%...
- Page 31 Higher TV height Lower TV height...
- Page 32 Logo is towards outside of bed.
- Page 34 18.2 18.1...
- Page 35 19.3 19.1 19.2...
- Page 37 Note: This TV mount is compatible with M6 screws without the need for using washers. M4 screws are also compatible if used with part H M4 Metal Washer which are supplied with this product. Note: The below diagram showing the positioning of Part 64 Cable Fixing Ribbon is a suggestion - users are free to position the parts wherever they...
- Page 38 BUILD OPTION 1 100% Assembly is complete...
-
Page 40: A Guide To Wall Mounting & Fixings
A Guide to Wall Mounting & Fixings Important: When drilling into walls always Important note: check that there are no hidden wires or pipes etc. If plastic wall plugs Make sure that the screws and wall plugs being used are supplied with your are suitable for supporting your unit. - Page 41 BUILD OPTION 2...
- Page 42 26.1 26.2 100%...
- Page 44 Higher TV height Lower TV height...
- Page 45 Logo is towards outside of bed.
- Page 47 30.1 30.2...
- Page 48 33.1 33.2 33.3...
- Page 50 Note: This TV mount is compatible with M6 screws without the need for using washers. M4 screws are also compatible if used with part H M4 Metal Washer which are supplied with this product. Note: The below diagram showing the positioning of Part 64 Cable Fixing Ribbon is a suggestion - users are free to position the parts wherever they choose to keep cables tidy...
- Page 51 BUILD OPTION 2 100% Assembly is complete...
-
Page 53: A Guide To Wall Mounting & Fixings
A Guide to Wall Mounting & Fixings Important: When drilling into walls always Important note: check that there are no hidden wires or pipes etc. If plastic wall plugs Make sure that the screws and wall plugs being used are supplied with your are suitable for supporting your unit. - Page 54 BUILD OPTION 3...
- Page 55 40.2 40.1 100%...
- Page 57 Higher TV height Lower TV height...
- Page 58 Logo is towards outside of bed.
- Page 60 46.2 46.1...
- Page 61 47.3 47.1 47.2...
- Page 63 Note: This TV mount is compatible with M6 screws without the need for using washers. M4 screws are also compatible if used with part H M4 Metal Washer which are supplied with this product. Note: The below diagram showing the positioning of Part 64 Cable Fixing Ribbon is a suggestion - users are free to position the parts wherever they...
- Page 64 BUILD OPTION 3 100% Assembly is complete...
-
Page 66: A Guide To Wall Mounting & Fixings
A Guide to Wall Mounting & Fixings Important: When drilling into walls always Important note: check that there are no hidden wires or pipes etc. If plastic wall plugs Make sure that the screws and wall plugs being used are supplied with your are suitable for supporting your unit. - Page 67 BUILD OPTION 4...
- Page 68 54.1 54.2...
- Page 70 Lower TV height Higher TV height...
- Page 71 Logo is towards outside of bed.
- Page 73 60.1 60.2...
- Page 74 61.3 61.1 61.2...
- Page 76 Note: This TV mount is compatible with M6 screws without the need for using washers. M4 screws are also compatible if used with part H M4 Metal Washer which are supplied with this product. Note: The below diagram showing the positioning of Part 64 Cable Fixing Ribbon is a suggestion - users are free to position the parts wherever they choose to keep cables tidy...
- Page 77 BUILD OPTION 4 100% Assembly is complete...
- Page 79 A Guide to Wall Mounting & Fixings Important: When drilling into walls always Important note: check that there are no hidden wires or pipes etc. If plastic wall plugs Make sure that the screws and wall plugs being used are supplied with your are suitable for supporting your unit.
Need help?
Do you have a question about the CONTRA and is the answer not in the manual?
Questions and answers