Advertisement
Quick Links
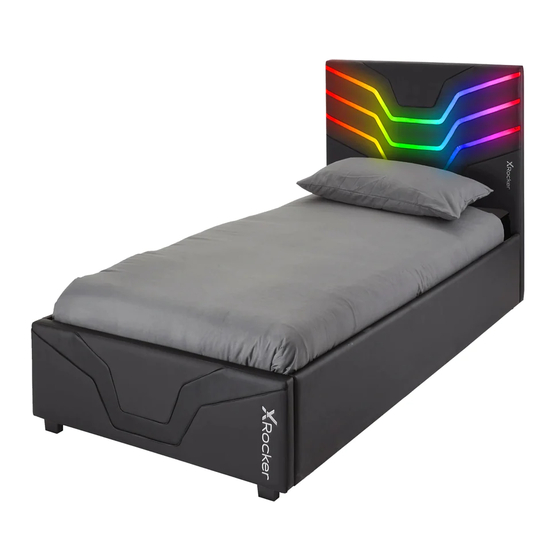
COSMOS SINGLE BEDSTEAD
2020126
IMPORTANT – READ CAREFULLY – RETAIN FOR FUTURE REFERENCE
Dimensions
Width -96.5cm
Depth - 203cm
Height - 108cm
Need Help? Contact X Rocker at :
www.xrockeruk.com/pages/support
IMPORTANT: You must keep your original retail receipt as proof of purchase.
1
KT-10/30/2020
Advertisement

Summary of Contents for XROCKER COSMOS
- Page 1 COSMOS SINGLE BEDSTEAD 2020126 IMPORTANT – READ CAREFULLY – RETAIN FOR FUTURE REFERENCE Dimensions Width -96.5cm Depth - 203cm Height - 108cm Need Help? Contact X Rocker at : www.xrockeruk.com/pages/support IMPORTANT: You must keep your original retail receipt as proof of purchase.
- Page 2 Safety and Care Advice Important Please read these instructions fully before starting assembly Check you have all the Make sure you have enough Assemble on a soft level components and tools listed on space to layout the parts before surface to avoid damaging the the following pages.
- Page 3 Components - Panels Please check you have all the panels listed below Headboard x1 Footboard x1 Side Panel x2 Side Panel x2 Support Leg x2 Leg x4 Bracket x2 Single Slat Cap x24 Side Rail x4 Bracket x2 Double Slat Cap x12 Center Rail x2 Wooden Slats x24 Center Rail x1...
- Page 4 Components - Fittings Please check you have all the panels listed below Note: The quantities below are the correct amount to complete the assembly. In some cases more fittings may be supplied are required. 20mm M6 Bolt x 28 35mm M6 Bolt x 12 40mm M6 Bolt x 20 Allen Key x 1 30mm M8 Bolt x 1...
- Page 5 Assembly Instructions Step 1 Step 1 Attach with 100% C x8 E x1 40mm M6 Bolt...
- Page 6 Assembly Instructions Step 1 Step 2 A x4 B x4 E x1 20mm M6 Bolt 35mm M6 Bolt...
- Page 7 Assembly Instructions Step 1 Step 3 Attach with Attach with 100% A x12 E x1 20mm M6 Bolt...
- Page 8 Assembly Instructions Step 1 Step 4 Attach with Attach with B x8 C x12 E x1 35mm M6 Bolt 40mm M6 Bolt...
- Page 9 Assembly Instructions Step 1 Step 5 Hang sub-assembly as illustrated, don't completely tighten the bolts until STEP 8 is complete.
- Page 10 Assembly Instructions Step 1 Step 6 Attach with 100% A x4 E x1 20mm M6 Bolt...
- Page 11 Assembly Instructions Step 1 Step 7 Attach with A x4 E x1 20mm M6 Bolt...
- Page 12 Assembly Instructions Step 1 Step 8 Attach with Attach with Then properly tighten all the bolts. 100% D x1 A x4 E x1 30mm M8 Bolt 20mm M6 Bolt...
- Page 13 Assembly Instructions Step 1 Step 9 9.1 Insert into 9.2 Press into , repeat the same procedure for the opposite side of the bed with a new 9.3 Insert ends of both slats into , then press into as illustrated. Repeat the same procedures going backwards for every row of slats.
- Page 14 Assembly Instructions Step 1 Step 10...
- Page 15 Assembly Instructions Step 1 Step 11 120° When using LED: 1. Point to the signal receiver with remote controller. 2. Get a good singal within 2 meters. FLASH STROBE FADE SMOOTH...
-
Page 16: Troubleshooting
RGB LED ‘Neo Motion’ Lighting Instructions Storage and transport Storing Safety notes – Store the device and any accessories in a dry, wellventilated place. • The user of the Neo Motion LED must have read and understood – In case of longer periods without operation, protect the LEDs and its these operating instructions prior to its first use in order to safely accessories against soiling and corrosion. -
Page 17: Technical Data
The packaging consists of cardboard and marked plastics that can be recycled. – Take these materials to a recycling centre. Technical data Article number LS8837-3.75M Dimensions 1250x10mm(x3) LEDs 225xLED 5050 Capacity Protection class Degree of protection IP20 -20 to +60 ℃ Operating temperature LED controller Rated voltage... - Page 18 1. The bed can only be used with the supplied adapter. The external flexible cable of this transformer cannot be replaced. If the cord is damaged, the transformer should be discarded. 2. Do not expose the adapter to rain or moisture. Use the adapter indoors only to avoid the risk of electric shock or fire.


Need help?
Do you have a question about the COSMOS and is the answer not in the manual?
Questions and answers