Table of Contents
Advertisement
Quick Links
Advertisement
Table of Contents

Subscribe to Our Youtube Channel
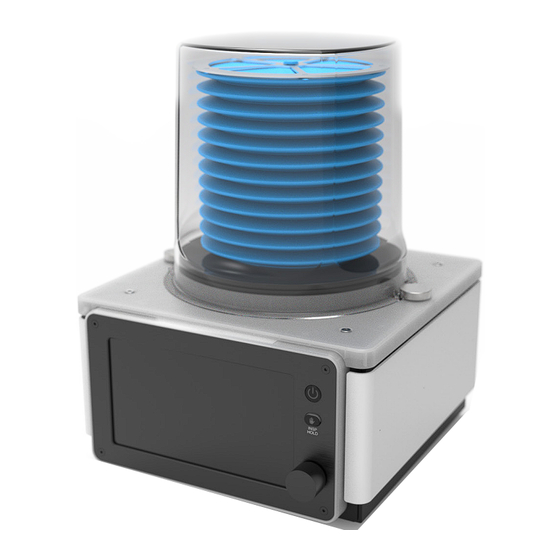
Summary of Contents for dispomed insPurr Moduflex
- Page 1 USER MANUAL...
- Page 2 6.1.1 General Settings ..................3.2.5 Power Requirements ................6.1.2 Measurement units ................3.2.6 Physical specifications and environmental ...... 6.1.3 Event Log ....................... 3.3 Components Included ................6.1.4 Time and Date ................... DISPOMED Ltée. / 1 800 363-1746 / info@dispomed.com / www.dispomed.com...
-
Page 3: Maintenance And Care
TABLE OF CONTENTS 6.2 System Startup Settings 7.1.4 Bellows ....................................Inspect for Contaminants: 6.3 Mode Selection ..................... Pre-Cleaning: 6.3.1 Volume-Controlled Ventilation (VCV) ........Cleaning Solution: 6.3.2 Pressure-Controlled Ventilation (PCV) Cleaning Process: ......... Rinse Thoroughly: 6.4 Setting Ventilation Parameters ............. Disinfection: 6.4.1 Preset Parameters ................ -
Page 4: Safety Information
InsPurr Veterinary Ventilator. Ensure that users have a comprehensive understanding of respiratory support and ventilation principles. 2.1.2 Device Location The device is designed to maintain optimal performance and DISPOMED Ltée. / 1 800 363-1746 / info@dispomed.com / www.dispomed.com... -
Page 5: Product Description
PRODUCT DESCRIPTION 2.3 Symbols Used in this Manual process. The real-time feedback provided by the Inspurr device empowers veterinary professionals with the information needed to Refer to the provided symbol key to understand the meaning of make informed decisions, contributing to optimal patient care and symbols used throughout the manual. -
Page 6: Physical Views
Power fuse Assemble and connect the breathing system hose as per the Gas evacuation instructions provided. Ensure a secure and airtight connection to Inlet air filter connector 30mm guarantee effective ventilation. DISPOMED Ltée. / 1 800 363-1746 / info@dispomed.com / www.dispomed.com... -
Page 7: Powering On/Off
OPERATING INSTRUCTIONS 4.3 Powering On/Off monitoring features. Familiarizing yourself with the interface will enhance your ability to operate the device efficiently. 4.3.1 Powering On 5.1 Display Overview Press and hold the power button until the startup ON ⊲ sequence initiates. Once the ventilator is ready ⊳... - Page 8 Operating the InsPurr Veterinary Ventilator involves a series of steps to set up, control ventilation parameters, and monitor the patient. Follow the guidelines below for a comprehensive understanding of the operating procedures. DISPOMED Ltée. / 1 800 363-1746 / info@dispomed.com / www.dispomed.com...
- Page 9 OPERATING INSTRUCTIONS 6.1.3 Event Log 6.3 Mode Selection Previous alarm will be displayed in this menu. Choose the desired ventilation mode. 6.1.4 Time and Date 6.3.1 Volume-Controlled Ventilation (VCV) Program the time and date. Select “Volume-Controlled Ventilation (VCV).” Press the “Exit” button to return to the main menu. 6.2 System Startup Settings 6.3.2 Pressure-Controlled Ventilation (PCV) •...
- Page 10 • Select the Positive End Expiratory Pressure (PEEP) button menu ventilation. The adjustable range spans is from 7 to 60 cmH2O and adjust as needed. with a increment of 1cmH20, providing a comprehensive DISPOMED Ltée. / 1 800 363-1746 / info@dispomed.com / www.dispomed.com...
-
Page 11: Inspiratory Hold
OPERATING INSTRUCTIONS 6.5.1 Real-Time Monitoring • Confirm the selected Positive End Expiratory Pressure (PEEP) Review real-time patient data, including before initiating ventilation. The device allows the user to either tidal volume and respiratory rate through disable PEEP (off) or activate it within a range of 2 to 10 cmH2O, the general screen. - Page 12 (below 0.5V or above) • turbine failure (driver fault or overheating) • data storage Technical component failure Maintenance required LOW? (memory) failure?? • date and time?? • software integrity?? (checksum) • firmware vs VCV & hardware mismatch?? • autres?? DISPOMED Ltée. / 1 800 363-1746 / info@dispomed.com / www.dispomed.com...
- Page 13 ALARMS LEGENDS VENTILATOR ALARMS MESSAGES TERMINATION MAX MUTE TIME ACTION BY THE DEVICE DETAILED MESSAGE DISPLAYED 1. Inappropriate ventilator settings (target TV too high) 2. O2 flow too high 3. Patient spontaneous breathing against ventilator Stop inspiration, perform a full When airway pressure goes 4.
- Page 14 Proper maintenance and care are essential to ensure the longevity and reliability of the InsPurr Veterinary Ventilator. Follow the guidelines below to keep the device in optimal working condition. 7.1 Cleaning and Sterilization 7.1.1 Daily Cleaning DISPOMED Ltée. / 1 800 363-1746 / info@dispomed.com / www.dispomed.com...
-
Page 15: Maintenance
MAINTENANCE AND CARE Power Off and Disconnect: Remove the bellows housing and then carefully remove the silicone bellows from the ventilator. • Ensure the veterinary ventilator is powered off. • Disconnect the ventilator from the power source. Inspect for Contaminants: Inspect the bellows for any visible contaminants or signs of wear. -
Page 16: Troubleshooting
If the test fails again, refer to the troubleshooting section of the manual. Once these steps are completed, press “Start Test,” and the leak test will automatically begin. DISPOMED Ltée. / 1 800 363-1746 / info@dispomed.com / www.dispomed.com... - Page 17 Provide detailed information Warranty Coverage: about the problem, any error messages, and the steps you’ve Dispomed Ltd. guarantees the quality of the insPurr ventilator, taken to troubleshoot. Technical support can guide you through providing a warranty that covers manufacturing defects for a additional diagnostics or arrange for service if required.
- Page 18 1. Damaged, misused, or misapplied. misuse, abuse, neglect, or any other similar incidents. 2. Repaired, altered, or modified by a person other than a Dispomed 8. Third-Party Accessories: Any damage caused by the use of Ltd. technician or approved service personnel.
- Page 19 Note that shipping charges for the return are the responsibility of the customer. Loaner Unit (if applicable): If available, Dispomed may offer a loaner unit to use during the repair period. Evaluation and Repair/Replacement: Dispomed’s technicians will evaluate the insPurr ventilator and, at their discretion, either repair or replace the unit.
- Page 20 Manufactured by Dispomed ltd Thank you for purchasing a Dispomed product. If you have any questions, please feel free to contact customer service. 745 Nazaire-Laurin Joliette (QC) Canada J6E 0L6 T. 1-800-363-1746 (Canada et États-Unis seulement) T. 1-450-759-9395 F. 1-450-759-8181 info@dispomed.com...


Need help?
Do you have a question about the insPurr Moduflex and is the answer not in the manual?
Questions and answers