Table of Contents
Advertisement
Quick Links
Advertisement
Table of Contents

Related Manuals for Fisher-Price Power Wheels JEEP RUBICON N3089


Summary of Contents for Fisher-Price Power Wheels JEEP RUBICON N3089
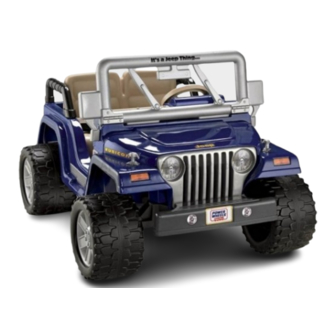
- Page 1 This Owner's Manual is provided and hosted by Appliance Factory Parts. FISHER PRICE N3089 Owner's Manual Shop genuine replacement parts for FISHER PRICE N3089 Find Your FISHER PRICE Ride On Parts - Select From 999 Models -------- Manual continues below --------...
-
Page 2: Manual Del Usuario
Owner’s Manual Manual del usuario Guide de l’utilisateur with Assembly con instrucciones incluant les instructions Instructions de montaje d’assemblage For Model N3089 Para el modelo N3089 Pour le modèle N3089 Please read this manual and save it Leer este manual y guardarlo con el Lire le présent guide et le conserver with your original sales receipt. - Page 3 ELECTRICAL HAZARD PELIGRO ELÉCTRICO DANGERS LIÉS À L’ÉLECTRICITÉ WARNING ADVERTENCIA AVERTISSEMENT • Battery can fall out and injure • La batería se puede caer • La batterie peut tomber et blesser a child if vehicle tips over. Always y lastimar a un niño si el vehículo un enfant si le véhicule bascule.
- Page 4 RIDING HAZARD PELIGRO AL CONDUCIR DANGERS LIÉS À LA CONDUITE WARNING ADVERTENCIA AVERTISSEMENT • Prevent Injuries and Deaths • Evitar lesiones y la muerte • Pour prévenir les blessures • Direct Adult • Utilizar bajo la vigilancia et la mort : Supervision Required de un adulto.
- Page 5 Ce véhicule pourrait endommager la plupart for damage to the floor if the vehicle is si se usa el vehículo bajo techo. Mattel no des revêtements de plancher. Fisher-Price ne used indoors. se hace responsable de daños a pisos si el peut être tenue responsable des dommages...
- Page 6 PARTS PIEZAS PIÈCES • If you experience a problem with this product, • Si llega a tener problemas con este producto, • En cas de problème avec ce produit ou or are missing a part, please call us at o si falta alguna pieza, llámenos al s’il manque une pièce, composer le 1-800-348-0751 (US and Canada), 1-800-348-0751 (EE.UU.
- Page 7 PARTS PIEZAS PIÈCES Steering Column Cap 2 Hood Latches Steering Wheel Cap Key Assembly Tapa de la columna de mando 2 seguros del cofre Tapa del volante Unidad de la llave Capuchon de colonne de direction 2 verrous du capot Garniture du volant Bloc clé...
- Page 8 ELECTRICAL HAZARD PELIGRO ELÉCTRICO DANGERS LIÉS À L’ÉLECTRICITÉ WARNING ADVERTENCIA AVERTISSEMENT • Battery can fall out and injure • La batería se puede caer y lastimar • La batterie peut tomber et blesser a child if vehicle tips over. Always a un niño si el vehículo se voltea.
- Page 9 BATTERY CHARGING CARGAR LA BATERÍA CHARGE DE LA BATTERIE CAUTION PRECAUCIÓN MISE EN GARDE • Use the charger in dry • Utilizar el cargador en lugares • Utiliser le chargeur dans un locations only. secos únicamente. endroit sec seulement. • Make sure you charge the battery for at least 18 hours using the •...
- Page 10 BATTERY CHARGING CARGAR LA BATERÍA CHARGE DE LA BATTERIE • Brancher le connecteur du chargeur sur la prise de la batterie. • Brancher le chargeur sur une prise de courant standard. • Remarques : - Si l’arrivée du courant à la prise murale est contrôlée par un interrupteur, s’assurer que celui-ci est à...
- Page 11 ASSEMBLY MONTAJE ASSEMBLAGE WARNING ADVERTENCIA AVERTISSEMENT Children can be harmed by Los niños se pueden lastimar Les petites pièces et les bords • • • small parts, sharp edges and con las piezas pequeñas y con tranchants ou les extrémités sharp points in the vehicle’s los bordes y puntas fi...
- Page 12 ASSEMBLY MONTAJE ASSEMBLAGE Key Assembly Dash Unidad de la llave Tablero Bloc clé Tableau de bord End of Steering Column End of Steering Column Extremo de la columna de mando Extremo de la columna de mando Extrémité de la colonne de direction Extrémité...
- Page 13 ASSEMBLY MONTAJE ASSEMBLAGE Steering Wheel Cap Steering Wheel Cap Tapa del volante Tapa del volante Steering Wheel Steering Wheel Garniture du volant Garniture du volant Volante Volante Volant Volant Steering Column Steering Column Columna de mando Columna de mando Colonne de direction Colonne de direction INSIDE VIEW INSIDE VIEW...
- Page 14 ASSEMBLY MONTAJE ASSEMBLAGE Hood Latch Hood Latch Seguro del cofre Seguro del cofre Verrou du capot Verrou du capot Slot Slot Slot Slot Ranura Ranura Hood Latch Hood Latch Ranura Ranura Fente Fente • Insert a #8 x ¾" (1,9 cm) screw through the hole in the Seguro del cofre Seguro del cofre Fente...
- Page 15 ASSEMBLY MONTAJE ASSEMBLAGE Wipers Tabs Tabs Hood Hood Limpiaparabrisas Lengüetas Lengüetas Cofre Cofre Essuie-glaces Pattes Pattes Capot Capot Large Tab Lengüeta grande Windshield Patte large Parabrisas Pare-brise Slots Slots Ranuras Ranuras Fentes Fentes • Insert the tabs on the hood into the slots in the front end of the vehicle.
- Page 16 ASSEMBLY MONTAJE ASSEMBLAGE Short Seat Belts Cinturones de seguridad cortos Seat Back Tabs Ceintures de sécurité courtes Lengüetas del respaldo del asiento Languettes du dossier Seat Asiento Banquette Tabs Lengüetas Languettes Fastener Side Fastener Side Lado del sujetador Lado del sujetador Côté...
- Page 17 ASSEMBLY MONTAJE ASSEMBLAGE x1 x Grab Bars Barras de sujeción Barres d’appui BACK VIEW • Fit a grab bar onto each side of the vehicle, as shown. VISTA DESDE ATRÁS VUE ARRIÈRE • Ajustar una barra de sujeción en cada lado del vehículo, tal •...
- Page 18 ASSEMBLY MONTAJE ASSEMBLAGE • Insert a #10-32 x 1" (2,5 cm) screw through the hole in each grab bar and into the seat. Tighten the screw. BOTTOM VIEW VISTA DESDE ABAJO • Insertar un tornillo n° 10-32 x 2,5 cm en el orificio de cada VUE DE DESSOUS barra de sujeción y en el asiento.
- Page 19 DECORATION DECORACIÓN DÉCORATION • Before applying the labels, wipe the surface of the vehicle • Essuyer la surface du véhicule avec un linge propre et sec with a clean, dry cloth to remove any dust or oils. pour enlever toute trace de saleté ou tout dépôt graisseux. •...
- Page 20 DECORATION DECORACIÓN DÉCORATION BACK VIEW VISTA DESDE ATRÁS VUE ARRIÈRE Troubleshooting • Solución de problemas • Guide de dépannage service.fi sher-price.com...
-
Page 21: Battery Installation
BATTERY INSTALLATION COLOCACIÓN DE LA BATERÍA INSTALLATION DE LA BATTERIE IMPORTANT! Use only a Power Wheels 12 volt lead-acid ® rechargeable battery. Use of any other battery will damage your vehicle. ¡IMPORTANTE! Usar únicamente una batería de plomo-ácido recargable Power Wheels de 12 voltios. El uso de cualquier otra batería dañará... - Page 22 RIDING HAZARD PELIGRO AL CONDUCIR DANGERS LIÉS À LA CONDUITE WARNING ADVERTENCIA AVERTISSEMENT • Prevent Injuries and Deaths • Evitar lesiones y la muerte • Pour prévenir les blessures • Direct Adult • Utilizar bajo la vigilancia et la mort : Supervision Required de un adulto.
-
Page 23: Safe Driving Rules
SAFE DRIVING RULES NORMAS DE SEGURIDAD PARA CONDUCIR RÈGLES POUR UNE CONDUITE EN TOUTE SÉCURITÉ Before children use this vehicle, an adult should Antes de que los niños usen este vehículo, Avant de laisser un enfant utiliser ce véhicule, carefully evaluate the driving area as well as the se recomienda que un adulto evalúe un adulte doit s’assurer que la zone de conduite child’s skill level and ability to drive the vehicle... -
Page 24: Vehicle Operation
VEHICLE OPERATION OPERACIÓN DEL VEHÍCULO FONCTIONNEMENT DU VÉHICULE • Help your child practice steering to learn • Quand l’enfant maîtrise parfaitement le • Antes de desconectar el tornillo bloqueador how far and how quickly to turn the steering fonctionnement du véhicule en marche avant, de velocidad rápida, asegúrese de que el wheel when driving, and automatically knows lui apprendre la marche arrière... -
Page 25: Battery Care And Disposal
BATTERY CARE AND DISPOSAL MANTENIMIENTO Y ELIMINACIÓN DE LA BATERÍA ENTRETIEN ET MISE AU REBUT DE LA BATTERIE BATTERY CARE MANTENIMIENTO DE LA BATERÍA ENTRETIEN DE LA BATTERIE • If a battery leak develops, avoid contact • Si ocurre un derrame de la batería, evitar •... -
Page 26: Vehicle Care
VEHICLE CARE MANTENIMIENTO ENTRETIEN DU VÉHICULE • Check all screws, cap nuts and their • Revisar periódicamente todos los tornillos, • Vérifier régulièrement les vis, les écrous protective coverings regularly and tighten tuercas ciegas y cubiertas protectoras y borgnes et leur revêtement protecteur et les as required. -
Page 27: Limited Warranty
LIMITED WARRANTY GARANTÍA LIMITADA GARANTIE LIMITÉE *One year limited warranty from the date of Should you need service or assistance with your *Garantie limitée de un (1) an à partir de la purchase on the Power Wheels ® vehicle. Six vehicle during the warranty period, do not return date d’achat pour le véhicule Power Wheels. -
Page 28: Consumer Information
CONSUMER INFORMATION INFORMACIÓN PARA EL CONSUMIDOR RENSEIGNEMENTS POUR LES CONSOMMATEURS FCC Statement (United States Only) Nota FCC (Válido sólo en los Estados Unidos) Énoncé de la FCC (États-Unis seulement) This equipment has been tested and found Este equipo fue probado y cumple con los límites Cet équipement a été... - Page 29 Charge the battery once a month, even if the vehicle is not used or stored. Do not return your vehicle to the store, we can help! Visit us online for our Troubleshooting Guide - service.fisher-price.com ¡Cargar la batería por 18 horas antes de usar el vehículo por primera vez! Cargar la batería inmediatamente después de cada uso.
Need help?
Do you have a question about the Power Wheels JEEP RUBICON N3089 and is the answer not in the manual?
Questions and answers