
Related Manuals for Terex ProAll Commander 2.0 P


Summary of Contents for Terex ProAll Commander 2.0 P
- Page 1 ProAll Mobile Mixer Operator’s Manual Commander 2.0 P and L Model 18 March 2024 Rev.1 5810 - 47 Avenue, Olds, Alberta, Canada, T4H 1V1 E info@proallinc.com | P 403-335-9500 | F 403-335-9560...
-
Page 3: Table Of Contents
Table of Contents Model Number ................... 1-3 Serial Number ..................1-3 Safety Decals ..................2-1 Safety Alert Symbol ................2-4 Signal Words ..................2-4 Safety ....................2-5 General Safety ..................2-5 Operating Safety ................2-6 Maintenance Safety ................2-6 Hydraulic Safety ................. 2-6 Storage Safety .................. - Page 4 Concrete Production Calibration Procedure ........5-1 Step 1: Cement Output per Auger Rev ............5-1 Step 2: Revs per Unit Volume of Concrete ..........5-1 Step 3: Gate Calibration ................5-2 Water and Admix Calibration............. 5-2 Colour and Auxiliary Feeder Calibration ..........5-2 Fibre Feeder Calibration ..............
- Page 5 Engine....................6-13 Starting Engine ..................6-13 Throttle Engine ..................6-14 Stopping Engine ..................6-14 Chain Oiler ..................6-14 Tarp ....................6-15 Tarp Control ....................6-15 Extension Chutes ................6-15 Cold Weather Working ..............6-15 Maintenance ..................7-1 Take Up Bearing ................. 7-1 Oil Specifications ................
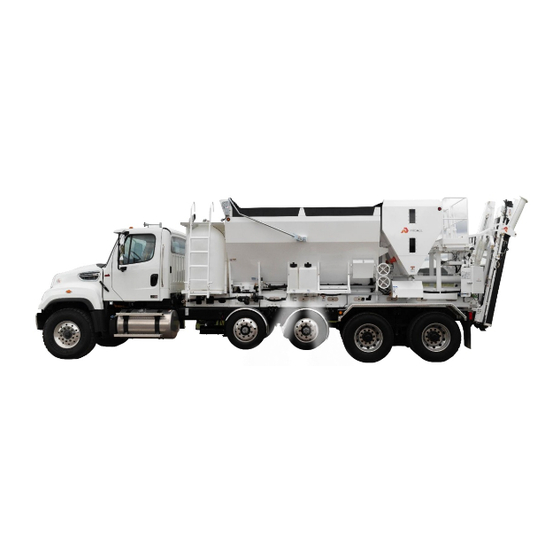
- Page 7 1. Introduction Congratulations, you have chosen the world’s finest and most reliable mobile mixer. You are now part of the world-wide ProAll International family, operating successfully in 36 countries. Your ProAll Mobile Mixer, manufactured by ProAll International Inc. will meet, or exceed your concrete requirements.
- Page 8 ALWAYS give the SERIAL NUMBER when ordering Model Number: parts or requesting service or other information. Serial Number: The serial number plate is located where indicated. Please mark the number in the space provided for easy reference. Plate 1. Model and Serial Number Plate Plate 2.
-
Page 9: Model Number
Model Number ##### ▪ Last 5 Digits of Serial Number ▪ 1 Standard Standard Scaled Cement Hopper Pneumatic Fill Configuration Pneumatic Fill Scaled ▪ A 93 Cubic Foot 113 Cubic Foot (Steel) 110 Cubit Foot (Aluminum) 133 Cubic Foot (Steel) 75 Cubic Foot (Aluminum) 186 Cubic Foot (Steel) Cement Hopper Size... -
Page 11: Safety Decals
2. Safety Safety Decals The following safety decals have been placed on Please take this manual and walk around your your machine in the areas indicated. They are machine, noting the location of the decals and intended for your personal safety and for those their significance. - Page 12 Decal 1 Decal 2 Decal 3 Rev. 18 March 2024...
- Page 13 Decal 4 Decal 5 Decal 7 Decal 6 Rev. 18 March 2024...
-
Page 14: Safety Alert Symbol
Safety Alert Symbol This Safety Alert symbol means ATTENTION! manual. When you see this symbol, be alert to the BECOME ALERT! YOUR SAFETY IS INVOLVED! possibility of personal injury or death. Follow the instruction in the safety message. The Safety Alert symbol identifies important safety messages on the machine and in the Why is SAFETY important to you? 3 BIG REASONS... -
Page 15: Safety
Safety • YOU are responsible for the SAFE operation and Do not modify the equipment in any way. maintenance of your equipment. YOU must Unauthorized modifications may impair the ensure that you and anyone who is operating, function and/or safety and could affect the maintaining or working around the equipment life of the equipment. -
Page 16: Operating Safety
Wear appropriate hearing Support the machine with blocks or safety protection when operating stands when changing tires or working for long periods of time. beneath. Know where overhead Follow good shop electrical lines are located practices. and stay away from them. Electrocution can Keep service area... -
Page 17: Storage Safety
Relieve pressure before working Make sure all transport safety locks are in hydraulic system. place before transporting. Do not attempt any makeshift repairs to the Do not allow anyone to ride on the hydraulic fittings or hoses by using tape, equipment during transport. -
Page 18: Safety Signs
• Safety Signs Decide on the exact position before you remove the backing paper. Always keep safety signs clean and legible. • Remove the smallest portion of the split Replace safety signs that are missing or have backing paper. become illegible. •... - Page 19 3. Overall Description The major mixer system components are shown in the following figures. Table 1. Left Side System Components. Water Tank Aggregate Control Gates Aggregate Bin Water/Admix Controls Enclosure Transition Chute Mixer Controls Enclosure Admix Tanks Cement Bin Electrical Junction Box Tarp Rev.
- Page 20 Table 2. Right Side System Components. Mixing Auger Oil Cooler Mixing Bowl Oil Reservoir Colour Feeder Cement Bin Hydraulic Valve Enclosure Transition Chute Fibre Feeder Roll Rev. 18 March 2024...
-
Page 21: Mixer Controls
4. Controls, Instruments and Operation Mixer Controls Table 3. Mixer Control Panel Table Mixer Computer Emergency Stop Button • • Commander ..Commander Manual In ............. Stop • Mix Auger ......... Joystick Out ..........Reset Main Keypad ......Push Buttons Aux/Options Keypad .... -
Page 22: Mix Auger Joystick
Mix Auger Joystick Table 4. Joystick Table Mix Auger Control ......Joystick • Up ..........Auger Up • Center ......No Movement • Down ........Auger Down • Left ........Swing Left • Right ........Swing Right Extension Chute ....Joystick Buttons •... -
Page 23: Operating Keypads
Operating Keypads The keypad operations are selected by pressing the desired function button until the indicator light on the button shows the colour corresponding to the associated mode. Button functions and status indicator lights are shown in the next section, Operating Keypad Status Indications. - Page 24 Operating Keypad Status Indications Amber Green Solid Flashing Switch Indication Description ON (the admix pump is running) Enabled (pump turns on with conveyor) Manual (intended for priming the admix pump, hold button 2 sec to activate) 1. Error! Refer ence sour ce not found. 2.
- Page 25 When belt is off brings up reset pop-up window on the display. Indicates the belt is running, so reset not available. 6. Error! Refer ence sour ce not found. 7. Error! Refer ence sour ce not found. OFF (chain oiler is in the OFF part of the cycle during conveyor operation) ON (chain oiler is in the ON part of the cycle during conveyor operation) Automatic (chain oiler is activated and ready once belt is started) Manual (belt must be running to function)
- Page 26 15. Error! Re feren ce source not found. ON (ramps up engine, mix auger and conveyor begin running when button 6 mix start is pressed) 16. Error! Re feren ce source not found. ON (auger mixing) Indicator, mix auger reverse activated Mix auger lid is open ON (Mix Start) Mixer fault (indicator only, pressing operation buttons that only work when not mixing...
-
Page 27: Remote Control Transmitter
Remote Control Transmitter The remote transmitter is a wireless handheld Table 8. Remote Transmitter Buttons/Indicators control device used to duplicate the operation of Power/Shift Button the main control panel. Please refer to the • Push ..Remote Transmitter Power ON Wireless Trident Transmitter C200 Receiver •... -
Page 28: Water/Admix Controls
Water/Admix Controls The water and admix control cabinet houses the flow meters and solenoids to control the water/admix flow. The devices in this cabinet are connected to the computer for water/admix and if equipped, fibre feeder control. The admix flow control is achieved using valves attached to the control cabinet, see Valve Location 6 on page 4-11. -
Page 29: Valve Locations
Valve Locations The following identifies valve locations for water figures correspond to the following valve and hydraulic oil. Numbers in the following locations. Rev. 18 March 2024... - Page 30 Valve Location 1. Water tank fill valve. (1) fill port valve, (2) tank valve. Valve Location 3. Admix tank valves. Valve Location 4. Rear water control valves. (1) admix blowout valve, (2) water blowout valve, (3) manual washout water valve. Valve Location 2.
- Page 31 Valve Location 8. Hydraulic oil pump suction valves. Valve Location 6. Admix manual control valves. (1) admix1, (2) admix 2. Valve Location 9. Free swing selector valve. Valve Location 7. Fibre feeder control valve. 4-11 Rev. 18 March 2024...
-
Page 33: Concrete Production Calibration Procedure
5. Calibration The calibration of the mixer is the process which NOTE: On a new mixer, cement calibration determines the control gate settings and the should be confirmed after 500 unit volumes of meter revolutions required to produce concrete concrete have been produced. of a certain specification. -
Page 34: Step 3: Gate Calibration
calibration data entered. This is done in the mix 9. Subtract the container weight from the total design screen after calibration (see computer weight to obtain the sample weight. manual.) 10. Enter the weight into the computer for up to three samples per gate height. - Page 35 1. Determine the amount of fibre required in kg per minute (lbs per min) according to the mix design (refer to the Calibration Sheets) 2. Set the fibre feeder flow with the air flow control valve (refer to Fibre feeder control valve.
-
Page 37: Principle Of Operation
6. Field Operation Principle of Operation The ProAll Mobile Mixer is uniquely designed to the conveyor belt and therefore, to the flow of allow for the supply of freshly mixed concrete, cement. Because the cement and aggregate regardless of delivery times, the elimination of feeders are mechanically synchronized, the wasted product, and flexibility of delivery that is proportions of each of the dry ingredients are... -
Page 38: Water Auto Mode
• Adjust the water pump speed on the computer – this is the normal control option. • Adjust the water with the manual water valve as long as the pump speed setting is high enough to allow water to be restricted by the valve. -
Page 39: Cement Powder
Figure 7. Installed mix auger. (1) mix auger, (2) mix bowl, (3) lower link arm, (4) transition chute, (5) auger top drive. The mix auger receives the concrete materials through the mi bowl, mixing throughout its length and discharging the mixed concrete through the top of the auger and into the transition chute. -
Page 40: Auger Bearing
The lower bearing supports the auger shaft and includes seals that help to keep materials from exiting the mix auger. Figure 8. Cover catch. Figure 11. Mix auger bearing and seals. Mix Bowl The mix auger attaches to the mix bowl by way of two removable mounts that enable the mix auger Figure 9. -
Page 41: Lower Lift Link
Lower Lift Link The lower lift link attaches to the auger through self-aligning ball-type pivot points. The pivot pins on the lower link arm make it possible to remove the mix auger for maintenance. Figure 15. Mix auger transition chute. The transition chute has been designed to be removed from the mix auger to facilitate cleaning and maintenance by rotating the chute off the... -
Page 42: Admixture
When controlling the admix manually , the flow rates can be preadjusted. Prime the admix pump and set the flow rate using the following procedure. 1. Prime the desired admix pump by pressing the corresponding admix button on the operating keypad – button 6,7 for admix 1,2 and button 1,2 for admix 3,4. -
Page 43: Fibre Feeder
Fibre Feeder The ProAll fibre feeder is designed to supply a controlled flow of fibre strands to the concrete mix. NOTE: The fibre feeder discharge rate does not change proportionally with changes in the conveyor speed. Record the conveyor speed setting when calibrating the fibre feeder and use that conveyor speed whenever the fibre feeder is used. -
Page 44: Setting Up To Pour
Setting up to Pour Upon arrival at the pour site, confirm the specifications of the concrete to be poured. Using the following sequence, set up the mixer in preparation for pouring. NOTE: The following section refers to the Operating Keypad on page 4-3. Please refer to this page for further information on keypad buttons. -
Page 45: Pouring
a. Adjust conveyor speed using 18. Set the Free swing selector valve to desired Selection Knob and Conveyor Speed function. (Refer to Valve Location 9 on page button – button 3. Typical conveyor 4-11.) speed is 65-75% NOTE: The free swing selector valve allows the b. -
Page 46: Wash Down And Preparation For Transport
NOTE: The operator MUST guard against ‘chasing’ CAUTION the slump by over adjustment of the mix water control. It takes several seconds for any changes • Keep hands, feet and loose clothing in water flow to be noticed at the discharge end of away from rotating shafts, gears, the mix auger. -
Page 47: Purging
WARNING Never run the mix auger with the top cover open. 9. Wash until the mix auger and trough are free of any material buildup. 10. Elevate mix auger to transport position. The retaining lock will automatically engage. IMPORTANT: Check for proper alignment as the auger is being raised 11. -
Page 48: Purging The Admix System With Water
pressure and may be damaged by the high air 16. Open the manual mix water valve (Valve pressure. Location 5 page 4-10.) 17. Open the water valve on the Main Operating 1. Close all drain valves including – but not Keypad by pressing button 15, to ON. -
Page 49: Purging The Admix System With Air
Engine 3. Open the admix washout valve (Valve Location 2 page 4-10.) The engine has been factory set and will not 4. Set all admix pumps to manual on the Main require adjustment. Engine pressures and limits Operating Keypad (includes buttons 6,7) and can be referenced in the supplied engine manual. -
Page 50: Chain Oiler
2. Push the Engine Stop button until the engine stops running. 3. Turn off the Power On switch. 4. Turn off the Master Switch. Chain Oiler The chain oiler consists of the chain oil reservoir and lubrication solenoid valve and is located between the gussets on the right hand side of the mixer at the rear of the aggregate bin. -
Page 51: Tarp
Extension Chutes Inspect the chain oil brushes periodically for debris and to ensure they are not clogged. Extension chutes are usually mounted on the left- Replace as necessary. hand side of the mixer as shown in the following figure. Tarp The tarp is used to cover the aggregate bin. -
Page 53: Maintenance
7. Lubrication and Maintenance Minimum Requirements for Replacement Maintenance Regular maintenance and inspection will help In this hydraulic, the optimum viscosity range is ensure trouble free operation, eliminate 16 – 36 cSt (75 – 168 SUS), at normal operation unnecessary down time, and extend the life of temperatures. -
Page 54: Particulate Air Filter/Regulator
The filters are equipped with indicator showing the status of the filter. Green indicates the filter is working properly. Red indicates flow through the filter is restricted requiring maintenance. Figure 30. High pressure filter indicator. Particulate Air Filter/Regulator Figure 31. Particulate air filter/regulator. (1) regulator set knob, (2) pressure gauge, (3) regulator bowl, (4) water The particulate air filter/regulator removes sight glass, (5) water purge valve. -
Page 55: Engine
IMPORTANT: When attaching the new wear IMPORTANT: Over adjustment puts undue stress plates, it is important that they are against a on the swivel ring and support pins. When firm, even surface at the bolting area. Excessive turning the clevis, do not hold the cylinder rod pressure on an uneven surface may cause with a pipe wrench or other tool - seal damage breakage. -
Page 56: Lubrication And Maintenance Points
Lubrication and Maintenance Points The following inspection and maintenance concrete being produced (for example, low schedule acts as a guideline only. It should be slump, high density) and other factors will affect noted that extreme weather conditions, the frequency of service required. aggressive aggregates, the nature of the Rev. - Page 57 Rev. 18 March 2024...
- Page 58 Maintenance 1. Front conveyor shaft, right and left. (1) bearing grease, (2) tension adjust Maintenance 4. Chain oil level check. Maintenance 2. High pressure hydraulic oil filters. (1) auger oil filter, (2) conveyor oil filter. Maintenance 5. Cement bin sump bearing grease. Maintenance 3.
- Page 59 Maintenance 9. Lower lift link grease. Maintenance 6. Rear conveyor shaft grease. Maintenance 10. Lock arm grease. Maintenance 7. Rear conveyor shaft grease, right. Maintenance 11. Upper lift link grease. Maintenance 8. Zerk grease. (1) boom cylinder, (2) swing pivot , lower, (3) swing pivot, upper. Rev.
- Page 60 Maintenance 12. Mix auger top bearing grease. Maintenance 14. Cement bin oiler brush check L Model Maintenance 13. Mix auger bottom grease Maintenance 15. Cement bin oiler brush check. Rev. 18 March 2024...
- Page 61 Maintenance 18. Hydraulic reservoir check. (1) check Maintenance 16. Conveyor chain brush check. oil level, (2) check return & suction filter. Maintenance 17. Clean water Y strainer. Rev. 18 March 2024...
-
Page 62: Lubrication And Maintenance Frequency
Lubrication and Maintenance Frequency Table 7. Frequency Table Maint. Every Every Every Every Item Number Points Daily Load Front conveyor shaft grease, right and left • Check conveyor tension adjust • High pressure hydraulic oil filter check • Admix tank filter check •... - Page 63 F. Check that the oil level is showing in the sight glass. Refer to Oil Specifications section on page 7-1 for correct hydraulic oil. G. The filter is located within the tank. A visual inspection of the filter will be required to ensure the filter is not clogged.
-
Page 64: Electrical Distribution Box
Electrical Distribution Box The electrical fuse and relay cabinet is located on the aggregate body on the left-hand side of the machine near the gate wheel adjustments. Electrical 2. Inside cabinet mounted electrical Electrical 1. Cabinet door mounted electrical 1. Circuit Board, master relay 1. -
Page 65: Bolt Torque
Bolt Torque The tables shown below give correct torque values for various bolts and capscrews. Tighten all bolts to the torque specified in chart unless otherwise noted. When assembling equipment, use bolt torque chart as a guide. Bolt Bolt Torque * Diameter SAE 2 SAE 5... - Page 67 8. Fault Finding Problem Cause Solution No electrical power Master switch not active Locate and ensure that the cab master switch is turned on. Electrical failure Check main circuit fuse/breaker located at the battery. If a short circuit is indicated, find the short and repair.
- Page 69 9. 1st 50 Hour Service CHECK AND ADJUST AS REQUIRED 1. Check mixer tie down bolts are the proper torque, refer to Bolt Torque section on page 7-13. 2. It is important to check the clean water Y strainer, ensure that this is monitored during the first 50 days according to Table 8.
- Page 70 5810 - 47 Avenue, Olds, Alberta, Canada, T4H 1V1 E info@proallinc.com | P 403-335-9500 | F 403-335-9560 Rev. 18 March 2024...
Need help?
Do you have a question about the ProAll Commander 2.0 P and is the answer not in the manual?
Questions and answers