
Subscribe to Our Youtube Channel
Related Manuals for Planet WDAP-W3000AX


Summary of Contents for Planet WDAP-W3000AX
- Page 1 Dual Band 802.11ax 3000Mbps In-wall Wireless Access Point w/802.3at PoE WDAP-W3000AX Quick Installation Guide...
-
Page 2: Table Of Contents
3. Hardware Installation ..................6 4. Connecting the AP (for Windows OS) .............. 7 5. Entering into the Web Management ..............8 6. Wireless Network Connection ................ 10 7. AP Discovery through PLANET NMS Controller (NMS-500/NMS-1000V) ....11 Further Information ..................12... -
Page 3: Package Contents
1. Package Contents Thank you for choosing PLANET WDAP-W3000AX. Before installing the AP, please verify the contents inside the package box. WDAP-W3000AX Screw x 2 If there is any item missing or damaged, please contact the seller imme- diately. -
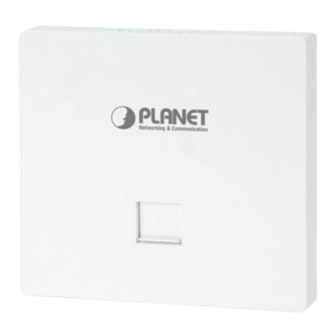
Page 4: Physical Introduction
2. Physical Introduction Hardware Description Front View LAN Port LAN Port Power/System LED Reset Button... - Page 5 Rear View Bottom View WAN/LAN PoE Port...
-
Page 6: Hardware Installation
3. Hardware Installation Follow the steps below to install the WDAP-W3000AX. Step 1: Get hold of an RJ45 cable. Step 2: Insert one end of the RJ45 cable into the WAN/LAN PoE port of the WDAP- W3000AX, and the other end into the PoE port of the switch. -
Page 7: Connecting The Ap (For Windows Os)
4. Connecting the AP (for Windows OS) As the default setting of the connection type of the WDAP-W3000AX is DHCP, your computer’s IP address has to be the same network segment as the wireless AP. To find the IP address of the AP, use the utility of “Smart Discovery Lite”, which can be found on PLANET official website. -
Page 8: Entering Into The Web Management
All characters should be in lowercase.) subject to the following two conditions: (1) This device may not cause harmful interference and (2) This device must accept any interference received, including interference that may cause undesired operation. PLANET Technology Corp. Made in Taiwan... - Page 9 Step 4: After logging in, you will be prompted to change the initial username and password to a permanent one. The Password must contain 8 to 31 characters, including uppercase, lowercase, numerals and other symbols. Please note spaces (blanks) are not accepted.
-
Page 10: Wireless Network Connection
Step 3: Enter the encryption key of the WDAP-W3000AX if necessary. If you have already finished the configuration of the WDAP-W3000AX, you can use your smart phone, tablet, laptop, or any other Wi-Fi device to connect with it wirelessly and start surfing the internet. -
Page 11: Ap Discovery Through Planet Nms Controller (Nms-500/Nms-1000V)
7. AP Discovery through PLANET NMS Controller (NMS-500/NMS-1000V) The WDAP-W3000AX is the Smart AP series which can be centrally managed by PLANET NMS Controller. Follow the steps below to discover the managed AP through PLANET NMS controller (NMS-500/NMS-1000V). Please ensure each managed AP uses a different static IP in the same subnet before physically connecting to the managed network. -
Page 12: Further Information
If you have further questions, please contact the local dealer or distributor where you purchased this product. Copyright © PLANET Technology Corp. 2024. Contents are subject to revision without prior notice. PLANET is a registered trademark of PLANET Technology Corp. All other trademarks belong to their respective owners.
Need help?
Do you have a question about the WDAP-W3000AX and is the answer not in the manual?
Questions and answers