Advertisement
Quick Links
Advertisement

Related Manuals for Jetinno JL30 Series


Summary of Contents for Jetinno JL30 Series
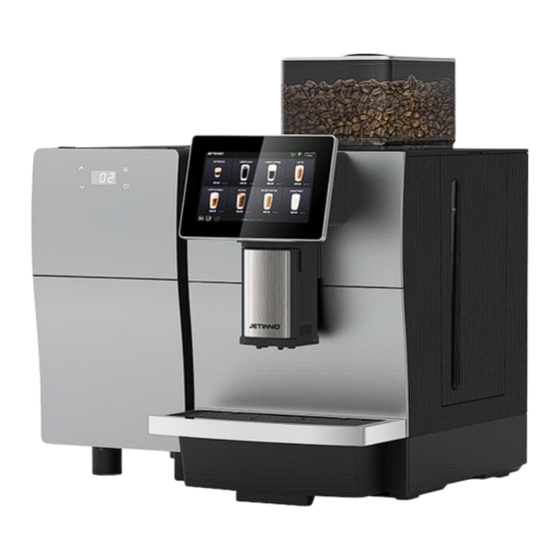
- Page 1 JL30&15 series Maintenance Manual...
- Page 2 Replacemen Replacement Warrant Recommended Part number Part name Replaceme Replacement Warrant Recommended Part Part name t guidelines frequency y period stock quantity frequency y period stock quantity of number of 100 units guidelines 100 units JL15&30 tank S20 Coffee brewer main Page17 Dysfunctional 1 year...
- Page 3 Part Part name Replacement Replacement Warranty Recommended Part Part name Replacem Replacement Warran Recommended number guidelines frequency period stock quantity number frequency stock quantity of 100 units guidelines period of 100 units JL15&30 Waste water Page17-18 Dysfunctional 1 year 3111286600A container cover Page29 Dysfunctional...
- Page 4 Part Part name Replacement Replacement Warranty Recommended Part Part name Replacem Replacement Warran Recommended number guidelines frequency period stock quantity number frequency stock quantity of 100 units guidelines period of 100 units 5111303400B Intake nozzle Page35 Dysfunctional 1 year Page35 Dysfunctional 1 year 5208053200A 7X7 sponge...
- Page 5 20g/14g brewing body module replacement method 1. Lift the coffee outlet to the highest position, pull the water tray outwards, and take out the water tray; After the water tray is taken, find the main module of the brewer (the part in the middle circle in the figure above). 2.
- Page 6 Brewer ID30x3.5 O-ring, top/bottom filter replacement method - 1. Unplug the coffee outlet pipe; Press the end face of the quick connector with your fingers to confirm that the elastic space has been compressed, and pull out the pipe forcefully; Pull out the latch with your finger; Lean down and pull out the brewer; When brewing coffee, the upper plunger has coffee fluid overflow, possibly a damaged seal. Remove the old seal ring with a toggle, take out the new seal ring from the wear bag and put it on.
- Page 7 Brewer ID30x3.5 O-ring, top/bottom filter replacement method - 2. Remove the screws in the center part of the upper/lower plunger filter screen with a screwdriver and remove the filter screen. Check that the mesh is blocked, if it is blocked, take out a new filter from the perishable bag and replace it. The replaced filter should be soaked in medicine, cleaned and reserved for use, and can be replaced next time.
- Page 8 Remove the exterior - The method for removing the cover Step 1: Remove the lid of the bean container, unscrew the four screws holding the bean container, and remove the bean container.
- Page 9 Remove the appearance - Method for removing the cover plate Step 2: Using a flat-head screwdriver, insert and rotate the screwdriver in the position shown to release these latches.
- Page 10 Remove the appearance - the method for removing the top cover Step 3: As shown in the picture below, pinch the top cover and lift it up, then pull the top cover out outwards, removing the top cover is complete.
- Page 11 Remove the appearance - the method of removing the tank base Lift up and remove the tank as shown above; In the direction of the arrow, pull out the base cover from the bottom up with both hands, pinch the base to take out the tank base, unplug the tank water level detection board connector, and remove the tank base.
- Page 12 Remove the appearance - the method of removing the rear cover of the machine from the side panels Step 1: As shown in the picture above, lift the rear cover from the bottom up (hold the vent protruding position up), then remove the rear cover, removing the rear cover is complete.
- Page 13 Remove the appearance - the method of removing the side panel of the machine with the back panel Step 2: As shown in the picture above, push the right cover plate up from the bottom, then pull back out and remove the right board, removing the right board is complete.
- Page 14 Remove the appearance - the method of removing the side plate of the machine with the rear cover plate Step 3: As shown in the picture above, push the left cover plate up from the bottom, then remove the tank water level detection plate, and remove the left plate finished. Note: Handle gently during removal to prevent scratching the appearance! You must push the tank water level detection plate to the top of the card position when installing it.
- Page 15 Remove the appearance - the method of removing the side plate of the machine base and the rear cover plate of the base Step 1: As shown in the picture above, first push up the left panel of the base from the bottom up, then take it off and take it out, removing the left panel of the base is finished...
- Page 16 Remove the appearance - the method of removing the side plate of the machine base and the rear cover plate of the base Step 2: As shown in the picture above, first push up the right panel of the base from the bottom up, and then remove and take out the right panel of the base...
- Page 17 Removing the appearance - The method of removing the side panel of the base and the rear cover of the base of the machine Step 3: As shown in the figure above, using a flat-head screwdriver, press the rear cover plate clip from the top down, then remove and take it out.
- Page 18 S Series Brewer Drive module, Liga Vigor Motor (BO26) Method of replacement of motor on brewer 1. Remove the main brewer module first, and then remove the brewer drive fixing screw with a hexagon screwdriver at the bottom of the machine. Remove the bean container, remove the upper cover plate, back cover plate, unplug the interface on the control board, take out the drive, remove the motor fixing screw to replace the motor.
- Page 19 Replacement method for grinder assembly Unplug the machine from the power supply. As shown in the picture above, first remove the bean container seat, then remove the five screws in the position marked by the red circle, and remove the grinder assembly from the fixing seat;...
- Page 20 JL15&30 Tank assembly replacement method At the top of the machine, open the cover of the water tank, raise the water tank upward, and put the new water tank into it.
- Page 21 JL15&30 tank filter assembly replacement method Remove the appearance of the machine, pull up the water intake cover (can be pry up with a certain screwdriver), and then pull up the water intake base and pull out the connected water pipe. The removal of the water intake assembly of the water tank is complete.
- Page 22 JL15&30 Condensing container assembly replacement method Remove the exterior of the machine, press the latch and exit, pull out the tube, remove the condensation container fixing screw, take out the condensate container, and remove the condensate container.
- Page 23 JL15&30 7-inch display assembly, 7 inch touch display assembly, JNMB-A133 replacement method-1 As shown in the picture above, remove the glue plug (touch screen mounting seat screw cover) marked by the red circle, then unscrew the fixing screw, remove the front panel assembly, and unplug the connector on the motherboard (DC12V power supply, R485 communication, MDB).
- Page 24 JL15&30 7-inch display assembly, 7 inch touch display component, JNMB-A133 replacement method-2 For the display and touch screen, turn the cable clip up, take out the two cables, remove the motherboard fixing screws, and remove the motherboard to separate the screen from the motherboard.
- Page 25 JL30_IO board replacement method Turn off the power switch of the coffee machine before removing the I/O. Remove coffee bean container, top cover plate and back cover plate; First unplug all the joints on the I/O board, then remove the four screws holding the I/O board in place, and finally remove the I/O board.
- Page 26 JL15-30 POWER PCBA V20 Power board replacement method Do not operate with power on to prevent electric shock. Unplug the coffee machine before removing the power board. Remove the coffee bean container, top cover plate and back cover plate; First unplug all the connectors on the power strip (perhaps with the help of needle-nose pliers), then remove the four screws holding the power strip in place, and finally remove the power strip.
- Page 27 24V fan 6025 Replacement method Before removing the fan, turn off the power switch of the coffee machine. Remove the coffee bean container, top cover plate and back cover plate; First unplug the fan connector, then pull out the fan, cut off the tie, remove the fan, remove the fan, remove the fan is complete.
- Page 28 Snap-in Joint Removal and Installation Method -1 Snap joint disassembly method: With tweezers, pull out the U-shaped snap ring from the two nostrils of the joint, pull out the tube, and take out the sealing ring with tweezers; Check whether the seal ring is damaged and replace the joint or seal ring of the same model.
- Page 29 Snap-type Joint Removal and Installation Method -2 Snap joint installation: Insert the pipe with a good sealing ring into the snap joint, and rotate the pipe or joint when inserting; Do not push directly into the pipe by brute force to prevent the sealing ring from being broken.
- Page 30 JL15&30 flowmeter replacement method Remove the appearance of the machine, first unplug the wiring plug on the flowmeter, and then take out the flowmeter upward, unplug the two water pipes on the flowmeter, take out the flowmeter, and remove the flowmeter.
- Page 31 ARS high pressure plunger pump CP4, snap type steady flow valve assembly (Kamel) Replacement Method-1 Do not operate with live power. Unplug the coffee machine before removing the water pump. Step 1: First with tweezers, pull out the U-shaped clapper from the two nostrils of the joint, pull out the tube; Pull out the two clamp positions on the fixed silicone sleeve of the water pump, move out the water pump, as shown by the arrow in the above picture, rotate the pressure regulator in the counterclockwise direction, and remove the pressure regulator.
- Page 32 ARS high pressure plunger pump CP4, snap type steady flow valve assembly (Kamel) Replacement Method-2 Do not operate with live power. Unplug the coffee machine before removing the water pump. Step 2: According to the position shown in the above picture, take out the silicone sleeve connected to the pump, pull out the power connector of the pump, take out the temperature sensor of the pump, and finally take out the pump.
- Page 33 The replacement method of snap type boiler (Kaneda) _220 V_1500W Live operation is prohibited. Unplug the coffee machine before removing the boiler. Please remove the coffee machine after it is completely cooled, beware of burns! As in the picture above, the screws in the circle are removed; With tweezers, pull out the U-shaped clapper from both nostrils of the joint. Pull out the hot water boiler inlet/outlet pipe; Plug (boiler live wire -- L, neutral wire -- N, ground wire --E) as shown by the arrow, pull out the joint of the temperature sensor and remove the boiler.
- Page 34 Replacement method of inlet valve, pressure reducing valve and check valve As shown in the picture above, 1, remove the 8 screws on the base and take out the base; 2. Remove the fixing screws of the pressure reducing valve; 3. Water inlet valve power cord (plug shown by arrow) out;...
- Page 35 The replacement method of silicone two-two way (water source switching valve) valve As shown in the picture above, remove the 8 screws from the base and take out the base; Remove the screws fixing the water supply switch valve with T10's plum screwdriver;...
- Page 36 Replacement method of snap type two-position two-way valve As shown in the picture above, remove the 4 screws from the boiler assembly and remove them slightly; Unplug the hot water pipe and joint at the location indicated by the arrow, and with tweezers, pull the U-shaped clapper out of both nostril of the holding valve joint.
- Page 37 Replacement method of snap type pagoda two-position three-way valve (steam exhaust valve) As shown in the picture above, pull the clasp outwards with index finger, push upward at the same time, remove the steam valve (V5), unplug the water pipe and power connector at the position indicated by the arrow, and use tweezers to pull the U-shaped clasp from both nostrils of the containment valve connector.
- Page 38 Replacement method of snap type two-position three-way valve (ES inlet valve) As shown in the picture above, unplug the position joint indicated by the arrow; With tweezers, pull the U-shaped clasp out of both nostril of ES inlet valve joint. Pull out the tube; Pull the clasp outwards with your index finger while pushing to the left to remove the inlet valve (V6), remove the fixing screws and remove the ES inlet valve, valve removal is complete.
- Page 39 Air valve 24 V replacement method As shown in the above picture, first cut off the cable tie, then pull out the pipe and joint marked by the arrow, take off the air valve, disassembly is complete.
- Page 40 JL15&30 Fresh Milk heating Assembly replacement method -1 Take off the nipple of the milk tube, pinch the buttons on both sides of the mouth of the drink with your fingers, take off the lid, and then forcibly take out the lower component of the milk foam;...
- Page 41 JL15&30 Fresh Milk Heating Assembly replacement method -2 Remove the nipple and silicone parts of the milk foam, take out the upper component of the milk foam, remove the connector, and then wipe the position of the milk foam installation and the coffee outlet with a wet towel. Put the rinsed frother or new frother back into the machine and close the coffee outlet cap.
- Page 42 JL30 waste water container assembly cleaning and replacement method Pull the water tray out of the machine: use clean water and household cleaner and wash the tray thoroughly with a towel; Rinse with clean water and dry with a towel. Pay special attention to the circled and marked metal sheet in the figure, be sure to thoroughly wash and dry the entire metal sheet and its surroundings, otherwise it may lead to false alarm phenomenon;...
- Page 43 JL30 waste slag container cleaning and replacement method Pull the water catch dish out of the machine, remove the coffee grounds container, and dump the coffee grounds. Use clean water and household cleaner to thoroughly clean the coffee grounds container. ...
Need help?
Do you have a question about the JL30 Series and is the answer not in the manual?
Questions and answers
JL 30 проблема после оплаты 1кружк последующего сразу надевает повторно кружку и на экране . На всех зночках появляется ! Знак
Добрый день, выдает ошибку 5700 контейнер для кофе