Table of Contents
Advertisement
Quick Links
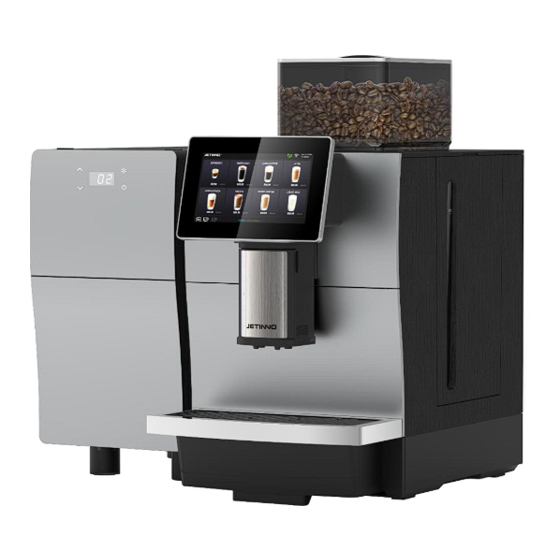
JL15&30 series coffee machine
Use Manual
Please read this operation manual carefully
before use and keep it safe
Guangzhou Jinuo Intelligent Equipment Co., LTD
Guangzhou Jetinno Intelligent Equipment Co.,Ltd.
www.jetinno.com
(86) 20-32038721
(86) 400-017-9997
Add: 4F, A Building, Creator Park, No.2,Tairui Rd, Science Park, Huangpu District, GZ, GD, PRC.
510663
Add: 4F, Building A, Creator Park, No.2 Ruitai Road, High-tech Industrial Development Zone, Huangpu
District, Guangzhou
Advertisement
Table of Contents

Related Manuals for Jetinno JL15 Series


Summary of Contents for Jetinno JL15 Series
- Page 1 Use Manual Please read this operation manual carefully before use and keep it safe Guangzhou Jinuo Intelligent Equipment Co., LTD Guangzhou Jetinno Intelligent Equipment Co.,Ltd. www.jetinno.com (86) 20-32038721 (86) 400-017-9997 Add: 4F, A Building, Creator Park, No.2,Tairui Rd, Science Park, Huangpu District, GZ, GD, PRC.
-
Page 2: Table Of Contents
Contents 1 Introduction ..............................4 1.1 Welcome to use ..........................4 1.2 Logos and symbols .......................... 4 2 General Safety Tips ............................ 6 2.1 Danger to users..........................6 2.2 Hazards to machines ........................9 3 Product Description ........................... 10 3.1 Welcome to use ..........................10 3.2 Technical Data .......................... - Page 3 4.4 Turn it on,............................23 4.4.1 Coffee maker ........................23 4.4.2 Counting ..........................23 4.4.3 diagnosis ..........................25 4.4.4 Machine status ........................28 5 First run ..............................28 5.1 Set up machine configuration - model number ................28 5.2 Connect to the Internet ........................29 5.3 Connect to the Server ........................
- Page 4 6.3.1 Brewer rinse ........................47 6.3.2 Milk Rinse ..........................48 6.3.3 Automatic flushing Settings ....................48 6.4 Cleaning Agent..........................49 6.5 Daily machine cleaning ........................49 6.5.1 Display to guide the cleaning routine ................. 49 6.5.2 System cleaning ........................50 6.5.3 Brewer cleaning ........................
-
Page 5: Introduction
1 Introduction 1.1 Welcome to use This instruction manual gives you the product information of JL15&30 and how to use it. If you do not use the coffee machine according to the relevant instructions in this manual, we do not assume any responsibility for the loss caused by this. - Page 6 Conditions exist that could cause damage to the machine. Be sure to follow the precautions to prevent such hazards. Fire hazard/combustible materials. Watch out for fire. Hot liquids. A dangerous condition that may cause burns. A hazard exists at the flow outlet location.
-
Page 7: General Safety Tips
Poisoning hazard. A general hazardous condition that may result in injury from poisoning. In the following Identification by symbol only. Be sure to follow precautions to prevent such hazards. 2 General Safety Tips 2.1 Danger to users Improper use of a coffee machine can result in minor injuries. Be sure to follow the following: Read the instructions carefully before use. - Page 8 Danger of electric shock. Incorrect use of electrical equipment can result in an electric shock. Be sure to observe the following: Work on electrical equipment should only be performed by electrical professionals. This machine must be connected to a circuit with fuse protection (it is recommended to lay the wiring through a leakage protector).
- Page 9 Danger of poisoning from ingestion of cleaning agents. Be sure to observe the following: Cleaning agent storage should be kept away from children and unauthorized persons. Do not ingest cleaning agents. Do not mix cleaning agents with other chemicals or acids. ...
-
Page 10: Hazards To Machines
Squeeze \ scratch hazard. There is a risk of being crushed by touching any moving part. Only handle pre-designed for output is allowed to be touched. Do not reach into the opening of the coffee bean trough, powder trough, or brewer after starting the coffee machine. -
Page 11: Product Description
Proper use of the coffee machine can cause damage or contamination. Be sure to follow the following points: Only coffee beans can be filled in the coffee bean tank, only finished drinks powder can be filled in the powder tank, and only ground coffee beans can be added to the manual addition port (or cleaning tablets can be added when cleaning). -
Page 12: Technical Data
Hazard to machinery. Incorrect operation of the coffee machine may cause damage to the equipment, use the original recipe, do not use other recipes. 3.2 Technical Data Name parameters Model number JL15, JL30 JL15 Dimensions/weight 300 (W)* 440 (H)*490 (D)mm, 14Kg JL30 Dimensions/weight 300 (W)* 540 (H)*490 (D)mm, 15Kg Rated voltage/frequency... -
Page 13: Installation And Commissioning
3.3 Installation and commissioning Machines should be installed in accordance with the electrical and hygiene regulations in force in each country or locality. These include taking adequate backflow protection measures. Sharp edges of packaging materials can lead to injury. Cutting nylon cable ties may make Eye injury. -
Page 14: Power Supply
4.1.2 Climatic conditions Hazards to machinery. The following climatic conditions are suitable for placing coffee machines. If these conditions are not guaranteed, the machine may be damaged. Be sure to observe the following conditions: The ambient temperature should be maintained at 5 ° C - 40 ° C. ... -
Page 15: Power Connection Cable
addition, cables should not be placed over hot objects and should be oil and corrosive cleaners resistant. Do not lift or pull the device through the power cord. Do not pull the plug out of the socket by pulling on the power cord. -
Page 16: Connection Value
3.6.2 Connection value Water pressure 0.1-0.6 MPa (1-6 bar) recommended Intake temperature Minimum >0° C Maximum 30° C 3.7 Mount 3.7.1 Unwrap the machine Read the "Set Up" and "Power Supply" sections carefully before starting the installation! Pay attention to the installation instructions that come with it! ... -
Page 17: Controls
4 Controls Hot liquid. Drinks made with this machine are hot drinks. Do not put your hand under the outlet of the drink or into the machine during discharge. High temperature steam. Risk of burns in the steam nozzle exit area. Do not extend your hand under the steam nozzle during output. - Page 18 JL30 coffee maker (front) ① coffee bean box, ② drink mouth, ③ built-in water tank, ④ touch + display screen, ⑤ water tray. Coffee machine (back) ① barreled water and built-in water tank switch knob, but also barreled water inlet, ② power switch, ③ power cable connector, ④MDB device interface, ⑤...
-
Page 19: Technical Parameters
Product interface Time/date Company LOGO Product buttons Preheat Single/double cup toggle button button Product name Product price Language toggle button 4.1.2 Technical parameters JL08 JL29 Recommended daily Cup capacity Recommended daily Cup capacity Drink Drink serving amount per hour serving amount per hour Espresso Espresso... -
Page 20: Accessories
4.1.3 Accessories Random accessories Fully automatic coffee makers come with the following accessories when supplied: Illustration Item name Functional specifications Product parameters Instruction manual For coffee machine use 210mmx291mm reference Coffee maker, pack of For daily consumable Regular consumable materials replacement of coffee machine (seals, strainers, etc.) Routine... -
Page 21: Check Before Turning On
Coffee maker milk For cleaning the milk 4g/ tablet, 120 tablets/bottle, 12 system clean tablets system bottles/case Coffee machine For coffee machine special inner diameter19, outside mounting accessories (to function installation diameter25 connect the outer row pipe of the water pan) 4.2 Check before turning on Check that the following prerequisites are met before turning on the coffee machine. - Page 22 A. External water source Take out the connector from the inside of the machine, rotate it clockwise to install it in the inlet valve interface, and insert the water inlet pipe into the interface. Direct drinking water interface A pump running without water can damage the machine. Make sure the main water valve is open before turning it on.
-
Page 23: Connect The Waste Water Line
C. Bottled water Open the switch knob between the bottled water and the built-in water tank, take out the white tube from the machine, and insert the tube into the interface until it is inserted to the bottom. Put the other end into the barrel water. -
Page 24: Turn It On
4.4 Turn it on, 4.4.1 Coffee maker ► Insert the machine power cord, female end, into the socket of the machine; Insert the other male end of the power cord into the socket of the power supply; ► Check the power connection of the machine and turn on the power switch. The machine starts, displays the main interface, and starts heating. - Page 25 Click "Drink", [Item] Counting mode interface [All] Counting mode interface Counting by Drink type screen Reset the counter screen. Life Counter Counts by drink type interface...
-
Page 26: Diagnosis
4.4.3 diagnosis Press and hold, the top left corner of the screen, enter your password (Tester: test9527) in the dialog box that pops up, and click "OK". Enter the background management interface and click on "Diagnosis", the diagnostic functions include "software and operating version, fault, diagnostic test". - Page 27 Software and Operating version -IP Address: User can turn on/off offline mode and set IP address here; Software and Operation version - Software: Users can check and update the IO board firmware version here. Software and Operating Versions - Applications: Users can check and update application versions here; Software and Operational version - Network Status: Users can check and set up networks here.
- Page 28 Faults - Current faults list: Users can query the current faults; Fault - Total fault list: users can query all the fault information. Diagnostic test - Status query: Users can check the status of all parts of the machine here; Diagnostic test - Valve test: Here the user can test all the valves within the machine.
-
Page 29: Machine Status
4.4.4 Machine status Press and hold, the top left corner of the screen, enter the password (Administrator: jn9527) in the dialog box that pops up, and click "OK" to enter the background of the machine. Click the icon to enter the "Status Details", press the prompt on the machine, and proceed with processing; Click the "machine reset"... -
Page 30: Connect To The Internet
Select [Machine Set -- up] - In the interface that pops up, click [Function Mode]. Select the corresponding machine model in the pop-up interface; With fresh milk model, click "fresh milk function on/off" to open the button in the pop-up interface. 5.2 Connect to the Internet Go to the background of the machine, click "Machine Settings", select [Remote detection] in the pop-up interface, and click the "remote detection"... -
Page 31: Connect To The Server
Click "Network and Internet", select "WLAN" in the pop-up interface, turn on the switch, the machine will automatically search for WIFI. Click the name of the WIFI you want to connect to, enter your password in the pop-up dialog box, and tap "Connect". -
Page 32: Fill The Box
Click "Software and Operating Version" -> "IP Address" to turn off offline mode. Click the Back button in the top right corner of the screen to return to the upper level interface. Click "Diagnostic Test" -> "Status Query" to view: Service connection configuration; Service connection status, indicating successful connection to the server;... -
Page 33: Fill The Refrigerator Milk Container With Milk
The grinder's spinning disk can cause injury. Do not put your hand into the coffee bean trough while the coffee machine is turned on. Adding foreign objects may cause the grinder to clog or damage the grinding equipment! Do not load any items other than coffee beans into the coffee bean trough. 5.5 Fill the refrigerator milk container with milk It is Important to: Contaminated milk tubes can be a health hazard. -
Page 34: Debugging And Calibration
5.6 Debugging and Calibration Calibrate Grinder calibration Before adjusting the grinder, prepare the (low magnitude) electronic scale! Grinder thickness adjustment First calibration Empty coffee beans (empty grinder residue before adjusting grinder) 5.6.1 Grinder thickness adjustment method 1、 Open the coffee bean box and find the grinder grinder coarseness adjustment knob. 2. -
Page 35: Adjust The Temperature Of The Hot Milk And Milk Foam
6 circle, as a benchmark thickness position (thickness of standard Italian coffee), then do calibration process acc ording to the thickness of the powder again (clockwise direction is thick, counterclockwise for fine). 5.6.2 Adjust the temperature of the hot milk and milk foam Press and hold the latch on both sides of the mouth, remove the mouth, you can see the adjustment knob, rotate the hand clockwise, the hot milk and milk foam temperature will increase, counterclockwise rotation of the hot milk and milk foam temperature will decrease. - Page 36 Grinder calibration steps: 1. Lift the coffee outlet to the highest position, pull the water tray outwards, and take out the water tray; Remove the coffee grounds box from the water tray and put it inside the machine. 2, Long press, the top left corner of the screen, enter the password (administrator: jn9527) in the dialog box that pops up, and click "OK".
- Page 37 4, click the "Grinder Calibration" option, -> "Start" button, the grinder starts to work, the grinder out of the powder mouth, will produce coffee powder, and finally drop into the coffee grounds box. 5, take out the coffee grounds box in the machine, put it on the electronic scale "zero/peel", put the coffee grounds box "zero/peel"...
-
Page 38: Calibration Of Fresh Milk
5.6.4 Calibration of fresh milk Different milk sources produce different concentrations, and fresh milk needs to be calibrated. The calibration should ensure that the milk source is sufficient. Calibration steps for fresh milk: 1. Empty the measuring cup under the outlet mouth, and move the outlet mouth down to the lowest position. 2, long press, the top left corner of the screen, enter the password (administrator: jn9527) in the pop-up dialog box, click "OK". -
Page 39: Product Testing And Adjustment
4, click the "milk foam calibration or hot milk calibration" option, click the "Start" button, and discard the milk foam or hot milk. Re-use an empty measuring cup under the outlet mouth; Click the "Start" button. When the milk foam or hot milk is finished, take off the measuring cup containing the milk foam or hot milk, read the value of the milk foam or hot milk in the measuring cup with your eyes level, enter the read value in the blank under [Input milk foam capacity] / [Input hot milk amount], and click "Save". -
Page 40: Drink Management (Set Drink Prices)
5.8 Drink Management (Set drink prices) Enter the background of the machine, click "drinks management", enter the drinks management interface, you can choose single/double cups of drinks, add products, batch operation, import products, export products. Click Add drink, you can edit the product: product ID (the entered ID needs to be consistent with the ID on the server), product name, product recipe, production time, price setting, sorting, normal display, removal, single cup, double cup, save function;... -
Page 41: Set The Selling Mode
5.9 Set the selling mode Free mode sales interface - no product price payment mode sales interface - product price Enter the background of the machine, click "Machine Settings", select [function mode] in the pop-up interface, and click the icon of "function mode". Click the "Payment System"... -
Page 42: Drink Making
5.10 Drink Making Place the cup under the mouth and select a drink from the display; Adjust the taste in the touch screen, there are five levels, and then confirm; Free mode (set 0 yuan), the machine directly makes drinks; In payment mode, the machine will appear several payment methods (paper money, coins, credit card payment);... -
Page 43: Operator Options
Enter the background of the machine, click "Operator Options - > Date and time" in the pop-up interface, use the time switch provided by the network to open, the system time will automatically update and synchronize with the local time; When the machine is used in a single machine and the network is not connected, click "Use the time switch provided by the network"... - Page 44 Set, screen saver wheel insertion interval (5-30 seconds); Click, wheel casting switch, enter the screen saver advertising cycle mode on/off, open can wheel casting. According to the requirements (picture size, name) on the computer to make "logo, start the picture", and then test them to the U disk, and then the U disk into the USB port (USB port at the bottom left bottom of the display), import the picture from the U disk;...
-
Page 45: Clear Pictures
First according to the requirements (picture size, naming) in the computer to make the "end of the production picture, production picture", and then put them into the U disk, and then the U disk into the USB port (USB port at the bottom left bottom of the display), from the U disk into the picture;... -
Page 46: Power Off
► Check the ground for obstacles and bumps before changing position. When using a stacking machine, improper transportation can cause damage to the machine. The following points must be noted when using a trolley to change the position of the machine: •... -
Page 47: Cleaning
6 Cleaning Thorough cleaning and maintenance are essential requirements for achieving food hygiene conditions. Only by regular maintenance, cleaning and maintenance (twice a week or increasing the frequency of cleaning according to the specific use) can the machine provide superior tasting drinks and satisfy customers. All relevant standards have been taken into account in the design of the machine to reduce maintenance costs and improve operational efficiency. -
Page 48: Daily Rinse
The cleaning intervals described in this chapter comply with the cleaning schedule of "Techno Smart Default". These Settings are in accordance with the "Hygiene Management Code of Make and Sell Automatic Vending Machines". When the cleaning level is set to "none", the operator is responsible for performing the necessary cleaning work. -
Page 49: Milk Rinse
6.3.2 Milk Rinse Enter the background of the machine, click the "cleaning and maintenance" button, in the pop-up interface, select "milk irrigation". There are two keys of "Confirm or cancel" in the pop-up matching box. Click "Confirm" to execute the flushing program, and click "Cancel"... -
Page 50: Cleaning Agent
6.4 Cleaning Agent Cleaning agents can cause poisoning! Only use cleaners recommended by the manufacturer of the device. The cleaner should be kept away from children. Do not eat or touch the detergent with your hands. Read the instructions and safety data sheet on the package carefully before using the detergent. If a safety data sheet is not provided, ask the distributor for it. -
Page 51: System Cleaning
Cleaning agents can cause poisoning. Cleaning machine parts can cause poisoning when contaminated with cleaning agents May cause harm to physical health. Please wear gloves during the cleaning procedure. High temperature liquid will be output during the cleaning procedure. Do not extend your hand to the stream outlet position during cleaning Below, or there is a risk of burns. - Page 52 Draw out the water tray and empty the water in the tray; Pull out the coffee grounds pail and empty the coffee grounds pail. Remove the tank and fill it with water; Take out the milk tube, put it into a clean box (milk road cleaning box), add 500ml water, and put in the cleaning tablet;...
-
Page 53: Brewer Cleaning
The machine is cleaning automatically, please wait... When the water runs out and the time is up, take out the cleaning box and put the milk carton in the refrigerator. Insert the milk tube into the carton and close the refrigerator door. -
Page 54: Milk Path Cleaning
Top of machine, open door, put cleaning sheet in brewing bin, close door; Click [NEXT], the machine performs the brewer cleaning procedure. The brewer cleaning time takes about 15 minutes to complete, wait patiently until the program is over, the interface prompts: "Brewer cleaning has been completed, click OK to return the user to the drinks selection screen";... - Page 55 Get 1 or 2 Rinza milk cleaning tablets; Drop the tablets into the cleaning box and fill with the appropriate amount of water; Open the refrigerator door, put the cleaning box in the refrigerator, take out the milk tube, insert it into the cleaning box, close the refrigerator door;...
-
Page 56: Clean The Coffee Grounds Box
6.5.5 Clean the coffee grounds box Coffee grounds in a coffee grounds box can easily lead to mold formation. If the plaque spreads to the machine, the coffee may become contaminated. Therefore, the coffee grounds box must be cleaned daily. High temperatures may cause damage. -
Page 57: Clean The Drink Out Of The Mouth
6.5.7 Clean the drink out of the mouth First pull out the coffee discharge tube, press the buckle on both sides of the drink outlet mouth, pull down hard, remove the discharge nozzle, rinse with water. Put back into the discharge nozzle to press to the bottom, and finally put the coffee discharge tube back. -
Page 58: Empty The Waterway
6.7 Empty the waterway The waterway must be emptied before the long- distance transportation below zero degree, The specific methods are as follows: Enter the machine background, click "Machine Settings", and click "Restart" in the pop-up interface then the next dialog box appears. -
Page 59: Preventive Measure
7 Preventive measure 7.1 Cleanser 7.1.1 Use Danger of poisoning from ingesting detergent. Be sure to observe the following: Cleaning agent storage should be kept away from children and unauthorized persons. Do not ingest cleaning agents. Do not mix cleaning agents with other chemicals or acids. ... -
Page 60: Health Regulations
7.2 Health Regulations 7.2.1 Water Improper use of water can be harmful to health! The water source must meet the sanitary standards for drinking water. Be sure to observe the following points: The water must be clean and pollution-free. Do not add seepage water or other corrosive water to the coffee maker. -
Page 61: Safety And Quality Assurance
8 Safety and Quality Assurance The manufacturer does not accept any responsibility for damage that may occur to the coffee machine if the user does not follow the instructions for the use and installation of the machine. Take care to follow the instructions. The installation site should be kept dry and waterproof;... -
Page 62: List Of Frequently Asked Questions
9 List of frequently asked Questions Possible causes (possible Problems(problems) A solution (solution) causes) The coffee is ground too fine Adjust the grinder The dose is much larger than Recalibrate the grinder intended Coffee exit flow rate is too slow Strainer blocking Pills to clean the brewer or replace the strainer Leaks (lower plunger damaged)
Need help?
Do you have a question about the JL15 Series and is the answer not in the manual?
Questions and answers