Gardner Denver WELCH CRVpro Series Operation Manual
Rotary vane pumps two-stage
Hide thumbs
Also See for WELCH CRVpro Series:
- Operation manual (48 pages) ,
- Operation manual (48 pages) ,
- Operation manual (46 pages)
Table of Contents
Advertisement
Quick Links
Advertisement
Table of Contents

Related Manuals for Gardner Denver WELCH CRVpro Series


Summary of Contents for Gardner Denver WELCH CRVpro Series
- Page 1 D e l ’ é q u i p e me n t E T d u s e r v i c e !
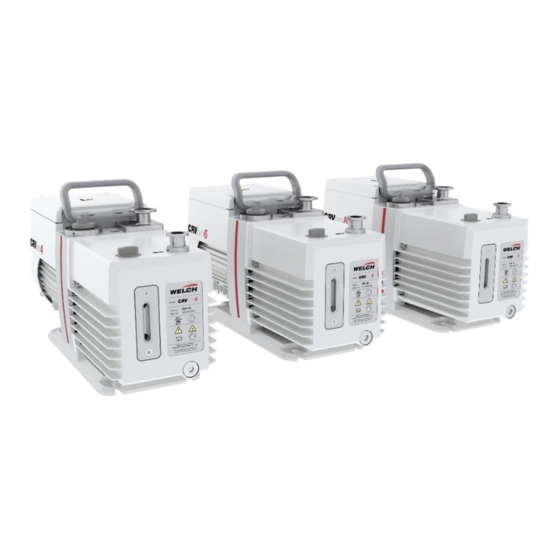
- Page 2 Operation Manual (EN) Original version of the operation manual Rotary vane pumps Two-stage Series CRVpro CRVpro 4 CRVpro 6 CRVpro 8 P1700011 2018-09-30...
-
Page 3: Table Of Contents
Contents Contents Important Information ......................1 Meaning of the Warning and Information notes ..............1 General Information ......................1 Target Groups ........................2 Intended Use ........................2 Use for an Unauthorized Purpose ..................2 Product Standards, Safety Regulations ................2 Basic Safety Instructions .................... - Page 4 Contents 5.5.3 Change the Voltage Setting ..................... 18 5.5.4 Motor Protection ......................18 Starting-up........................19 Operating Temperature ....................19 Oil for Drawing off Oxygen ....................20 Gas Ballast Control ......................20 5.10 Trap installation and maintenance ................... 20 5.11 Side Panel Fitting Port ..................... 21 5.12 Closing down ........................
-
Page 5: Important Information
Important Information Important Information 1.1 Meaning of the Warning and Information notes Take note of the warning notes which are in the following boxes: CAUTION ! / WARNING ! Hazard which may lead to serious injuries or material damage. WARNING ! Hot surface which may lead to serious injuries or material damage. -
Page 6: Target Groups
Important Information ONLY RELEVANT FOR CE (220-240V / 50HZ ) OPERATION The rotary vane pump conform to the following directives: Directive on machinery 2006/42/EC Directive on waste electrical and electronic equipment 2012/19/EU Directive on the restriction of the use of certain hazardous substances in 2011/65/EU electrical and electronic equipment 1.3 Target Groups... -
Page 7: Basic Safety Instructions
Basic Safety Instructions Basic Safety Instructions IMPORTANT SAFETY INSTRUCTIONS SAVE THESE INSTRUCTIONS 2.1 General Information CAUTION ! To reduce the risks of fire or explosion, electrical shock, and the injury to persons, read and understand all instructions included in this manual. Be familiar with the controls and the proper usage of the equipment ·... -
Page 8: Hazardous Substances
Basic Safety Instructions CAUTION ! Solid particles in the pumping medium impair the pumping action and can lead to damage. Prevent solid particles penetrating into the pump! 2.4 Hazardous Substances CAUTION ! The operating company bears the responsibility for the use of the rotary vane pump. Hazardous substances in the gases to be pumped can cause personal injuries and property damage. -
Page 9: Description
Description Description 3.1 Design The CRVpro series vacuum pumps are oil-sealed, two-stage Rotary vane pumps. The drive motor is directly flange-mounted onto the motor cover of the pump holder and the pump shaft and the motor shaft are connected to each other by an elastic coupling. The bearings of the interior pump body are force-fed lubricated sliding bearings. - Page 10 Description Americas 115V, Hose barb and 230V, Hose barb and Description 115V, Standard 115V, Flare fitting flange adapter flange adapter, IEC CRVpro 4 3041-00 3041-01 3042-01 Ordering CRVpro 6 3061-00 3061-01 3062-01 Information CRVpro 8 3081-00 3081-01 3081-02 3082-01 Factory wired 220-240V / 50Hz, 115V / 60 Hz 115V / 60 Hz...
-
Page 11: Function
Description 3.4 Function 3.4.1 Principles of Vacuum Pump Operation The main purpose of a vacuum pump is to reduce the pressure in a vessel or a closed system. The degree of pressure reduction is dependent upon the requirements of the application and the type of vacuum pump employed. - Page 12 Description Fig. 3 Pre-stage / high stage When in operation, the intake stage is at lower pressure and the exhaust stage is at higher pressure relative to each other. Each stage contains a rotor assembly consisting of a rotor with two vanes and a stator.
-
Page 13: Oil Functions
Description pressure of the pump and its system. No matter how much additional pumping time is provided, no further reduction in system pressure will be accomplished once ultimate pressure is attained. Intake Anti-suck back Protection When power to the pump is turned off, this device closes automatically, maintaining vacuum in the system being evacuated, and vents the inside of the pump to atmospheric pressure. - Page 14 Description When pumping condensable vapours, they may be compressed during the compression phase above the saturated vapour pressure and condense. This causes considerable deterioration in the vacuum pump’s performance: · ultimate pressure is not achieved · corrosion occurs · heavy oil contamination and formation of emulsions CAUTION ! Operating with gas ballast increases the operating temperature of the vacuum pump by 5 –...
-
Page 15: Technical Data
Technical Data Technical Data 4.1 Dimensions Fig. 4 Dimensions (in mm) Pump series (in mm) CRVpro 4 35.5 163.5 88.5 CRVpro 6 35.5 163.5 88.5 CRVpro 8 35.5 163.5 88.5 4.2 Pumping Speed / Intake Pressure – Diagram Fig. 5 Pumping Speed / Intake Pressure - Diagram CRVpro 4, 6, 8 P1700011... -
Page 16: Device Data
Technical Data 4.3 Device Data 304x-xx 306x-xx 308x-xx Parameter Unit (CRVpro 4) (CRVpro 6) (CRVpro 8) Free Air Displacement (max. pumping speed) - @ 50Hz /h (L/min) 4 (67) 6 (100) 8 (133) - @ 60Hz CFM (L/min) 2.8 (78) 4.2 (118) 5.6 (158) Pumping speed (Ø-data 133 to 1013 mbar) -
Page 17: Lubrication Data
Technical Data 200V 50/60Hz version Parameter Unit 50 Hz 60 Hz Frequency Frequency 50 Hz Frequency 60 Hz Voltage Motor power 0.37 0.37 Nominal current Motor speed 50/60Hz 1440 1720 4.5 Lubrication Data Welch Directorr™ Premium vacuum oil is a triple-distilled hydrocarbon oil using severely hydrotreated base stock. -
Page 18: Installation And Operation
Installation and Operation Installation and Operation 5.1 Unpacking Carefully unpack the rotary vane pump. Keep all paperwork and inspection tags for future reference. Check the pump for: · Transport damage · Conformity with the specifications of the supply contract (model, electrical supply data) ·... -
Page 19: General References
Installation and Operation 5.4 General References CAUTION ! On continuous operation it’s recommended to run the pump below 10mbar maximum vacuum pressure. According to its intended use the capacity of the vacuum pump depends on: · the kind of assembly ·... -
Page 20: Connecting To The Electricity Supply
Installation and Operation 5.5.1 Connecting to the Electricity Supply The standard pump is supplied with complete electrical wiring. It is connected via an appliance cable and a power supply plug. If the supply cord is damaged, it must be replaced by the manufacturer, its service agent or similarly qualified persons in order to avoid a hazard. -
Page 21: Installation Of The Grounding Plug
Installation and Operation 5.5.2 Installation of the Grounding Plug ONLY RELEVANT FOR UL (115V, 230V / 60HZ) OPERATION This product must be grounded. In the event of an electrical short circuit, grounding reduces the risk of electric shock by providing an escape wire for the electric current. This product is equipped with a cord having a grounding wire with an appropriate grounding plug. -
Page 22: Change The Voltage Setting
Installation and Operation 5.5.3 Change the Voltage Setting Depending on the order number, pump are factory wired for low voltage (LV) 115V / 60Hz or high voltage (HV) 220-240V / 50Hz; 230V / 60Hz. If necessary the voltage setting can be changed as followed: 10. -
Page 23: Starting-Up
Installation and Operation 5.6 Starting-up Observe the basic safety instructions when using the pump. Before using the pump for the first time, it is recommended to spend a few minutes inspecting the pump and its electrical and vacuum connections. Please notice the information which are listed in chapter 5 Installation and Operation. -
Page 24: Oil For Drawing Off Oxygen
Installation and Operation 5.8 Oil for Drawing off Oxygen WARNING ! Pump should be not used for oxygen service! Oxygen at atmospheric pressure is exceptionally dangerous! For drawing off oxygen containing mixtures or pure oxygen the following must be taken into consideration: ·... -
Page 25: Side Panel Fitting Port
Installation and Operation suitable solvent in a fume hood. Thoroughly clean and dry the trap before reinstalling in the system. 5.11 Side Panel Fitting Port Some applications call for a gas purge using a clean dry gas such as nitrogen. An external gas supply can be routed into the gas ballast assembly using that port. -
Page 26: Storage
Installation and Operation 5.13 Storage The pumps are to be stored in a low-dust, interior room within the temperature range from + 5 to + 40 °C and at a relative air humidity < 90%. Leave the protective elements on the suction and pressure ports. Another equally good protection may be used. -
Page 27: Maintenance And Servicing
Maintenance and Servicing Maintenance and Servicing Under normal operating conditions the maintenance of the rotary vane pump is limited to: · external cleaning · checking running noises · checking the level and quality of the oil · regular oil changes These maintenance intervals must be specified according to the prevailing operating conditions and adhered to. -
Page 28: Oil Colour Check
Maintenance and Servicing Oil fill plug Oil drain plug Lower marking MIN Oil sight glass Upper marking FULL Fig. 11 Oil level control 6.2 Oil Colour Check WARNING ! The condition and quality of the pump oil have a substantial effect upon the performance and operational readiness of the vacuum pump! Comparing the colour of a sample of the pump oil with fresh oil provides an indication of the contamination of the pump oil. -
Page 29: Filling Up With Oil
Maintenance and Servicing WARNING ! Avoid skin contact with the oil! Dispose of the oil in accordance with the valid environmental protection regulations! 6.3.2 Filling up with Oil 1. Switch off the pump, disconnect from the power outlet and from the vacuum system. 2. -
Page 30: Frequency Of Oil Changes
Maintenance and Servicing 6.3.4 Frequency of Oil Changes The oil change interval is completely dependent upon the running conditions of temperature, operating pressure, hours of daily operation, and upon the materials pumped. Clean, dry air at pressures below 0.7 mbar (50 mtorr) are the most forgiving conditions. To determine your own oil change interval, visually monitor the pump oil conditions at regular intervals. -
Page 31: Troubleshooting
Troubleshooting Troubleshooting Only manufacturing firm and authorized service workshops may work on the pump and their accessories during the warranty period. Remedy Trouble Cause with: Qualified No power supply Check electrical installation electrician Motor defective Service Exchange workshop Coupling defective Repair and/or exchange Vacuum pump Put vacuum pump in a warm place... - Page 32 Troubleshooting P1700011...
-
Page 33: Overview Of Accessories
Overview of Accessories Overview of Accessories 8.1 Overview and Order Numbers for EMEA, Asia Type Product name Description Order no. Oil Mist Separator AKD 16 DN 16 KF 320015 Replacement element for AKD 16 DN 16 KF 800160 Oil Mist Filter OME 10/16 DN 16 KF 700010 Replacement element for OME 10/16,... -
Page 34: Overview And Order Numbers For Americas
Overview of Accessories Type Product name Description Order no. Directorr™ Premium vacuum oil 1 liter 800995-01 Directorr™ Premium vacuum oil 5 liter 800995-05 Directorr™ Premium vacuum oil 10 liter 800995-10 Directorr™ Premium vacuum oil 20 liter 800995-20 Directorr™ Premium vacuum oil 200 liter 800995-200 8.2 Overview and Order Numbers for Americas... - Page 35 Overview of Accessories Type Product name Description Order no. Hose Clamps for Thick Wall Vacuum 3/4” ID x 1-3/4” OD, 10 Rubber Hose Pk/10 FT Length 331060-10 Hose Clamps for Thick Wall Vacuum 3/4” ID x 1-3/4” OD, 15 Rubber Hose Pk/10 FT Length 331060-15 Hose Clamps for Thick Wall Vacuum...
-
Page 36: Inlet Condensor Aks 16
Overview of Accessories 8.3 Inlet Condensor AKS 16 Order no. 320016 Connecting flange DN 16 KF Separator – basic body Aluminium Collector or condensate vessel Borosilicate glass Technical Data Seals Max. filling volume 380 ml Order no. Beaker glass AKS 828835 Order no. -
Page 37: Oil Mist Separator Akd 16
Overview of Accessories 8.4 Oil Mist Separator AKD 16 320015 Order no. Connecting flange DN 16 KF Separator – basic body Aluminium Collector vessel Borosilicate glass Seals Technical Max. filling volume 270 ml Data Filter cartridge Optical fiber Order no. Spare-filter 800160 cartridge Order no. -
Page 38: Sorption Trap Sof
Overview of Accessories 8.5 Sorption trap SOF The gas flows from the recipient via the gas inlet into the sorption trap, passes by Mode of action the sorption agent, and reaches the outer cylinder to the gas outlet which is connected to the pump. -
Page 39: Overview Of Spare Parts
Overview of Spare Parts Overview of Spare Parts The overview of spare parts contain all service kits, single spare parts with all the information necessary for ordering. When ordering please quote the order number, description and quantity! CAUTION ! We are not liable for any damage caused by the installation of any parts not supplied by the manufacturer. -
Page 40: Seal Kit
Overview of Spare Parts 9.2 Seal Kit The seal kit contains all the seals which must be exchanged during a preventive maintenance or repair. · For the Rotary vane pumps CRVpro 4, 6, 8 Order no. S3080-99 Description CRVpro 4, 6, 8: S3080-99 Item no. -
Page 41: Service Kit
Overview of Spare Parts 9.5 Service Kit The service kit contains, in addition to the seals, all the spare parts which are subject to high wear and tear and therefore have to be replaced. · For the rotary vane pump CRVpro 4: Order no. S3077-99 ·... -
Page 42: Kf25 Inlet Port Kit
Overview of Spare Parts 9.7 KF25 Inlet Port Kit The KF25 Inlet Port Kit is for the inlet interface requirement of KF25 which includes all the parts for replacing the original KF16 inlet. · For the Rotary vane pumps CRVpro 4, 6, 8 Order no. -
Page 43: List Of Spare Parts
Overview of Spare Parts 9.8 List of Spare Parts Fig. 12 Exploded view CRVpro 4, CRVpro 6, CRVpro 8 CRVpro 4 CRVpro 6 CRVpro 8 Item no. Description Order no. Order no. Order no. Motor S3001-99 S3001-99 S3001-99 Handle S3002-99 S3002-99 S3002-99 6, 46... - Page 44 Overview of Spare Parts CRVpro 4 CRVpro 6 CRVpro 8 Item no. Description Order no. Order no. Order no. O-Ring S3096-99 S3096-99 S3096-99 Rubber Sheet S3097-99 S3097-99 S3097-99 Blank Flange S3098-99 S3098-99 S3098-99 Hoop S3099-99 S3099-99 S3099-99 Coupling Element S3024-99 S3024-99 S3024-99 Coupling...
-
Page 45: Warranty
Gardner Denver Thomas, Inc. under this warranty is limited to servicing, adjusting, repairing or replacing any unit or component part which in the judgment of Gardner Denver Thomas, Inc. has not been misused, abused or altered in any way causing impaired performance or rendering it inoperative.
Need help?
Do you have a question about the WELCH CRVpro Series and is the answer not in the manual?
Questions and answers