
Related Manuals for Kleenmaid RHSCKL92


Summary of Contents for Kleenmaid RHSCKL92
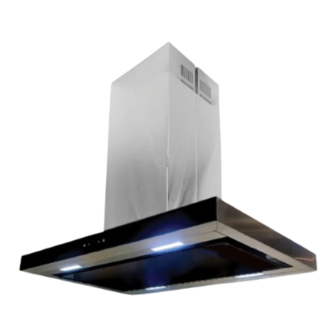
- Page 1 To register your warranty or make a warranty claim, scan this QR code: cooking collection Instructions for use and warranty details Island Canopy Rangehood Model No.:RHSCKL92...
-
Page 2: Table Of Contents
Once installation is complete, please read this instruction manual carefully and get to know the controls and the features of your new Kleenmaid appliance. These simple instructions will enable you to achieve excellent results from the very first time you use it. -
Page 3: Recommendations And Suggestions
RECOMMENDATIONS AND SUGGESTIONS Before planning or commencing installation, the installer should refer to the current online version of the User Manual, which is available on the Kleenmaid website (see back cover for details). INSTALLATION The manufacturer will not be held liable for any damages resulting from incorrect or improper installation. -
Page 4: Components
COMPONENTS Ref. Qty. Product Components Rangehood Body,complete with: Controls, Light, Blower,Filter. Lower Decorative Chimney Upper Decorative Chimney Hanger Assembly Hanger The Round Activated Charcoal filter ( optional ) Qty. Documentation User Manual Ref. Qty. Installation Components Screws M4*8 (4 spare screws included) Screws ST5*50 Screw anchor plugs There are appliance specific accessories (e.g. -
Page 5: Dimensions
Min. 650mm The safety gap between the rangehood and the hob below must comply with the recommendations of the hob manufacturer. In case of no instructions, a minimum distance of 650mm (or other minimum distance as may be specified by AS/NZS 5601 and interpreted by a certified installer) should apply. -
Page 6: Installation
INSTALLATION NOTE: Before planning or commencing installation, the installer should refer to the current online version of the User Manual, which is available on the Kleenmaid website (see back cover for details). CHOOSE A VENTING MODE This rangehood may be installed in one of two modes - ducted or recirculation mode. The mode to be used must be decided before installation. - Page 7 INSTALLATION 1. Install the Exhaust pipe to the Rangehood body using smooth walled rigid pipe ɸ150 (not supplied). 2. Fasten the 4 Hangers to the Rangehood Body assembly with 8 Screws (M4*8) according to the image below. 3. Fit the Lower Decorative Chimney and the Upper Decorative Chimney to the Rangehood body assembly.
- Page 8 4. Drill holes according to the Figure A with a Ф10 mm drill bit; and then insert the screw anchor plugs into the holes. Finally fasten the adjustment hanger assembly to the ceiling by 4 Screws ST5*50) Ceiling 4 Screws (ST5*50) and 4 Wall plugs Mounting hole position size...
-
Page 9: Use
Note: It is recommended that the rangehood in an apartment be either connected to a dedicated ducting outlet on the external wall, or that it be installed in recirculating mode, including the use of carbon filters, allowing the air to be returned to the kitchen through the outlet pipe DUCTED VERSION AIR EXHAUST SYSTEM When installing the ducted version, connect the rangehood to the chimney using smooth... -
Page 10: Maintenance
Normally these filters will last the life of the rangehood, however if they are damaged in any way, replacements may be purchased by emailing support@kleenmaid.com.au or calling 02 9310 1207. KLEENMAID ACTIVATED CHARCOAL FILTER (RECIRCULATION VERSION) These filters are not washable and cannot be regenerated, and must be replaced approximately every 4 months of operation, or more frequently with heavy usage. - Page 11 LIGHTING LIGHT REPLACEMENT (To be completed by professionals) The light bulbs cannot be replaced. The entire light module has to be replaced. When changing the light modules, the contacts are live. Before changing the light module(s), unplug the appliance from the mains or switch off the circuit breaker in the fuse box.
-
Page 12: Trouble Shooting
(see back cover of this manual for details). When booking a service please provide your Model No: RHSCKL92, and the individual Serial Number of your rangehood from your appliance paperwork. It is also on the rating plate. -
Page 13: Technical Specifications
TECHNICAL SPECIFICATIONS 220-240V~ 50Hz Voltage Rated Power 4x1.5W Lighting Motor Input Power 150mm Diameter of air outlet Air flow with BLDC motor Noise at lowe 4 4 dB(A) - Page 14 Kleenmaid Warranty, however, if repair is needed because of Product failure during normal Domestic Use, Kleenmaid has the option to repair or replace the defective Product or part of the Product with a product or part of like kind and quality.
- Page 15 Service under this warranty may be limited by the area in which you live. Service to remote and regional areas may incur additional travel costs which will be payable by you. You will be advised of this at the time you make a claim and Kleenmaid arranges to attend your premises.
- Page 16 Other products available in the Kleenmaid range of appliances Washing machines Clothes dryers Dishwashers Ovens Cooktops Steam ovens Microwave ovens Built in espresso coffee machines Rangehoods Freestanding ovens Refrigerators & Freezers Beverage Serving Cabinets Water Dispensers Vacuum Cleaners Compass Capital Services Pty Limited...
Need help?
Do you have a question about the RHSCKL92 and is the answer not in the manual?
Questions and answers