Subscribe to Our Youtube Channel
Summary of Contents for Kleenmaid cooking Series
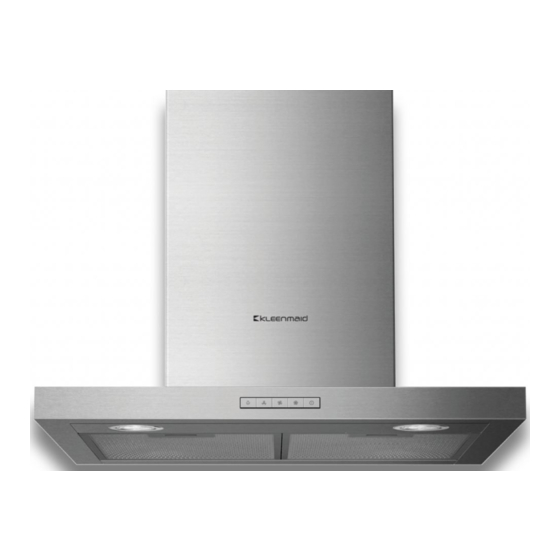
- Page 1 cooking collection Instructions for use and warranty details To register your warranty or make a warranty claim, scan this QR code: Wall Mounted Canopy Rangehood Model No:RHSC61_RHSC91...
- Page 2 Once installation is complete, please read this instruction manual carefully and get to know the controls and the features of your new Kleenmaid appliance. These simple instructions will enable you to achieve excellent results from the very first time you use it.
-
Page 3: Recommendations And Suggestions
RECOMMENDATIONS AND SUGGESTIONS Before using this appliance please study this entire User Manual carefully. Keep this manual in a safe place for future reference. Ensure that other people using the product are familiar with these instructions as well. The latest version of this manual is available on our website. (See back page for details.) The manufacturer will not be held liable for any damages resulting from incorrect or improper installation. - Page 4 COMPONENTS Ref. Qty. Product Components Hood Body,complete with: Controls, Light, Blower,Filter. Lower Decorative Chimney Upper Decorative Chimney The Activated Charcoal filter ( optional ) Qty. Documentation User Manual Ref. Qty. Optional Installation Components Screws 5 x 50 Wall Plugs Screws 4,2 x 9,5 Hood fixing bracket Chimney fixing bracket...
- Page 5 :mm Air outlet diameter Min. Min. 650mm 650mm The safety gap between the rangehood and the hob below must comply with the recommendations of the hob manufacturer. In case of no instructions, a minimum distance of 650mm (or other minimum distance as may be specified by AS/NZS 5601 and interpreted by a certified installer) should apply.
-
Page 6: Installation
INSTALLATION NOTE: Before making preparations for or commencing installation, the installer should refer to the current online version of the User Manual, which is available on the Kleenmaid website (see back cover for details). CHOOSE A VENTING MODE This rangehood may be installed in one of 2 venting modes - ducted extraction-air mode and recirculation mode. -
Page 7: Wall Drilling And Bracket Fixing
INSTALLATION WALL DRILLING AND BRACKET FIXING NOTE: The safety gap between the rangehood and the hob below must comply with the recommendations of the hob manufacturer. In case of no instructions, a minimum distance of 650mm (or other minimum distance as may be specified by AS/NZS 5601 and interpreted by a certified installer) should Vertical reference line... - Page 8 Fix the 150mm diameter smooth wall rigid exhaust pipe (not supplied) on the hood body, connect chimney and hood body with 2 screws . connect chimney fixing bracket and chimney with 2 screws Hook the hood body Hook the hood body to the bracket 20. ...
- Page 9 Speed adjustment buttons Each function is controlled independently by a button. Light High Power When first plugged in to a powered electrical socket, the rangehood will chime once to show it's connected to the electrical supply. After the connection: ...
-
Page 10: Maintenance
MAINTENANCE FILTERS Your Kleenmaid rangehood has one or both the following types of filters: These filters must be cleaned after every 2 months of operation, or more frequently for particularly heavy usage. Operate the latch on the grease filters and remove the filters one by one, pushing them towards the back side of the rangehood unit and simultaneously pulling downwards. -
Page 11: Cleaning The Rangehood
Remove the metal grease filters REMOVE Remove the saturated activated charcoal filter. Fit the new filters. Replace the metal grease filters. REMOVE It must be ensured that the filters are correctly installed whenever the rangehood is operating. Failure to do so may damage the rangehood, and such damage will not be covered by the manufacturer's warranty. - Page 12 LIGHTING LIGHT REPLACEMENT ( Replacing the light modules The light bulbs cannot be replaced. The entire light module has to be replaced. When changing the light modules, the contacts are live. Before changing the light module(s), unplug the appliance from the mains or switch off the ...
-
Page 13: Troubleshooting
TROUBLE SHOOTING Fault Cause Solution The blades are blocked. Check the blades. The capacitor is damaged. Contact Service Department Light on, but The motor is damaged. Contact Service Department motor does not The internal wiring of motor is cut off/ work Contact Service Department disconnected. - Page 14 The benefits given to you under this Kleenmaid Warranty are in addition to other rights and remedies to which you may be entitled under the Australian Consumer Law in relation to the Product to which this Kleenmaid Warranty relates. Subject to the conditions below, the Product is warranted by Kleenmaid and/or its agents to be free from defects in materials and workmanship for the Warranty Period for normal Domestic Use.
- Page 15 13. Kleenmaid accepts no liability for items that are lost, damaged, or stolen as a result of freight, transport or storage. If you are required to transport the Product to an authorised service centre, you must ensure that it is securely packed and insured.
- Page 16 Other products available in the Kleenmaid range of appliances Washing machines Clothes dryers Dishwashers Ovens Cooktops Steam ovens Microwave ovens Built in espresso coffee machines Rangehoods Freestanding ovens Refrigerators & Freezers Beverage Serving Cabinets Water Dispensers Vacuum Cleaners Compass Capital Services Pty Limited...


Need help?
Do you have a question about the cooking Series and is the answer not in the manual?
Questions and answers