Table of Contents
Advertisement
Quick Links
Advertisement
Table of Contents

Related Manuals for ALDI Gardenline GL 46


Summary of Contents for ALDI Gardenline GL 46
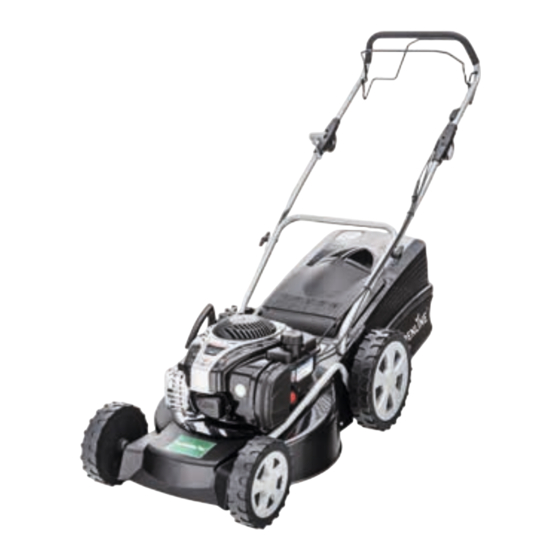
- Page 1 User Manual PETROL LAWN MOWER GL 46 Original instructions ID: #05007...
-
Page 2: Table Of Contents
Contents Overview ................3 Use ..................4 Pack contents/parts list ............6 General information ............7 Read and keep the user manual ..........7 Explanation of symbols ............7 Symbols on the lawn mower ..........9 Safety ................. 10 Proper use ................10 Residual risks ................10 Safety and maintenance guidelines........10 Safety notices ................11 Initial use ................ - Page 5 33 34 35 14 13...
-
Page 6: Pack Contents/Parts List
Package contents/parts list Gear selector arm (wheel drive) ∅ 3×25 mm screw, 2× Upper handle M5×16 mm screw, 2× Bowden cable M5 domed cap nut, 2× Cable tie, 2× Fill level indicator Handle cover (top part of grass catcher Grass catcher bag bag) Flap Leg spring (flap) Primer bulb (fuel pump) -
Page 7: General Information
This user manual can be downloaded as a PDF from our homepage: www.al-ko.com/service-aldi. Explanation of symbols The following symbols and signal words are used in this user manual, on the lawn mower or on the packaging. - Page 8 General information Dimensions: 1450 × 530 × 1080 mm The lawn mower weighs approx. 30.8 kg. The cutting width is approx. 46 mm. You can adjust the cutting height for a lawn length of approx. 3–8 cm. The grass catcher bag can hold up to 65 l. The lawn mower motor has a power output of 2.2 kW/2900 min Handle vibration value: a =3.5 m/s...
-
Page 9: Symbols On The Lawn Mower
General information Symbols on the lawn mower Symbol Meaning Attachment point WARNING! Flap Be particularly careful when handling the lawn mower. First read and understand the user manual! Flap The cutting blade is very sharp – keep your hands and feet away from the cutting Flap blade! Risk posed by discharged objects when the... -
Page 10: Safety
Safety Safety Proper use The lawn mower is designed exclusively for mowing lawns in domestic gardens and allot- ment gardens. It is only intended for private use and is not suitable for commercial use. Any other application is expressly prohibited and deemed improper use. Neither the manufacturer nor the retailer can accept responsibility of any kind for in- jury, loss or damage caused by misuse of this product. -
Page 11: Safety Notices
Safety Safety notices DANGER! Risk of explosion, fire and damage to health! Improper handling of petrol or oil may lead to an explosion or a fire and can thereby damage your health through improper use. − Petrol is highly flammable. Keep the lawn mower away from open flames and do not smoke when adding fuel. - Page 12 Safety WARNING! Danger for children and persons with impaired physical, sensory or mental capacities (e.g. partially disabled persons, older persons with reduced physical and mental capacities) or lack of experience and knowledge (e.g. older children). − The lawn mower may not be used by children and persons with impaired physical, sensory or mental capacities or a lack of experience and knowledge.
- Page 13 Safety − Please observe the information supplied on the sound and vibration caused by this lawn mower (see chapter ‘Noise/vibration information’). − Please also observe the separate user manual for the motor. WARNING! Risk of injury! Improper use, improper maintenance or improper work with the lawn mower may result in dangerous situations and injury.
- Page 14 Safety − Stop the motor, unplug the spark plug, and make sure all moving parts have come to a complete stop: − before loosening or removing blockages or obstructions from the grass discharger. − before checking, cleaning or servicing the lawn mower. −...
- Page 15 Safety − Always mow horizontally to the slope when on sloped terrain; never up or down slopes. For safety reasons, do not mow slopes with an incline greater than 20°. − Be extra cautious when you change the mowing direction on sloped terrain. −...
-
Page 16: Initial Use
Initial use Initial use Checking the lawn mower and package contents NOTICE! Risk of damage! If you are not cautious when opening the packaging with a sharp knife or other pointy objects, you may damage the lawn mower. − Be careful when opening the package. Two people are required to remove the lawn mower from the packaging. - Page 17 Initial use 6. Insert the metal bracket into the corresponding holes in the top part of the grass catcher bag and guide the support plates into the corresponding slots in the top part of the grass catcher bag (see Fig. C). 7.
-
Page 18: Preparations
Preparations 6. From the outside, put a 8.5/15.5 mm washer onto the screw. 7. Use two wing nuts to tighten the two screws. 8. Install the pull starter bracket on the upper handle by inserting the M8 × 45 screw through the upper handle, the pull starter bracket and the ∅ 6.4 / washer from the outside (see Fig. - Page 19 Preparations − Switch off the motor and let the lawn mower cool down before filling the petrol tank or oil tank. Overflowing fuel may otherwise catch fire. − Only refill the lawn mower in well-ventilated areas. Petrol fumes can catch fire or explode when they accumulate.
- Page 20 Preparations 1. Turn the fuel tank cap anticlockwise (Symbol ) and remove it (see Fig. A). 2. Use a funnel to carefully add fuel to the tank. The fuel tank can hold up to 0.75 l and must not be overfilled. Be very careful when adding fuel to the tank and make sure not to spill any fuel.
-
Page 21: Settings
Preparations Settings Adjusting the height of the upper handle 1. On both sides of the upper handle, open up the clamping levers used for ad- handle (see Fig. N). justing the height of the upper 2. Adjust the upper handle to the desired height. When mowing, take care to keep a normal body position (e.g. -
Page 22: Using The Lawn Mower
Using the lawn mower Using the lawn mower DANGER! Risk of fire and explosion! Petrol is highly flammable. Accidentally spilled fuel may catch on fire when you start up the lawn mower. There is a risk of fire and explosion! −... -
Page 23: Starting And Stopping The Motor
Using the lawn mower WARNING! Risk of injury! Improper handling of the lawn mower may result in injury. − Always turn off the lawn mower’s motor when you stop or interrupt your work. Also always stop the motor during short breaks. WARNING! Risk of injury! Improperly installed mower parts or broken mower parts may result in injury. - Page 24 Using the lawn mower 4. Pull the bail control arm up to the upper handle’s handlebar and hold it in po- sition to release the engine brake and automatic switch-off. 5. Slowly pull the pull starter until you feel a little resistance, then quickly and forcefully pull it until the motor starts running.
-
Page 25: Using The Wheel Drive
Using the lawn mower Using the wheel drive The lawn mower is equipped with wheel drive that facilitates the work of the operator. − While the motor is running, slowly pull the gear selector arm to the upper handle’s handlebar and hold it there in order to use the wheel drive (see Fig. A). -
Page 26: Emptying The Grass Catcher Bag
Using the lawn mower Emptying the grass catcher bag DANGER! Fire hazard! Grass clippings left in the grass catcher bag increase the risk of fire. − After each lawn mower use, empty the grass catcher bag even when it is not full. -
Page 27: Cleaning
Cleaning 5. Lift the flap and use a hand brush, etc. to remove any grass clippings from the grass discharger, if necessary. Keep the grass clippings and any obstructions out of the grass discharger to make sure the mown grass can be transported to the grass catcher bag. 6. -
Page 28: Maintenance
Maintenance − Do not use any aggressive cleaners such as cold cleaners or benzine (spirit solvent). The lawn mower must be cleaned on a regular basis in order to achieve the best mowing results. Clean your lawn mower immediately after each use. −... - Page 29 Maintenance after each after 8 hours after 25 hours after 50 use, of use or of use or hours of use daily, yearly, or yearly, Lawn mower Cleaning Cleaning Cleaning Cleaning Air filter Cleaning Cleaning Exchange Spark plug Cleaning Cleaning Exchange Motor oil Test...
- Page 30 Maintenance 4. Slide the air filter back onto the bracket. 5. Reattach the filter cover by first hooking the two hooks on the lower part of the fil- ter cover. Then click the top of the filter cover back into the receptacle. Motor oil WARNING! Risk of injury!
- Page 31 Maintenance Cutting blade WARNING! Risk of injury! The lawn mower’s cutting blade is very sharp. You could severely injure yourself on it. − For safety reasons, have a qualified professional sharpen, balance and install the blades. − When working on the cutting blade, always turn off the motor and dis- connect the ignition cable to prevent the cutting blade from accidentally starting.
-
Page 32: Storage
Storage The manufacturer recommends inspecting the cutting blade once a year to achieve the best possible cutting results. − Have a qualified professional replace the cutting blade if it is severely worn or dull. − Replace the cutting blade after 50 hours of use or after two years, whichever comes first. - Page 33 Storage Short-term storage If you do not use the lawn mower for a short period of time (less than 15 days), you do not need to carry out major maintenance work (see chapter “Longer-term storage”). 1. Allow the motor to cool completely. 2.
-
Page 34: Transport
Transport Transport WARNING! Risk of explosion and fire! Fuel may leak out if you transport the lawn mower with a filled fuel tank. This could cause an explosion or a fire. − Use a petrol suction pump to completely remove fuel from the lawn mower’s fuel tank before transporting the lawn mower. -
Page 35: Technical Data
Technical data Cause Problem Solution The cutting blade is The mowing results Have a qualified professional dull. are not even. sharpen or replace the cutting blade. The cutting height is Set the cutting height (see chapter not low enough. “Setting the cutting height”). The cutting height is Not all the grass is Set the cutting height (see chapter... -
Page 36: Noise/Vibration Information
Noise/vibration information Noise/vibration information WARNING! Health hazard! Working without wearing hearing protection or protective clothing can lead to health problems. − Wear ear protection and suitable protective clothing when working with the device. Measured in accordance with ISO 5395-1:2013. The noise at your workplace may ex- ceed 85 dB (A);... -
Page 37: Disposal
Disposal • Is the equipment being used as described in this user manual? If the equipment is improperly used it can cause vibration-related ailments. WARNING! Depending on the type of use or conditions of use, the following safety measures must be taken to protect the user: −... -
Page 38: Declaration Of Conformity
Declaration of conformity EU/EC Declaration of Conformity Original Declaration of Conformity We hereby declare under our sole responsibility that this product, in the form distributed on the market, meets the requirements of the harmonised EU directives, EU safety standards and other product-specific standards. Product Manufacturer Authorised person for documentation... - Page 39 PRODUCED IN AUSTRIA FOR: ALDI STORES LTD. PO BOX 26, ATHERSTONE WARWICKSHIRE, CV9 2SH. ALDI STORES (IRELAND) LTD.
Need help?
Do you have a question about the Gardenline GL 46 and is the answer not in the manual?
Questions and answers