
Related Manuals for LEGRAND SANUS VMF720-B2


Summary of Contents for LEGRAND SANUS VMF720-B2
- Page 1 GET IT RIGHT THE FIRST TIME VMF 720-B2 Follow this step-by-step VMF 720-S2 instruction manual to INSTRUCTION MANUAL speed up your installation.
-
Page 2: We're Here To Help
中文文字说明请参见第 50 页 Texto en español, página 26 Deutscher Text Seiten 34 Svensk text sida 42 Texte français page 30 Nederlandse tekst op pagina 38 日本語は 54 ページ Русский текст: стр. 46 WE’RE HERE TO HELP Want to watch a video that Get it right the first time. -
Page 3: Before You Begin
Before you begin Remove the stand Install any accessories Protect the face from your TV — of your TV if attached. you may have purchased — if they require when laying it down for installation. the TV to be removed from the wall for assembly. - Page 4 IMPORTANT SAFETY INSTRUCTIONS – PLEASE READ MANUAL PRIOR TO USE – SAVE THESE INSTRUCTIONS Please read through these instructions completely to be sure you’re comfortable with this easy install process. Check your TV owner’s manual to see if there are any special requirements for mounting your TV. If you do not understand these instructions or have doubts about the safety of the installation, assembly or use of this product, contact Customer Service: [US]: +1 (800) 359-5520 [EMEA]: +31 (0) 495 580 852 [UK]: +44 (0) 800 056 2853.
-
Page 5: Wall Construction
Wall wood studs Solid concrete or CAUTION: concrete block Construction DO NOT install ONLY install on in drywall alone these acceptable wall types. Drywall alone Call will hold the Unsure Customer weight of your TV. Service ACCEPTABLE ACCEPTABLE [US]: +1 (800) 359-5520 [EMEA]: +31 (0) 495 580 852 [UK]: +44 (0) 800 056 2853 Tools Needed... - Page 6 STEP 1 Attach TV Bracket to TV WARNING: This product contains small items that could be a choking hazard if swallowed. Before starting assembly, verify all parts are included and undamaged. If any parts are missing or damaged, do not return the damaged item to your dealer; contact Customer Service. Never use damaged parts! NOTE: Not all hardware included will be used.
- Page 7 1.1 Select TV Screw Diameter 1.2 Select TV Screw Length and Spacers Only one screw size fits your TV. NO SPACER SPACER NEEDED • Flat Back TV • Flat Back TV • Rounded or with Irregular Back TV Extra Space Needed [TV brackets lay flat on your TV] [for deep inset holes...
- Page 8 1.3 Attach TV Brackets to Your TV MEASURE ADJUST TO WIDTH inches inches inches 7 ⅞ 7 ⅞ 11 ¾ 11 ¾ 15 ¾ 15 ¾ 300 mm position illustrated inch dimensions are approximate...
- Page 9 ASSEMBLE FOR HEIGHT ASSEMBLE FOR HEIGHT For height 200 mm or less For height greater than 200 mm ≤ 200 mm > 200 mm...
- Page 10 1. 3 (continued) CENTER LOOSELY ASSEMBLE NO SPACER SPACER NEEDED...
- Page 11 SECURE ASSEMBLY TIGHTEN ALL SCREWS...
-
Page 12: Attach Wall Plate To Wall
STEP 2 Attach Wall Plate to Wall WARNING: This product contains small items that could be a choking hazard if swallowed. Before starting assembly, verify all parts are included and undamaged. If any parts are missing or damaged, do not return the damaged item to your dealer; contact Customer Service. Never use damaged parts! NOTE: Not all hardware included will be used. -
Page 13: Wood Stud Installation
STEP 2A Attach Wall Plate Wood Stud Installation CAUTION: Avoid potential personal Min. 3 ½ in. (8.9 cm) injury or property damage! Min. 1 ½ in. (3.8 cm) ● Drywall covering the wall must not exceed 5/8 in. (1.5 cm) Max. - Page 14 STEP 2A (continued) DRILL REMOVE COVERS POSITION TEMPLATE Visit 2¾ in. (7.0 cm) HeightFinder™ sanus.com /2567 1/8 in. (3 mm) To calculate your precise wall plate location, check Be sure you drill into the out our HeightFinder at sanus.com [www.sanus. CAUTION: TIP: CENTER of the stud.
- Page 15 SECURELY TIGHTEN INSERT COVERS 10 10 CAUTION: TIP: You can make small level Avoid potential personal injury or property damage! adjustments by loosening the bottom Both lag bolts MUST BE firmly tightened to prevent unwanted movement lag bolt and shifting the wall plate of arm assembly .
- Page 16 STEP 2B Attach Wall Plate Solid Concrete or Concrete Block Installation CAUTION: Avoid potential personal injury or property damage! POSITION TEMPLATE Visit HeightFinder™ sanus.com ● Mount the wall plate directly onto the concrete surface /2567 ● Minimum solid concrete thickness: 8 in. (20.3 cm) ●...
- Page 17 DRILL INSERT ANCHORS REMOVE COVERS 3 in. (7.5 cm) 3/8 in. (10 mm) Be sure the anchors are seated flush Never drill into the mortar between CAUTION: CAUTION: CAUTION: CAUTION: with the concrete surface. blocks.
- Page 18 STEP 2B (continued) SECURELY TIGHTEN INSERT COVERS CAUTION: TIP: You can make small level Avoid potential personal injury or property damage! adjustments by loosening the bottom Both lag bolts MUST BE firmly tightened to prevent unwanted movement lag bolt and shifting the wall plate of arm assembly .
-
Page 19: Attach Tv To Wall Plate
STEP 3 Attach TV to Wall Plate WARNING: Before starting assembly, verify this part is undamaged. If HANG YOUR TV damaged, do not return the damaged item to your dealer; contact Customer Service. HEAVY! Never use damaged parts! You may need assistance with this step. - Page 20 STEP 3 (continued) SECURELY TIGHTEN ATTACH CAUTION: Avoid potential personal injury or property damage! Always make sure your securement screw is tightened, so the TV is securely fastened to the arm assembly...
-
Page 21: Manage Cables
Manage Cables ROUTE CABLES ATTACH COVERS IMPORTANT: Pull arm to its full extension, to leave enough slack and prevent stretching the cables when the arms are moved. - Page 22 Adjustments LEVEL ADJUSTMENT TILT ADJUSTMENT TILT NOTE: If you do not intend to adjust the tilt for different viewing locations, you can tighten the tilt tension knobs , to prevent unwanted movement. If needed, use hex key to tighten more firmly. CAUTION: CAUTION: Avoid potential personal injury or...
- Page 23 EXTEND / RETRACT -- ONLY IF NECESSARY CAUTION: Avoid potential personal injury or property damage! DO NOT remove screws , only turn enough for slight adjustment. TIP: ONLY If needed, adjust the arm tension when you extend or retract your TV, with screw using hex key...
- Page 24 REMOVE THE TV Disconnect all cables from the TV. Remove securement screw HEAVY ! You may need assistance with this step. Pull down on the release cord to release the TV. Carefully lift the TV from arm assembly...
-
Page 25: Troubleshooting
Troubleshooting If you are uncertain about your hardware selection, contact Customer Service TV SUPPLIED SPACERS Use your TV supplied spacer for: Use your TV supplied spacer and spacer for: • Flat Back TV • Rounded or Irregular Back TV with Extra Space Needed •... - Page 26 ESPAÑOL INSTRUCCIONES IMPORTANTES DE SEGURIDAD: GUARDE ESTAS INSTRUCCIONES Y LEA TODO EL MANUAL ANTES DE UTILIZAR ESTE PRODUCTO. Antes de empezar, asegúrese de que este es el soporte adecuado para usted. ¿Su televisor pesa No — ¡Perfecto! (accesorios incluidos) 24,9 kg MÁS de 24.9 kg Sí...
-
Page 27: Antes De Comenzar
ESPAÑOL Antes de comenzar Retire el soporte de su televisor... ¡si ya estaba instalado, claro! Instale cualquier accesorio que quiera añadir a su televisor. Consulte todos los manuales de instalación de los accesorios para determinar si necesita INSTALARLOS ANTES de montar su televisor. Proteja la pantalla de su televisor cuando lo tumbe para la instalación. - Page 28 ESPAÑOL PASO 2A Colocación sobre montantes de madera PÁGINA 13 PRECAUCIÓN: Evite posibles lesiones personales o daños materiales. • • • Los paneles de yeso que cubren la pared no deben superar los 1,5 cm (5/8 pulg.) Tamaño mínimo de los montantes de madera: nominal 5,1 x 10,2 cm (2 x 4 pulg.), real 3,8 x 8,9 cm (1½ x 3½ pulg.). Debe comprobar el centro del montante LOCALIZAR...
-
Page 29: Resolución De Problemas
ESPAÑOL Gestión de los cables PÁGINA 21 PASE LOS CABLES IMPORTANTE: xtienda el brazo por completo antes de pasar los cables. VUELVA A COLOCAR LA CUBIERTA Ajustes PÁGINA 22 NIVELACIÓN PRECAUCIÓN: Se DEBE aflojar el tornillo antes de girar el tornillo PRECAUCIÓN: Evite posibles lesiones personales o daños materiales. - Page 30 INFORMATIONS IMPORTANTES CONCERNANT LA SÉCURITÉ – CONSERVEZ CES INSTRUCTIONS – FRANÇAIS VEUILLEZ LIRE ATTENTIVEMENT LE MANUEL AVANT D'UTILISER CE PRODUIT Avant de commencer, assurons-nous que ce support vous convient parfaitement ! Votre téléviseur Non — Parfait ! 24,9 kg (accessoires compris) Oui —...
-
Page 31: Avant De Commencer
FRANÇAIS Avant de commencer Retirez le socle de votre téléviseur ... s'il est installé bien sûr. Installez tout accessoire que vous prévoyez d'ajouter à votre téléviseur. Vérifiez les manuels d'installation de tous les accessoires pour savoir si vous devez les INSTALLER AVANT de monter votre téléviseur. Protégez la face de votre téléviseur lorsque vous la poserez vers le bas pour l'installation. - Page 32 FRANÇAIS ÉTAPE 2A Installation sur des montants en bois PAGE 13 • • ATTENTION : Évitez les risques de blessures corporelles ou de dommages matériels ! L'épaisseur du revêtement de cloison sèche ne doit pas excéder 1,5 cm (5/8 po). Taille minimum des montants en •...
-
Page 33: Gestion Des Câbles
FRANÇAIS Gestion des câbles PAGE 21 IMPORTANT : Allongez complètement le bras pour laisser su isamment de jeu et éviter que les câbles soient étirés lorsque les bras sont déplacés. Retirez le cache-câble C du bras Faites passer le câble le long du bras. Replacez le cache-câble C . Réglages PAGE 22 NIVEAU... - Page 34 WICHTIGE SICHERHEITSHINWEISE – BEWAHREN SIE DIESE HINWEISE SORGFÄLTIG AUF – LESEN SIE VOR DEM GEBRAUCH DEUTSCH DES PRODUKTS BITTE DAS GESAMTE HANDBUCH Stellen Sie vor Montagebeginn sicher, dass diese Halterung für Sie geeignet ist! Wiegt Ihr Fernseher Nein – Perfekt! (einschließlich Zubehör) Ja –...
- Page 35 Vorbereitung DEUTSCH Nehmen Sie Ihren Fernseher vom Standfuß ... natürlich nur, falls Sie einen verwenden. Montieren Sie alles Zubehör , das Sie mit dem Fernseher benutzen wollen. Sehen Sie in den Installationshandbüchern des Zubehörs nach, ob Sie es VOR dem Aufhängen des Fernsehers MONTIEREN müssen. Schützen Sie die Bildschirmseite Ihres Fernsehers, wenn Sie ihn für die Montage hinlegen.
- Page 36 DEUTSCH Montage an Holzbalken SCHRITT 2A SEITE 13 VORSICHT: • • Vermeiden Sie Verletzungen und Sachschäden! Die Gipsschicht der Wand darf 1,5 cm (5/8") nicht überschreiten. Mindestmaße der Holzbalken: Nenngröße 5,1 x 10,2 cm (2 x 4"), • tatsächlich 3,8 x 8,9 cm (1½ x 3½"). Die Balkenmitte muss überprüft werden.
-
Page 37: Fehlerbehebung
DEUTSCH Kabelführung SEITE 21 WICHTIG: Ziehen Sie den Arm bis zu seiner vollen Länge aus und lassen Sie so genug Spiel, um ein Überdehnen der Kabel beim Bewegen des Arms zu verhindern. Entfernen Sie die Kabelabdeckungen C vom Arm . Legen Sie die Kabel am Arm entlang. Bringen Sie die Kabelabdeckungen C wieder an. Einstellungen SEITE 22 AUSRICHTEN... - Page 38 NEDERLANDS BELANGRIJKE VEILIGHEIDSINSTRUCTIES – BEWAAR DEZE INSTRUCTIES – LEES DE VOLLEDIGE HANDLEIDING VOORAFGAAND AAN HET GEBRUIK Controleer voor u begint of deze wandbevestiging ook voor u geschikt is! Weegt uw tv Nee: Prima! (inclusief accessoires) Ja: Deze wandbevestiging is NIET geschikt. Raadpleeg MountFinder.Sanus.com of bel 24,9 kg MEER dan [US]: +1 (800) 359-5520 [EMEA]: +31 (0) 495 580 852 [UK]: +44 (0) 800 056 2853 o...
-
Page 39: Voordat U Begint
Voordat u begint NEDERLANDS Verwijder de standaard van uw tv (mits er een is geïnstalleerd natuurlijk). Installeer eventuele accessoires op uw tv. Lees alle installatiehandleidingen van de accessoires om te bepalen of u deze moet INSTALLEREN VOORDAT u de tv monteert. Bescherm de voorkant van de tv wanneer u deze neerzet voor de installatie. - Page 40 NEDERLANDS Installatie met houten dragers STAP 2A PAGINA 13 LET OP: Voorkom lichamelijk letsel of materiële schade! • • • Gipsplaten die de muur bedekken, mogen niet dikker zijn dan 1,5 cm (5/8 in.). Minimale grootte houten drager: nominaal 5,1 x 10,2 cm (2 x 4 in.), werkelijk 3,8 x 8,9 cm (1½ x 3½ in.). Het midden van de dragers moet worden gecontroleerd ZOEKEN CONTROLEREN...
-
Page 41: Problemen Oplossen
NEDERLANDS Kabels verbergen PAGINA 21 BELANGRIJK: Trek de arm volledig uit, maar laat voldoende speling en zorg ervoor dat de kabel niet worden uitgetrokken wanneer de armen worden bewogen. Verwijder de kabelafdekking uit de arm . Leid de kabels langs de arm. Bevestig de kabelafdekkingen Aanpassingen PAGINA 22 RECHT HANGEN... - Page 42 SVENSKA VIKTIGA SÄKERHETSANVISNINGAR – SPARA DESSA ANVISNINGAR – LÄS HELA BRUKSANVISNINGEN INNAN DU ANVÄNDER DENNA PRODUKT Innan du börjar bör du se till att det här monteringsfästet är perfekt för dig! Väger TV:n (inklusive Nej – Perfekt! tillbehör) 24,9 kg Ja –...
-
Page 43: Innan Du Börjar
Innan du börjar SVENSKA Ta bort stativet från TV:n ... om det är installerat, självklart. Installera eventuella tillbehör som du planerar att använda med TV:n. Läs alla bruksanvisningar till tillbehör för att bestämma om du behöver INSTALLERA dem INNAN du monterar TV:n. Skydda TV:ns framsida när du lägger den ner för installation. - Page 44 SVENSKA STEG 2A Installation på träregel SIDAN 13 FÖRSIKTIGHET: Undvik eventuella personskador och materiella skador! • • Gipsskiva som täcker väggen får inte överstiga 1,5 cm (5/8 tum). Minsta storlek på träregel: nominell 5,1 x 10,2 cm (2 x 4 tum) e ektiv 3,8 x 8,9 cm (1½ x 3½ tum). •...
- Page 45 SVENSKA Hantera kablar SIDAN 21 VIKTIGT: Dra ut armen helt för att lämna tillräckligt med kabellängd och förhindra att kablarna inte sträcks när någon rör på armarna. . Dra kablarna längs med armen. Sätt tillbaka kabelskydden C . Ta bort kabelskyddet C från armen Justeringar SIDAN 22 PLANJUSTERING...
- Page 46 РУССКИЙ ВАЖНЫЕ ИНСТРУКЦИИ ПО ТЕХНИКЕ БЕЗОПАСНОСТИ – СОХРАНИТЕ ЭТИ ИНСТРУКЦИИ – ПЕРЕД ЭКСПЛУАТАЦИЕЙ ИЗДЕЛИЯ ПОЛНОСТЬЮ ПРОЧТИТЕ ДАННОЕ РУКОВОДСТВО Перед началом установки необходимо убедиться, что это крепление подходит для вашего телевизора! Ваш телевизор Нет — Прекрасно! (включая 24,9 кг Да — Это крепление НЕ подходит. Посетите веб-сайт MountFinder.Sanus.com или позвоните по телефону принадлежности) [US]: +1 (800) 359-5520 [EMEA]: +31 (0) 495 580 852 [UK]: +44 (0) 800 056 2853 весит...
-
Page 47: Перед Началом Работы
Перед началом работы РУССКИЙ Снимите подставку с телевизора ..., конечно, если установлена. Установите все принадлежности, которые требуется установить на ваш телевизор. Прочитайте все руководства по установке принадлежностей и проверьте, требуется ли УСТАНАВЛИВАТЬ их ДО крепления телевизора. Защитите поверхность экрана своего телевизора, когда кладете его на экран для монтажа. Крепление... - Page 48 РУССКИЙ Установка на деревянные стойки ШАГ 2A СТР. 13 ВНИМАНИЕ! Соблюдайте осторожность во избежание получения травм или повреждения имущества! • • НАЙДИТЕ Толщина гипсокартона, покрывающего стену, не должна превышать 1,5 см (5/8 дюйма). Минимальный размер деревянной стойки: общий 5,1 х 10,2 см (2 х 4 дюйма); номинальный 3,8 х 8,9 см (1 ½ x 3 ½ дюйма). •...
- Page 49 РУССКИЙ Прокладка кабелей СТР. 21 Вытяните штангу до ее полного удлинения, чтобы оставить достаточный запас длины кабелей и предотвратить их натяжение во время движения штанг. ВАЖНО! . Проложите кабели вдоль штанги. Установите на место крышку кабельного короба C . Снимите крышку кабельного короба C со штанги Регулировки...
- Page 50 中文 重要安全说明 – 保存这些说明 – 使用本产品之前,请阅读完本说明书 在开始安装之前,我们首先来确认此支架是否适合您! 您的电视机 否 — 适合! (包括配件) 24.9 kg — 此支架不兼容。访问 MountFinder.Sanus.com 或致电 [US]: +1 (800) 359-5520 [EMEA]: +31 (0) 495 580 852 是 的重量是否 超过 (55 磅) 24.9 kg(55 磅)? [UK]: +44 (0) 800 056 2853 查找兼容的支架。 实心混凝土或...
- Page 51 中文 开始安装之前 拆除电视机底座。 如果电视机已安装底座,先将其拆除。 安装所需配件 到电视机上。 查看所有配件安装手册,并确定是否需要在安装电视机之前安装这些配件。 保护电视屏幕。 将电视机放倒安装时,请保护好电视屏幕。 步骤 1 安装电视机托架 第 6 页 警告: 此产品包含若吞咽可能引致窒息危险的小部件。在开始装配以前,先确定所有零件均已提供且完好无损。如果有零件缺失或受损,请勿将受损零件返回至经销商;请联系客户服务部。切勿使用 受损零件! 注意: 并非包含的所有配件均要使用。 1.1 选择电视机螺钉直径 只有一种螺钉尺寸适用于您的电视机。 1.2 选择电视机螺钉长度和隔圈 无需隔圈 • 后部平直电视机 [电视机托架平放在电视机上] 使用较短的电视机螺钉 。 无需使用隔圈 。 需要隔圈 • 需要额外空间 [因应嵌孔较深或线缆较多的情况] 的后部平直电视机 • 圆背形或背面不规则形电视机 [电视机托架无法紧贴在电视机上] 使用较长的电视机螺钉...
- Page 52 中文 步骤 2A 木墙柱安装 第 13 页 注意: 避免潜在人身伤害或财产损毁! • • • 墙上覆盖的干式墙不能超过 1.5 cm (5/8 in.)。 最小木墙柱尺寸:标称 5.1 x 10.2 cm (2 x 4 in.) 实际 3.8 x 8.9 cm (1½ x 3½ in.)。 确保安装在墙柱中间 确定位置 确认 标记 定位模板 提示:...
- Page 53 中文 管理线缆 第 21 页 直至其完全展开,留出足够的长度以防止悬臂移动时拉伸电缆。将线缆盖 C 从悬臂 上移除。沿悬臂布放线缆。重新安装线缆盖 C 。 重要事项: 拉动悬臂 调节 第 22 页 水平 注意: 拧动螺丝 前必须先拧松螺丝 。 注意: 避免潜在人身伤害或财产损毁!始终确保锁定螺丝 已拧紧,以确保电视机牢固地拧紧在悬臂组件 上。 倾斜 电视机应该易于移动和调节,调节完毕后应该保持在位。如果您的电视机向上或向下倾斜,请调整倾斜度调整旋钮 。 注意:如果不想针对不同观看位置调整倾斜度,则可以用手拧 紧倾斜度调整旋钮 ,以防止意外移动。如果需要,请使用六角扳手拧紧旋钮 。 延伸/收缩 - 仅在必要时 警告: 请勿拧出螺丝 ,只需拧松至足够进行细微的调整即可。 拆卸电视机 重物!您可能需要帮助来完成此步骤。...
- Page 54 日本語 安全のための重要な説明 – この説明書を保管しておいてください – 本製品を使用する前に、 説明書全体をよくお読みください 作業を始める前に、 このマウントがお使いのテレビに適しているかどうかを確認します。 設置するテレビ (アク いいえ — 最適です ! の重量 セサリを含む) はい — このマウントは、 適合しません。 MountFinder.Sanus.comをご覧になるか、 [US]: +1 (800) 359-5520 24.9 kg が、 24.9 kg (55 ポン ド) [EMEA]: +31 (0) 495 580 852 [UK]: +44 (0) 800 056 2853 で適合するマウン トについてお問い合わせください。 を超えていますか。...
- Page 55 日本語 作業を始める前に 取り外します。 テレビ台を付けている場合は、 すべて取り付けます。 テレビに必要なアクセサリを テレビを壁に掛ける前にアクセサリを取り付ける必要があるかどうかを、 それぞれのアクセサリの取扱説明書で確認してください。 画面を保護します。 テレビを下に置く場合は、 手順 1 テレビに壁掛けブラケッ トを取り付ける 6 ページ 警告: 本製品には、 誤って飲み込むと窒息する危険性のある、 小さな部品が含まれています。 組み立て始める前に、 部品がすべて揃っており、 破損していないことを確認してください。 足りない部品や 破損している部品がある場合は、 販売店に返品せずに、 カスタマーサービスまでご連絡ください。 破損した部品は絶対に使用しないでください。 注記: 付属の金具をすべて使用するわけではありません。 1.1 適切な直径のネジを選ぶ お使いのテレビに適したネジのサイズは 1 種類だけです。 1.2 適切な長さのネジとスペーサーを選ぶ スペーサーなし • 背面が平らなテレビ [テレビブラケットをテレビに直接取り付ける] 短いネジ...
- Page 56 日本語 木製スタ ッ ド壁への取り付け 手順2A 13 ページ • • 注意: 負傷したり壁面を傷付けたり しないように注意してください。 壁面を覆う石膏ボー ドは1.5 cm (5/8 イ ンチ) を超えてはいけない 。 木製スタ ッ ドの最小寸法 : 名目 • 5.1 x 10.2 cm (2 x 4 イ ンチ) 、 実寸 3.8 x 8.9 cm (1½ x 3½ イ ンチ) 。...
- Page 57 日本語 ケーブルの配線 21 ページ 重要: アーム を完全に伸ばしてください。ケーブルに余裕を持たせ、アームを動かしてもケーブルが引っ張られないようにします。 アーム からケーブルカバー を外します。アームにケーブルを沿わせます。ケーブルカバー を取り付けます。 調節 22 ページ 水平位置 注意: ねじ は必ず、 ねじ を回す前に緩める必要があ り ます。 注意: 起こり うる人身事故や物的損害が起こらないようにご注意ください。 常に、 止めネジ が締められ、 テレビがアームアセンブリー にしっかり固定されていることをご確認ください。 傾き テレビの傾きは簡単に変えることができ、 そのままの位置に留まるはずです。 傾き調節ノ ブ を回して、 テレビを自然に上下に傾けます。 注記:異なった視聴場所のためにテレビの傾きを調節する必要のない場合 は、 傾き調節ノ ブ を手で締めて、...
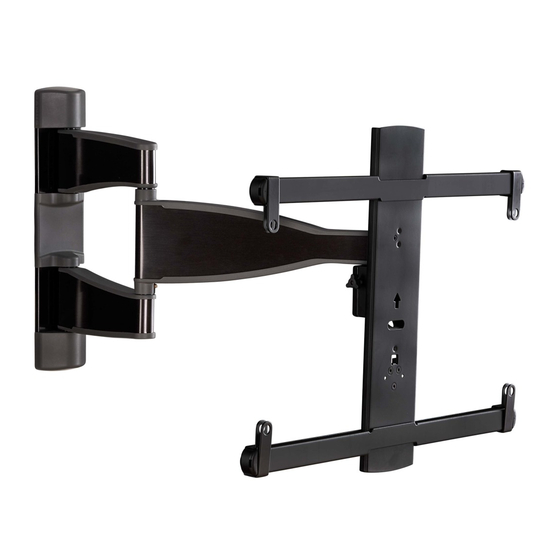
- Page 58 Dimensions in. [mm] TV INTERFACE 18.03 458.0 3.94 100.0 15.75 16.40 3.94 400.0 416.6 100.0 0.38 16.28 413.4 WALL PLATE TOP VIEW - EXTENDED SIDE VIEW - EXTENDED 2.59 0.33 65.8 20.00 5° 508.1 60.00° 13.03 11.39 331.0 289.3 SIMULATED 49" FLAT SCREEN TV 15°...
- Page 59 в данном документе. Legrand AV Inc et ses sociétés a liées et ses liales (collectivement dénommées « Legrand »), se sont e orcées de rendre ce manuel précis et complet. Cependant, Legrand ne garantit pas que les informations qu’il contient 中文...
- Page 60 EMEA: +31 (0) 495 580 852 Legrand AV Inc. and its a iliated corporations and subsidiaries (collectively, “Legrand”), intend to make this manual accurate and complete. However, Legrand AV makes no claim that the information contained herein covers all details, conditions, or variations. Nor does it provide for every possible contingency in connection with the installation or use of this product. The information contained in this document is subject to change without notice or obligation of any kind.
Need help?
Do you have a question about the SANUS VMF720-B2 and is the answer not in the manual?
Questions and answers