Table of Contents
Advertisement
Quick Links
Advertisement
Table of Contents

Subscribe to Our Youtube Channel
Related Manuals for Madimack ECLIPSE MM-ETD160


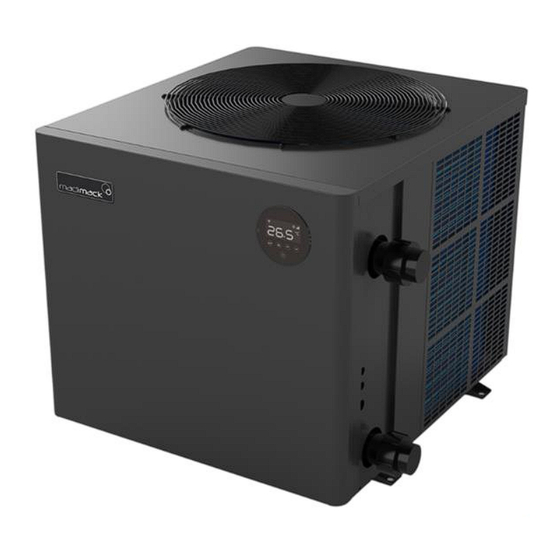
Summary of Contents for Madimack ECLIPSE MM-ETD160
- Page 3 INDEX...
- Page 5 Appendix section at the back of the booklet www.madimack.com.au/warranty-registration. Please read and fully understand all information provided before attempting to install the pool heat pump. For technical questions and further information please contact support@madimack.com.au. We hope you enjoy using our heat pumps. Thank you!
- Page 6 COVER THE BASICS: 1. Check that you have received the package in good condition 2. Every residential heat pump comes with two accessory boxes and the manual. The manual will mention all the parts and where they belong to make sure that the unit is commissioned, as per the 'commissioning' section, and that adequate water flow rate is provided 3.
-
Page 7: Safety Precautions
Safety Precautions... - Page 8 We have provided important safety messages in this manual for the installation, maintenance and repair of your heater. Please read thoroughly and obey all safety messages. Environmentally friendly R32 Refrigerant is used in this heat pump. 1. Warning This WARNING sign denotes a hazard. It calls attention to a procedure, practice, or the like, which, if not correctly performed or adhered to, could result in personal injury or injury to a third party.
- Page 9 2. Attention a. Please read the following instructions before installation, use and maintenance. b. Installation must be completed only by competent persons only, and in accordance with this manual. c. Check all water connections are sealed and tested before operating the machine d.
-
Page 10: About Your Heat Pump
About your heat pump... - Page 11 1. Transportation a. Always keep upright b. Do not lift the water union (Otherwise, the titanium heat exchanger may be damaged) 2. Accessories 4 x Rubber Feet Connection of the condensate drainage kit:...
- Page 12 3. Features a. DC Twin-rotary inverter compressor b. DC Brushless fan motor c. EEV Technology d. High efficiency twisted titanium heat exchanger e. Sensitive and accurate temp control and water temp display High pressure and low-pressure protection g. Full protection on electrical system 4.
-
Page 13: Technical Parameter
6. Technical parameter Model MM-ETD160 MM-ETD210 MM-ETD260 PERFORMANCE CONDITION: Air 27°C/ Water 27°C/ Humid. 80% Heating capacity (kW) 16.5 21.0 26.0 Heating capacity (kW) in Silence mode 14.3 18.7 23.8 COP range 15.6~7.2 15.9~7 15.8~6.9 Average COP at 50% speed 11.6 11.8 11.5... - Page 14 7. Dimension Size(mm) Name Model ETD160/240MM ETD210/240MM ETD260/240MM ※ Above data is subject to modification without notice. Note:The picture above and the specification diagram of the pool heater is for the technician’s installation and layout reference only. The product is subject to adjustment periodically for improvement without notice.
-
Page 15: Installation Guidance
Installation Guidance... - Page 16 case: Single unit – 3 obstacles Model number ETD160 ETD210 ETD260 Distance A (mm) Distance B (mm) Distance C (mm) Please note that these are absolute minimum distances and where possible should always have a greater difference. Under no circumstances should any of the distances be reduced as performance will be affected.
- Page 17 case: Multiple units – 3 obstacles Model number ETD160 ETD210 ETD260 Distance A (mm) Distance B (mm) Distance C (mm) Distance D (mm) Please note that these are absolute minimum distances and where possible should always have a greater difference. Under no circumstances should any of the distances be reduced as performance will be affected.
- Page 18 Plumbing Multiple units: Multiple heat pumps acting as one system should be connected in Cascade (Parallel Connection). Adequate flowrate should be provided to all the units in the system to ensure efficient heating (Please refer to the commissioning section in the manual to learn about heat pumps commissioning).
-
Page 19: Installation Reminder
1. Installation reminder Only competent persons are authorized to install the heat pump and should be educated with the relevant building codes and standards of their current state or local governing body for all electrical, mechanical and water services to prevent danger or damage to the unit. a. - Page 20 2. Placing the unit and water connections a. Placing the unit and fixing • The frame must be fixed by bolts (M10) to concrete foundation or brackets. The concrete foundation must be solid and fastened; the bracket must be strong enough and anti-rust treated.
-
Page 21: Wiring Requirements
3. Wiring requirements Connect the heat pump to an appropriate power supply, the voltage should comply with the rated voltage of the product. The machine must be earthed Wiring must be handled by a professional technician according to the circuit diagram. Install electrical protection device according to local code for wiring The layout of power cable and signal cable should be orderly and not affecting each other. - Page 22 5. References for protecting devices and cable specification MODEL ETD160 ETD210 ETD260 Max Rated Current Breaker Rated Residual Action Current (mA) ※ Above data is subject to modification without notice. Note:The above data is associated to power cables less than 10m. If the power cable is longer than 10m, the wire diameter must be increased in accordance with current regulations.
-
Page 23: Installation Options
6. Installation options: Flow switch activated heating The heat pump is activated by the flow of water initiated from the filtration/circulation pump, if the heater gets to temperature within the timers the unit will first start to use the inverter technology to slow the machine down to maintain the temperature and eventually to a stop. - Page 24 Heat pump activation without using the chlorinator controller and using the one pump used for filtration (additional controller required) An on-board pump output relay can activate the main filtration pump by using it in combination with a “single pump controller” without using the chlorinator timers needing to be activated which will stop over chlorination but still use a single supply pipework for the pool.
- Page 25 c. Individual circulation pump installation An onboard output initiates the circulation pump to start and stop from the heat pump itself based on temperature and timers. For use when there are dedicated heating pipes and to separate from the filtration timer A: Switch active outlet 1.
- Page 26 d. Solar retro In some situations, when a heat pump is replacing a solar heating system, the pipework is available to be used next to the house but there is no way of adding a new electrical circuit to the pool equipment. With the use of an additional temperature sensor, you can use the in- built flow switch to activate the heating.
- Page 27 Automation systems and additional controls For 230V auxiliary outputs, please see Madimack automation bridge (sold separately) www.madimack.com.au/brochures The heat pump comes with easy to connect socket labelled as control input The unit comes prewired with a bridge cab le connected. To add an external control to activate the heat pump, remove the bridge and add in a volt free terminal connection.
- Page 28 f. Control socket connection diagram For Control input connection and Pump control output...
-
Page 29: Operation Guidance
Operation Guidance... -
Page 30: Display Functions
1. Display Functions Symbol Designation Function Power On/Off ON/OFF WiFi setting 1. Lock/Unlock Screen 2. Heating mode (18-40°C) Unlock 3. Cooling mode (12-30°C) 4. Auto mode (12-40°C) Speed Mode Two modes: Boost Silence UP/DOWN Temperature Setting & Displaying a. Standby mode or Screen lock:Only symbol lights up, screen and other buttons turn darker b. - Page 31 2. Operation Instruction a. Screen Lock 1) Press “ ” for 3 seconds to lock or unlock the screen. 2) Display automatically locks in no input is detected after 30 seconds. b. Power On Press “ ” for 3 seconds to unlock screen. Press “ ”...
- Page 32 e. Wi-Fi 1. Download InverGo app from Apple app store or Google Play store. 2. Set up new account, enter WiFi password and click add new device (Enter area code +61 when registering by phone number) 3. When the screen is unlocked, hold button for 3 seconds, after symbol will begin flashing.
- Page 33 Testing Parameters...
-
Page 34: Trial Run
1. Heat Pump checks before use a. The air inlets and outlets are free of any debris and are not obstructed. b. Refrigeration pipes or components are not installed in a corrosive environment. c. Check electric wiring connections are tight and adhere to the electrical schematic d. - Page 35 4. Running Status Check a. Press and hold for 5 seconds, a beep sound should be heard, and it will enter into running status mode b. Use to switch through the different c. Press again to quit can running status mode Symbol Content Unit...
- Page 36 1. Parameters Checking 1.1 Press “ ”and “ ” together for 5 seconds to enter “parameter checking” status, parameter code “NO.P0” will blink on the left, parameter value “2”will display on the right. 1.2 Press “ ” Key and “ ”...
- Page 37 3. Parameter Table Step Content Adjust range Default length 0:Continuation Water pump running way 1:Water temp control 2:time/water temp control Time setting (only available when the water 10 ~ 120min 5 min 60 min pump running way is set to “2” Compressor continuously running time in 30 ~ 90min 1min...
- Page 38 Commissioning...
-
Page 39: Flow Rates
Madimack Heat Pumps have a built-in flow switch which will deactivate the heating function if not enough water flow is detected. The Heat Pump has a large range operation up to a seven-degree differential. -
Page 40: Maintenance
Maintenance... - Page 41 “SWITCH OFF” power supply to the heater before cleaning or examination 1) In the winter season when unit is not operating for long periods of time or if prone to freezing. a. Cut off power supply to prevent any machine damage. b.
-
Page 42: Troubleshooting For Common Faults
Troubleshooting for common faults... - Page 43 1. Repairing Guidance WARNING! If repairs or removal is required, contact authorized service center. Requirements for Service Personnel Any person who is involved with working on or breaking into a refrigerant circuit should hold a current valid certificate from an industry-accredited assessment authority, which authorizes their competence to handle refrigerants safely in accordance with an industry recognized assessment specification.
- Page 44 Component What did the error Error Solution corresponding detect? High pressure protection High gas pressure switch 1. Check the water flow from the filtration pump and ventilation clearances. 2. Check high pressure switch is closed circuit 3. Replace PCB 4. replace inverter board Low pressure protection Low gas pressure switch 1.
- Page 45 Power filter plate No-power Power filter not working Single Phase Model protection 1). Replace Inverter board 3 Phases Model 1). Replace power filter plate module over current Solar inverter voltage change 1). Initial power testing has completed. protection Power black out Power off and restart (happens install with Power surge solar PV)
- Page 46 Wi-Fi operation For video tutorials and further help please visit www.Madimack.com.au FAQ for all you need to do and full walkthrough. It is crucial that the WiFi is over the machine and is of a high power, the WiFi is a cloud based solution and needs the WiFi to be active on the machine for it to receive a signal.
- Page 47 InverGo Download Account Registration Register by e-mail or third-party application. Android a. E-mail registration.
- Page 48 b. Register through third-party application Create Family Please set family name and choose location of device.
- Page 49 APP Pairing a. With Bluetooth 1. Please confirm that you’re connected to Wi-Fi and your Bluetooth is on. 2. Click “Add Device”, and then follow the instructions to pair device.
- Page 50 b. With Wi-Fi 1. Please make sure you are connected to Wi-Fi. 2. Press " " for 3 seconds to unlock the screen. Press “ ” for 3 seconds and release. After hearing “Beep”, enter Wi- Fi password in app. During connection, “...
- Page 51 Operation 1. For heat pump with Heating function only: Indicate Compressor Boost/Silence mode speed °C/°F switch Inlet water Setting temperature temperature Query Select Boost/ Silence Mode Timer On/Off 2. For heat pump with Heating&Cooling function: Compressor Indicate speed Boost/Silence mode °C/°F switch Inlet water Setting...
- Page 52 The Madimack Pty Ltd (“Madimack”) equipment listed on the back of this card is warranted by Madimack against defects in design, materials and workmanship for a period of up to 2 Years from the date the equipment is purchased by the original owner.
- Page 53 Madimack for any defect of design, materials or workmanship will be limited to any of the following as determined by Madimack: - a) Replacing the equipment or supplying equivalent equipment;...
- Page 54 ● Copy of invoice from an approved Madimack approved service agent ● For a major defect a copy of the report for major defects from approved Madimack Service agent ● All Service Claim Submissions will be processed and reimbursement on validated claims...
- Page 55 Please complete all the details below from the installer and store this card along with the purchase docket in a safe place. Please take 2 or 3 photos of the installation and with this information upload them online athttps://www.madimack.com.au/warranty-registrationor use the barcode scanner to go direct to the page. Supplied by...
- Page 57 AQ01CV-R32-V22-2...
Need help?
Do you have a question about the ECLIPSE MM-ETD160 and is the answer not in the manual?
Questions and answers