Table of Contents
Advertisement
Quick Links
Advertisement
Table of Contents

Related Manuals for Madimack ImverECO IEAC320


Summary of Contents for Madimack ImverECO IEAC320
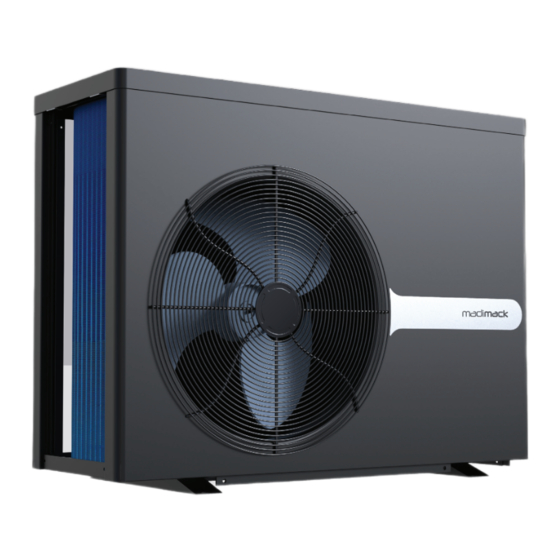
- Page 1 INSTALLATION MANUAL...
-
Page 2: Table Of Contents
CONTENTS 1. Foreword 2. Safety precautions 2.1. Warning 2.2 Attention 2.3 Safety 3. About your heat pump 3.1 Transportation 3.2 Accessories 3.3 Operating condition and range 3.4 Introduction of different modes 3.5 Technical parameter 3.6 Dimension 4. Installation guidance 4.1 Installation reminder 4.2 Wiring 4.3 Electric wiring diagram 4.4 Reference for protecting devices and cable specification... -
Page 3: Foreword
SECTION 1 FOREWORD Thank you for choosing the Madimack high efficiency inverter pool heat pump! All our heat pumps are built and designed to the highest standard and are protected by our extended warranty service for peace of mind. Warranty registration is required to be submitted online in conjunction with the... - Page 4 All contractual or non-contractual liabilities of Madimack products shall be deemed null and void in relation to any damage stemming from installation or operational lapses, or the failure to adhere to the instructions provided by Madimack or the applicable installation standards pertaining to the equipment detailed in this document.
-
Page 5: Safety Precautions
COVER THE BASICS: 1. Check that you have received the package in good condition 2. Every residential heat pump comes with two accessory boxes and the manual. The manual will mention all the parts and where they belong to make sure that the unit is commissioned, as per the 'commissioning' section, and that adequate water flow rate is provided 3. -
Page 6: Attention
2.2 Attention a. Please read the following instructions before installation, use and maintenance. b. Installation must be done by professional staff only in accordance with this manual. c. Leakage test must be performed after installation. d. Please don’t stack substances, which will block air flow near inlet or outlet area, otherwise the efficiency of the heat pump will be reduced or even stopped. -
Page 7: About Your Heat Pump
SECTION 3 ABOUT YOUR HEAT PUMP 3.1 Transportation a. Always keep upright b. Do not lift the water union (Otherwise, the titanium heat exchanger inside the heat pump may be damaged) 3.2 Accessories Connection of condensate drain 3.3 Operating condition and range To provide you comfort and pleasure, please set swimming pool water temperature efficiently and economically. -
Page 8: Technical Parameter
3.5 Technical parameter Model IEAC320 IEAC400 IEAC500 IEAC660 Performance Condition: Air 80°F / Water 80°F / Humidity 80% Heating capacity (BTU) 32,000 40,000 50,000 66,000 Heating capacity (KW) COP Range 10.0 ~ 6.7 10.7 ~ 6.0 10.2 ~ 6.2 11.6 ~ 6.2 Performance Condition: Air 80°F / Water 80°F / Humidity 63% Heating capacity (BTU) 31,000... -
Page 9: Dimension
3.6. Dimension Size(mm) Name Model IEAC320 IEAC400 IEAC500 IEAC660 ※ Above data is subject to modification without notice. Note: The picture above is the specification diagram of the pool heat pump, for technician’s installation and layout reference only. The product is subject to adjustment periodically for improvement without further notice. InverECO... -
Page 10: Installation Guidance
SECTION 4 INSTALLATION GUIDANCE Ventilation requirements: 1st case: Single unit – 3 obstacles 1500mm/ 60 inch clearance above IEA C 320 IEA C 400 IEA C 500 IEA C 660 Model number Distance A inch inch inch inch 2500 2500 2500 2500 Distance B... -
Page 11: Installation Reminder
Plumbing multiple units Multiple heat pumps acting as one system should be connected in Cascade (Parallel Connection). Adequate flowrate should be provided to all the units in the system to ensure efficient heating (Please refer to the commissioning section in the manual to learn about heat pumps commissioning). The diagram above represents the cascade connection 4.1 Installation reminder Only a professional staff is allowed to install the heat pump. -
Page 12: Wiring
b. The inlet and outlet water unions can’t stand the weight of soft pipes. The heat pump must be connected with hard pipes! 4.2 Wiring a. Connect to appropriate power supply, the voltage should comply with the rated voltage of the products. b. -
Page 13: Reference For Protecting Devices And Cable Specification
4.4 Reference for protecting devices and cable specification MODEL AC320 IEAC400 IEAC500 IEAC660 Rated Current (A) Breaker Rated Residual Action Current (mA) Fuse (A) 3×13 3×13 3×13 3×11 Power Cord (AWG) 3×20 3×20 3×20 3×20 Signal cable (AWG) Above data is subject to modification without notice. Note: The above data is adapted to power cord ≤... -
Page 14: Operation Guidance
SECTION 5 OPERATION GUIDANCE 5.1 Key Function Symbol Function Power On/Off Heating/Cooling/Auto mode Press to start Boost mode Press to start Silence mode Temperature Setting Heating mode(64°F-104°F) Cooling mode(54°F-86°F) Auto mode(54°F-104°F) Attention: The controller has power-down memory function. 5.2 Operation Instruction Power On &... - Page 15 (Frost melting) and white smoke coming out of the unit (Water Vapor). 3. WiFi Operation For video tutorials and further help please visit www.Madimack.com.au FAQ for all you need to do and full walkthrough. It is crucial that the WiFi is over the machine and is of a high power, the WiFi is a cloud based solution and needs the WiFi to be active on the machine for it to receive a signal.
-
Page 16: Wi-Fi Operation (Optional)
SECTION 6 WI-FI OPERATION (OPTIONAL) Install position Components Wi- Fi Box Base Installation Terminal Screw base on back panel Slide Wi - Fi box into base Wi-Fi Button Indicator Light Connect cable InverGo Download Account Registration Register by e-mail or third- party application InverECO... - Page 17 a. Email registration b. Third-party application registration InverECO...
- Page 18 APP Pairing a. With Bluetooth 1. Please confirm that you ’ re connected to Wi-Fi and your Bluetooth is on. 2. Click “Add Device”, and then follow the instructions to pair device. InverECO...
- Page 19 b. With Wi -Fi 1. Please make sure you are connected to Wi-fi 2. Press Wi -Fi button for 3 seconds and release to start pairing, light will flash. Green: Network connected Orange: No network Red: Failure Red (flash): Waiting for connection 3.
- Page 20 Operation 1. For heat pump with Heating function only: Compressor Indicate speed Boost/Silence mode °C/°F switch Inlet water Setting temperature temperature Query Select Boost/ Timer Silence Mode On/Off 2. For heat pump with Heating & Cooling function: Compressor Indicate speed Boost/Silence mode °C/°F switch Inlet water...
- Page 21 Share Devices to Your Family Members After pairing, if your family members also want to control the device, please let your family members register “InverGo” first, and then the administrator can operate as below: Notice: 1. Weather forecast is just for reference. 2.
-
Page 22: Testing
SECTION 7 TESTING 7.1 Inspect heat pump before use a. The ventilating device and outlets are operating adequately and are not obstructed. b. It’s prohibited to install refrigeration pipe or components in corrosive environment. c. Inspect the electric wiring on basis of the electric wiring diagram and earthing connection. d. -
Page 23: Running Parameter Checking
7.5 Running Parameter Checking 1) Press “ ” and for 10 seconds, it will enter running status checking. 2) During this time, the display will show the parameter symbol “P0” and its corresponding value. 3) Change status through the corresponding value also changes. 4) Press “... -
Page 24: Commissioning
Madimack Heat Pumps have a built -in flow switch which will deactivate the heating function if not enough wate r flow is detected. The Heat Pump has a large range operation up to a seven -degree differential. -
Page 25: Maintenance
SECTION 9 MAINTENANCE “CUT OFF” power supply of the heat pump before cleaning, examination and repairing 1. In winter season when you don’t swim: a. Cut off power supply to prevent any machine damage. b. Drain water clear of the machine. !!Important: Unscrew the water nozzle of inlet pipe to let the water flow out. -
Page 26: Troubleshooting For Common Faults
SECTION 10 TROUBLESHOOTING for common faults 1. Repairing Guidance ----------------------------------------------------------------------------------------------------------------------------------------- WARNING: a. If repair or scrap is required, please contact authorized service center nearby. b. Requirements for Service Personnel c. Any person who is involved with working on or breaking into a refrigerant circuit should hold a current valid certificate from an industry-accredited assessment authority, which authorizes their competence to handle refrigerants safely in accordance with an industry recognized assessment specification. - Page 27 3. Protection & failure code Display Protection code description No water protection Power supply excesses operation range (not failure) Excessive temp difference between inlet and outlet water(Insufficient water flow protection) Ambient temperature too high or too low protection (not failure) Anti-freezing reminder (not failure) Display Failure code description...
-
Page 28: Warranty
Madimack, at its discretion, shall rectify defects covered under this warranty by either repair or replacement of the faulty equipment or parts. Such repairs or replacements will be conducted during regular business hours by Madimack or an authorized repair agent, free of charge for parts or direct repair labor. - Page 29 Access and Transportation: Any costs related to gaining access to equipment in challenging or hazardous locations, as well as freight charges or travel costs for repairs outside Madimack's standard service area. Mobile Applications and Reinstallation: Equipment installed in transportable or mobile applications (e.g., caravan or boat), reinstallation in such applications, or relocation to a different location.
-
Page 30: Product Warranty Registration
Please take 2 or 3 photos of the installation and with this information upload them online at https://www.madimack.com.au/warranty-registration or use the barcode scanner to go direct to the page. Supplied by...
Need help?
Do you have a question about the ImverECO IEAC320 and is the answer not in the manual?
Questions and answers