Table of Contents
Advertisement
Advertisement
Table of Contents

Related Manuals for Madimack Elite Max


Summary of Contents for Madimack Elite Max
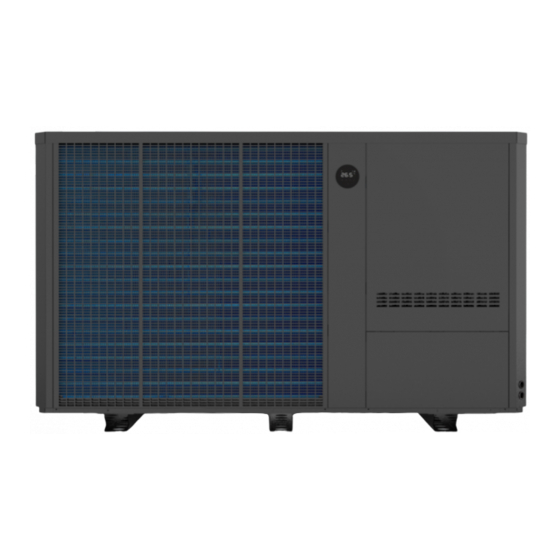
- Page 1 User’s Manual Elite Max COMMERCIAL POOL HEAT PUMP...
-
Page 2: Table Of Contents
Table of contents Foreword A. Safety Precautions Warning 2. Attention 3. Safety B. About your heat pump Transportation Accessories: Operating condition and range: Introduction of different modes: Technical parameter Dimension C. Installation guidance Installation reminder Wiring requirements Electric wiring Diagram Installation options D. -
Page 3: Foreword
Foreword Thank you for choosing the Madimack high efficiency inverter pool heat pump. All our heat pumps are built and designed to the highest standard and are protected by our extended warranty service for peace of mind. Warranty registration is required to be submitted online in conjunction with the commissioning page and warranty registration page in the Appendix section at the back of the booklet www.madimack.com.au/warranty-registration... -
Page 4: Safety Precautions
A. Safety Precautions We have provided important safety messages in this manual for the installation, maintenance and repair of your heater. Please read thoroughly and obey all safety messages. 1. Warning The WARNING sign denotes a hazard. It calls attention to a procedure, practice, or the like, which, if not correctly performed or adhered to, could result in personal injury or injury to a third party. -
Page 5: Attention
2. Attention a. Please read the following instructions before installation, use and maintenance. b. Installation, must be completed only by competent persons only, and in accordance with this manual. c. Check all water connections are sealed and tested before operating the heat pump d. -
Page 6: About Your Heat Pump
B. About your heat pump 1. Transportation a. Always keep upright b. Loosen the screws in the bottom, and use a forklift to transport. c. Do not lift by the water unions, otherwise, the titanium heat exchanger inside the heat pump may be damaged) 2. -
Page 7: Operating Condition And Range
3. Operating condition and range: To provide you comfort and pleasure, please set swimming pool water temperature efficiently and economically. The heat pump can work between air -10°C~43°C, and its ideal operation range is between air 15°C ~ 25°C. 4. Introduction of different modes: The heat pump has two modes: Boost and Silent. -
Page 8: Technical Parameter
5. Technical parameter Model EM60 EM110 PERFORMANCE CONDITION: Air 27°C/ Water 27°C/ Humid. 80% Heating capacity (kW) 60.2 115.0 Average COP at 50% Speed 10.5 PERFORMANCE CONDITION: Air 15°C/ Water 26°C/ Humid. 70% Heating capacity (kW) 40.1 80.8 Average COP at 50% Speed TECHNICAL SPECIFICATIONS Advised pool volume (m 125~260... -
Page 9: Dimension
6. Dimension Size (mm) Name Model EM60 1000 1110 1070 1000 1260 Size (mm) Name Model EM110 1000 1630 1090 1050 2100 1280... -
Page 10: Installation Guidance
C. Installation guidance 1. Installation reminder Only competent persons are authorized to install the heat pump and should be educated with the relevant building codes and standards of their current state or local governing body for all electrical, mechanical and water services to prevent danger or damage to the unit. a. - Page 11 Plumbing connection installation guide 2. Placing the unit and water connections a. Placing the unit and fixing • The frame must be fixed by bolts (M10) to a concrete foundation or brackets. The concrete foundation must be solid and fastened; the bracket must be strong enough and anti-rust treated. •...
-
Page 12: Wiring Requirements
Electrical connection installation guide 2. Wiring requirements a. Connect the heat pump to an appropriate power supply, the voltage should comply with the rated voltage of the product. b. The machine must be earthed c. Wiring must be handled by a professional technician according to the circuit diagram. d. - Page 13 Step 2. Power cord must be passed through below 3 holes Connect the wire through three holes ‚ ƒ Restore the internal panel Fix the internal panel by two screws „ … Restore the panel Fix the panel by three screws...
-
Page 14: Electric Wiring Diagram
3. Electric wiring Diagram For power supply: 400V 50Hz Distribution Box(Not provided) Swimming Pool Heat Pump Wiring Board Power Cord Power Supply Fuse 400V 50Hz Breaker Earth Must be hard wired, plug is not allowed. Note: 1) 2) The swimming pool heat pump must be earthed Current protection devices must be installed in accordance with local electrical regulations Please see appendix for further wiring information including pump control and auxiliary input... -
Page 15: Installation Options
4. Installation options Flow switch activated heating The heat pump is activated by the flow of water initiated from the filtration circulation pump, if the heater gets to temperature within the timers the unit will first start to use the inverter technology to slow the machine down to maintain the temperature and eventually to a stop. - Page 16 b. Heat pump activation without using the chlorinator controller and using the one pump used for filtration (additional controller required) An on board pump output relay can activate the main filtration pump by using it in combination with a single pump controller without using the chlorinator timers needing to be activated which will stop over chlorination but still use a single supply pipework for the pool.
- Page 17 Individual circulation pump installation. An onboard output initiates the circulation pump to start and stop from the heat pump itself based on temperature and timers. For use when there are dedicated heating pipes and to separate from the filtration timers. 1- Termination points are labelled P1-P2 from the on board relay and is activated by the timers and pool temperature, and will continue to run the pump until the heated water reaches the set temperature or the timer switches off.
- Page 18 d. Solar retro In some situations, when a heat pump is replacing a solar heating system, the pipework is available to be used next to the house but there is no way of adding a new electrical circuit to the pool equipment. With the use of an additional temperature sensor you can use the in- built flow switch to activate the heating.
-
Page 19: Operation Guidance
D. Operation guidance 1. Key Function Symbol Heating & cooling models Power On/Off ii. Wi-Fi setting Lock/Unlock Screen ii. Heating mode (18-40°C) iii. Cooling mode (12-30°C) iv. Auto mode (12-40°C) Boost ii. Silence Temperature Setting a. Standby mode or Screen lock:Only symbol lights up, screen and other buttons turn darker. -
Page 20: Operation Instruction
2. Operation Instruction a. Screen Lock 1) Press for 3 seconds to lock or unlock the screen 2) Automatic Lock Period: 30 seconds if no operation b. Power On Press for 3 seconds to unlock screen, Press to power on machine. c. - Page 21 Defrost cycle • Automatic active defrosting When the machine is operating in low temperatures it is very common for ice to build up on the external coil. The heat pump has a built in defrost protection program which will activate when it senses ice starting to form.
-
Page 22: Testing
E. Testing Heat pump checks before use The air inlets and outlets are free of any debris and are not obstructed. Refrigeration pipes or components are not installed in a corrosive environment. Check electric wiring connections are tight and adhere to the electrical schematic Check for water leaks around the machine and all new water connections Refrigerant leak detection Leak testing is prohibited in enclosed areas... -
Page 23: Commissioning
OPTIMUM FLOW RATE DIFFERENTIAL FROM INLET TO OUTLET IS BETWEEN 2-3 DEGREES Madimack Heat Pumps have a built-in flow switch which will deactivate the heating function if not enough water flow is detected. The Heat Pump has a large range operation up to a seven-degree differential. -
Page 24: Maintenance
F. Maintenance “ Switch Off ” power supply of the heater before cleaning, examination and repairing 1. In winter season when you don’t swim: a. Cut off power supply to prevent any machine damage. b. Drain water clear of the machine. c. -
Page 25: Trouble Shooting For Common Faults
G. Trouble shooting for common faults 1. Repairing Guidance ----------------------------------------------------------------------------------------------------------------------------------------- WARNING: If repairs or removal is required, contact authorized service center. Requirements for Service Personnel Any person who is involved with working on or breaking into a refrigerant circuit should hold a current valid certificate from an industry-accredited assessment authority, which authorizes their competence to handle refrigerants safely in accordance with an industry recognized assessment specification. - Page 26 Protection & Failure code Error Component corresponding What did the error detect? Solution High pressure protection High water flow pressure switch Check the water flow from the filtration pump, check the sensor electrical connection, might need to change if faulty, check the pressure switch and circuit Low pressure protection Low water flow pressure sensor Check the water flow from the filtration pump, check the...
- Page 27 Cooling plate overheat protection 1). Power off and restart 2). Check fan motor 3). Check cooling plate Fan motor failure Fan motor Check the fan motor wiring, check if the fan is broken or loose Power filter plate No-power Power filter not working Single Phase Model protection 1).
-
Page 28: Electrical Wiring Schematic
H. Electrical wiring schematic Water pump: 400V voltage Breaker/fuse (Not Provided) Power Cord Power Supply 400V~/50Hz Earth Water Pump Water Pump Breaker/fuse (Not Provided) Contactor coil voltage:400V Power Supply 400V~/50Hz Earth... -
Page 29: Water Testing Pump Output
Water pump control and timer connection 1: Water pump timer 2: Water pump wiring of Heat Pump Note: The installer should connect 1 parallel with 2 (as above picture). To start the water pump, condition 1 or 2 is connected. To stop the water pump, both 1 and 2 should be disconnected. Water Testing Pump Output For an individual pump system only used for pool heating. -
Page 30: Wi-Fi Operation
I. Wi-Fi operation For video tutorials and further help please visit www.Madimack.com.au FAQ for all you need to do and full walkthrough. It is crucial that the WiFi is over the machine and is of a high power, the WiFi... - Page 35 Notice: 1. The weather forecast is just for reference. App is subject to updating without notice.
- Page 36 Your Australian Consumer Law guarantees, and similar statutory rights, are called the “Owner’s Statutory Rights” in this Warranty. THE RIGHTS GIVEN BY MADIMACK AUSTRALIA 4 YEARS WARRANTY ARE IN ADDITION TO THE OWNER’S STATUTORY RIGHTS.
- Page 37 Except where inconsistent with the Owner’s Statutory Rights and the rights given by this Warranty, all other warranties and all liability of Madimack for any loss or damage direct and consequential is expressly excluded.
- Page 38 Madimack for any defect of design, materials or workmanship will be limited to any of the following as determined by Madimack: - Replacing the equipment or supplying equivalent equipment;...
-
Page 39: Product Warranty Registration
IMPORTANT NOTE For repair of equipment under this Warranty it is recommended that the owner contact their Madimack Dealer / Installer. If the owner requests Madimack to perform or arrange the service call, the owner will be liable for all associated costs if the problem is not covered by the provisions of this Warranty or the Owner’s Statutory Rights.
Need help?
Do you have a question about the Elite Max and is the answer not in the manual?
Questions and answers