Table of Contents
Advertisement
Quick Links
Advertisement
Table of Contents

Subscribe to Our Youtube Channel
Related Manuals for Kverneland BB


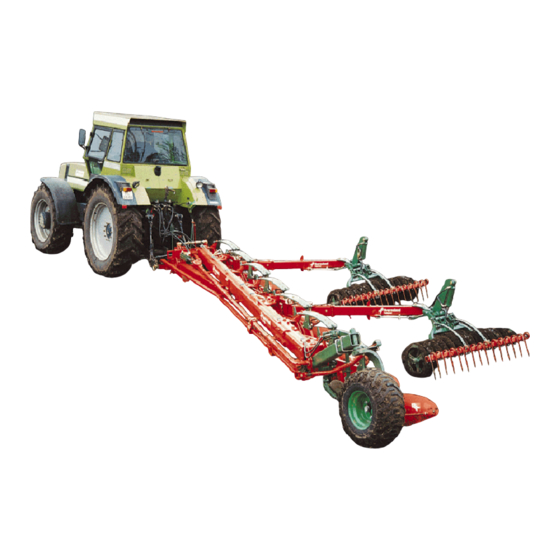
Summary of Contents for Kverneland BB
- Page 1 Operating Manual Model BB No KK730990 kk730990TOC.fm - 9/03...
- Page 2 kk730990TOC.fm 9/03...
-
Page 3: Table Of Contents
21.0 Tightening torque ............40 Kverneland Klepp AS... -
Page 4: Introduction
1.0 Introduction Congratulations on the purchase of your new Kverneland plough. You have chosen a product which will give you trouble free service and performance to the highest standards expected. Should you require after sales, service or the supply of spare parts, please contact your local Kverneland dealer. -
Page 5: New Equipment - Be Careful
When leaving the Kverneland factory all new equipment is lubricated with the correct kind of grease. Only use quality grease recommended. - Page 6 Modelé Dégagement sous age Type de tête Modelo Separaciòn entre cuerpos Tipo de cabezal WEIGHT MADE IN NORWAY BY KVERNELAND KLEPP AS N-4355 KVERNALAND - NORWAY Serial number Type of beam: Type of body Seriennummer Heavy Duty Körperform Numéro de serie...
-
Page 7: Think Safety
gb_introduksjon_sikkerhet.fm 3.0 Think safety The tractor should be fitted Read instruction with enough front-end manual and follow the weights for stability and to instructions given. maintain secure steering. Do not stand on, under or Use the tractor’s position close to the implement control when coupling the while it is in work or while implement to the tractor. -
Page 8: Think Safety - Always Observe The Decals Displayed
gb_introduksjon_sikkerhet.fm 3.1 Think safety - always obser ve the decals displayed 1. Warning: Always read the instruction manual. 2. Danger: Do not stand between tractor and implement. 3. Use the parking support. 4. Danger: Reversible plough. 5. Crush danger: Keep clear. 6. -
Page 9: Technical Specifications
2.Plough with skimmers, disc coulter on rear body and depth wheel. 4.1 Depth/transport wheel BB depth wheel 400 x 15,5 without cylinder/hydraulic furrow width BB depth wheel 400 x 22,5 with cylinder/hydraulic furrow width BB-HD depth wheel 400 x 15,5 without cylinder/hydraulic furrow width... - Page 10 gb_BB_tekniske_spesifikasjoner.fm Fig. 1 9/03...
-
Page 11: Description
6.0 Description The BB-plough consists of a main frame (A, fig. 1) which is connected to a towing bracket (B), a towing frame (C) and an adjusting tube (D). All legs (E) are mounted to the main frame by means of a leg assembly (F) with a 24mm pivot bolt (G). - Page 12 gb_semi_traktor.fm Fig. 2 Fig. 3 9/03...
-
Page 13: Tractor
Optional: if the plough is equipped with Packomat more outlets may be required. The lower links should be stabilised on all Kverneland semi-mounted ploughs during ploughing. The rear wheel setting (between inside faces of tyres) should be from 110 to 150 cm, the front wheel setting 0 to 10 cm greater (fig. - Page 14 gb_semi_oppslaaing_plogkropp.fm Fig. 4 9/03...
-
Page 15: Raising The Plough Body
gb_semi_oppslaaing_plogkropp.fm 8.0 Raising the plough body The rear plough body assembly can be raised out of work if conditions become difficulty. This can be done as follows: The tension of the leaf spring is reduced and removed from the front spring arm as shown in (fig. - Page 16 gb_teig_steinutloser.fm Fig. 5 Fig. 6 70 cm Fig. 7 Fig. 8 9/03...
-
Page 17: Auto Reset System
gb_teig_steinutloser.fm 9.0 Auto reset system Fig. 5 shows the HD - spring. For heavy soils two additional No. 5 leaves can be fitted. The standard spring is delivered without No. 5 leaves shown. For light soils it is recommended that one leaf No. 1 should be removed from the standard spring. Loosen bolt (D) before adjusting the spring with bolt (B). - Page 18 gb_teig_rullekniv.fm Fig. 9 Fig. 10 2/3 D 1/3 D 5 cm 1-4 cm Fig. 11 Fig. 12 Fig. 13 Fig. 14 9/03...
-
Page 19: Disc Coulter
gb_teig_rullekniv.fm 10.0 Disc coulter Standard (fig. 9) or spring loaded (fig. 10 and fig. 14) disc coulters are available as optional equipment. 10.1 Standard disc coulter Adjust the depth by loosening bolt (A, fig. 9). If the depth adjustment on the arm is not enough, the serrated connection (B, fig. - Page 20 gb_teig_skumutstyr.fm Fig. 15 Fig. 16 Fig. 17 9/03...
-
Page 21: Skim Equipment
gb_teig_skumutstyr.fm 11.0 Skim equipment 11.1 Manure skimmer The manure skimmer (fig. 15) is suitable for both grassland and stubble. A special type for maize is shown in fig. 16 and is suitable when there is a lot of surface residue where you are ploughing. The skimmer is mounted to the beam as shown in fig. - Page 22 gb_teig_landsidekniv.fm Fig. 18 Fig. 19 Fig. 20 9/03...
-
Page 23: Landside, Knives & Furrow Openers
gb_teig_landsidekniv.fm 12.0 Landside, knives & furrow openers Fig. 18 shows a landside knife mounted on a body. This knife has the same function as the share knife, but has better wearing characteristics. The landside knife can be mounted in two positions (A and B). - Page 24 gb_semi_klargjoring_innstilling.fm Fig. 21 Fig. 22 9/03...
-
Page 25: Checking And Adjustment Of The Plough
gb_semi_klargjoring_innstilling.fm 13.0 Checking and adjustment of the plough 13.1 Checking The paint on the mouldboards, trashboards and manure skimmers should be removed by using a scraper or paint remover. Mouldboard extensions can be delivered as extras, and should be mounted as shown in fig. 21. Fig. - Page 26 gb_semi_klargjoring_innstilling.fm Fig. 23 Fig. 24 Fig. 25 Fig. 26 9/03...
-
Page 27: Adjustment Of The Plough
gb_semi_klargjoring_innstilling.fm 13.2 Adjustment of the plough The frame of the plough should be parallel with the ground (front to rear) once the required ploughing depth has been achieved. The front part of the plough is lowered to the required depth with the hydraulic controls of the tractor and the rear part is lowered gradually to an equal depth as shown in fig. - Page 28 gb_semi_klargjoring_innstilling.fm Fig. 27 Fig. 28 9/03...
- Page 29 gb_semi_klargjoring_innstilling.fm Fig. 29 9/03...
- Page 30 gb_semi_transport.fm Fig. 30 Fig. 31 Fig. 32 9/03...
-
Page 31: Transport
gb_semi_transport.fm 14.0 Transport The plough should always be transported at its narrowest working width (fig. 30). The hydraulic control system can also be used to straighten the plough in behind the tractor. Fig. 31 shows the spring-loaded parking stand in a parked position. The dotted line shows the position of the support during ploughing. - Page 32 gb_semi_isetting_opptaing.fm Fig. 33 Fig. 34 9/03...
-
Page 33: Entering And Finishing Of Furrows
gb_semi_isetting_opptaing.fm 15.0 Entering and finishing of furrows When starting to plough with a semi-mounted plough, the front is lowered first by means of the tractor linkage (fig. 33) such that the first plough body enters the 'scratch' furrow. The whole plough is then gradually lowered by the hydraulic cylinder controlling the rear wheel. - Page 34 BB_gb_vedlikehold.fm One grease nippel on every side Fig. 35 Fig. 36 Fig. 37 9/03...
-
Page 35: Maintenance
The lubrication points (S) are shown in fig. 35 to fig. 39. Fig. 36 and fig. 37 shows the lubrication for mast (BB-HD) and fig. 38 shows the lubrication for an ordinary towing box. During the ploughing season, the plough should be lubricated daily to prevent the ingress of dirt into bearings and moving parts. - Page 36 gb_semi_start_avslutning.fm Fig. 40 Fig. 41 Fig. 42 Fig. 43 Fig. 44 9/03...
-
Page 37: Crown
gb_semi_start_avslutning.fm 17.0 Crown Fig. 40 to fig. 42 shows a simplified crown which requires minimal plough adjustment. With the plough adjusted for normal ploughing, the crown can be made without any other adjustment except for varying the working depth via the tractor hydraulic controls and rear support wheel. First run (A) Only the three last bodies are working. - Page 38 gb_org_reserv.fm Shinpiece Saddle Mouldboard Reversible point Share Fig. 45 9/03...
-
Page 39: Original Spare Parts
- If non genuine spare parts are used - Parts are heated or welded Kverneland reserves the right to make changes in design and specification or to add new features without obligation on implements purchased before or after such changes are made. -
Page 40: Tightening Torque
gb_teig_moment.fm 21.0 Tightening torque Tigthening torque kpm Bolt diam. El. galvanized bolts 10,9 12,9 M8 - M10 6,5 - 7,0 8,0 - 9,0 M 12 11,5 - 12,5 14,0 - 15,0 18,5 - 20,0 22,0 - 24,0 28,5 - 31,0 34,0 - 37,5 55,5 - 61,0 65,5 - 73,0...
Need help?
Do you have a question about the BB and is the answer not in the manual?
Questions and answers