
Related Manuals for PDi medTV 16


Summary of Contents for PDi medTV 16
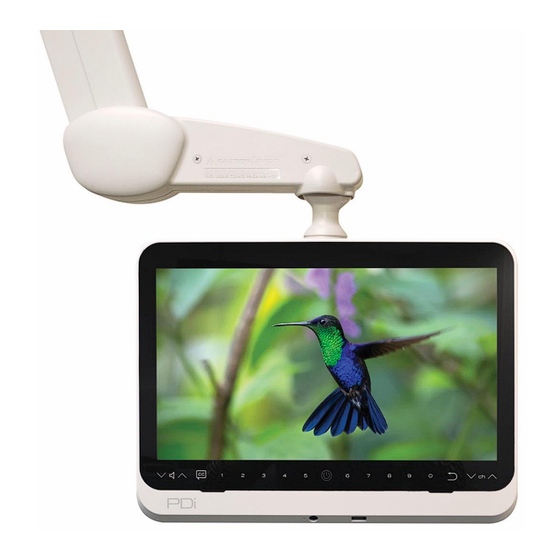
- Page 1 USER MANUAL Document Number: PD196-442R1 For model numbers beginning PDI-P16TV5 16” Arm-Mounted, Healthcare-grade LED Backlit HDTV mymedTV.com...
-
Page 2: Table Of Contents
CH Override/Auto Update ..................................12 Auto Channel Alias ....................................12 Accessing the TV Settings menu..............................................13 Picture Settings ...................................................... 13 Sound Settings ......................................................14 www.pdiarm.com www.mymedTV.com PDi Communication Systems, Inc. ▪ 40 Greenwood Ln ▪ Springboro, Ohio 45066 USA ▪ ▪ Phone 800.628.9870... - Page 3 Reset All TV Settings ....................................16 USB Cloning: ......................................17 MTI/SmartPort Personality ................................... 17 Security ......................................... 17 Support Information ..................................... 17 Limited Warranty ....................................................17 www.pdiarm.com www.mymedTV.com PDi Communication Systems, Inc. ▪ 40 Greenwood Ln ▪ Springboro, Ohio 45066 USA ▪ ▪ Phone 800.628.9870...
- Page 4 PDi Communication Systems, Inc. ▪ 40 Greenwood Ln ▪ Springboro, Ohio 45066 USA ▪ ▪ Phone 800.628.9870...
-
Page 5: Important Safety Instructions
à oxygène. Une telle utilisation peut causer operating instructions. un risque d'incendie. www.pdiarm.com www.mymedTV.com PDi Communication Systems, Inc. ▪ 40 Greenwood Ln ▪ Springboro, Ohio 45066 USA ▪ ▪ Phone 800.628.9870... -
Page 6: Introduction
Installation Precautions For models powered over coax, use only a power source from PDi suitable for use in a healthcare facility. The single coaxial cable out the top of the TV is used to supply both low voltage AC or DC power (28VAC or 24VDC) and RF signal to the television. -
Page 7: Removing Tv From Suspension Arm
To remove the TV from the arm: Remove plastic arm cover kits from the nose of the arm. Find the safety pin stored in the nose of the arm. If unable to find the safety pin, contact PDi for a replacement before proceeding. -
Page 8: Direct Entry Keypad
USB Cloning Once you have a PDi TV configured the way you want, you can copy these setting configurations to other PDi TVs. USB Cloning copies most of the TV settings, including: channel scan/map, power on channel/volume, channel aliases, min/max volume, source settings. -
Page 9: Delete Channels From The Channel Map
The firmware is field upgradeable, but normally does not require this process and should be performed by the hospital technician. Once complete, the TV settings must be reprogrammed. A special data file is required from the PDi factory to complete this process by USB. -
Page 10: Programming Menus And Setup
Note: The following instructions assume you have a programming remote, have correctly mounted the TV, and connected a coax cable that provides both power and RF signal. The PDi programming remote Part Number PD108-520 must be ordered separately. If the SETUP screen times out while you are changing any settings, simply press SETUP on the PD108-520 remote. -
Page 11: Accessing The Channel Setup Menu
Press Auto Scan button. Note: auto scan can take several minutes to complete Press Done when Auto Scan is complete. www.pdiarm.com www.mymedTV.com PDi Communication Systems, Inc. ▪ 40 Greenwood Ln ▪ Springboro, Ohio 45066 USA ▪ ▪ Phone 800.628.9870... -
Page 12: Channel Sequence
Copy Service Level: This setting copies the channel map from one service level to another service level (ie Free copied to Basic). www.pdiarm.com www.mymedTV.com PDi Communication Systems, Inc. ▪ 40 Greenwood Ln ▪ Springboro, Ohio 45066 USA ▪ ▪ Phone 800.628.9870... -
Page 13: Accessing The Tv Settings Menu
DeBlock etc. It is rare that these settings will need to be adjusted. Reset: lets you default all picture settings back to factory defaults www.pdiarm.com www.mymedTV.com PDi Communication Systems, Inc. ▪ 40 Greenwood Ln ▪ Springboro, Ohio 45066 USA ▪ ▪ Phone 800.628.9870... -
Page 14: Sound Settings
Pillow Speaker Boost: Defaulted to Normal, can be changed to Disabled or Strong. Treblebass: Adjust Treble and Bass. Both default to 50%. Balance: Adjust speaker volume left to right. www.pdiarm.com www.mymedTV.com PDi Communication Systems, Inc. ▪ 40 Greenwood Ln ▪ Springboro, Ohio 45066 USA ▪ ▪ Phone 800.628.9870... - Page 15 HDMI CEC and ARC settings: Enable and adjust HDMI CEC settings and ARC control through the HDMI CEC and HDMI ARC Audio Latency menus under the Sources Menu. www.pdiarm.com www.mymedTV.com PDi Communication Systems, Inc. ▪ 40 Greenwood Ln ▪ Springboro, Ohio 45066 USA ▪ ▪ Phone 800.628.9870...
- Page 16 Reset All TV Settings: Clears TV settings to factory settings. To factory reset the entire television, press TV SETUP on PD108-520 -> Menu -> System -> Settings -> Device Preferences -> About -> Factory reset www.pdiarm.com www.mymedTV.com PDi Communication Systems, Inc. ▪ 40 Greenwood Ln ▪ Springboro, Ohio 45066 USA ▪ ▪ Phone 800.628.9870...
- Page 17 PDI-P16TV5 User Manual Page 17 of 17 USB Cloning: Once you have a PDi TV configured the way you want, you can copy these settings to other PDi TVs. USB Cloning copies most of the TV settings, including: channel scan/map, power on channel/volume, channel aliases, min/max volume, source settings.
Need help?
Do you have a question about the medTV 16 and is the answer not in the manual?
Questions and answers