Table of Contents
Advertisement
Quick Links
Advertisement
Table of Contents

Related Manuals for TRENDnet TEW-941APBO


Summary of Contents for TRENDnet TEW-941APBO
- Page 1 Cover Page TRENDnet User’s Guide...
-
Page 2: Table Of Contents
Quick Reference ................7 Airtime Fairness ......................24 Management VLAN...................... 24 TEW-941APBO ....................... 7 Time and Date Settings ....................24 TEW-941APBO Basic Installation and Configuration (Basic Access Point Schedule ........................25 Setup) ..................... 8 LED Control ........................26 Hardware Setup ......................8 LLDP .......................... - Page 3 System Log ........................35 Administration ......................32 Diagnostics........................35 Timeout Settings ......................32 Technical Specifications ..............37 SNMP Settings ......................33 Appendix ..................41 Settings Management ....................34 Settings Management ....................34 SSH ..........................35 © Copyright 2024 TRENDnet. All Rights Reserved.
-
Page 4: Product Overview
The IP67 rated housing on this WiFi 6 outdoor access point is designed for outdoor environments, and conveniently includes wall and pole mounting hardware. Easily manage and configure TRENDnet’s 5 dBi WiFi 6 AX1800 Outdoor PoE+ Omni- Directional Access Point remotely with TRENDnet Hive. TRENDnet Hive is a remote network cloud manager that reduces management time and cost. - Page 5 Hive Enabled (Optional) Remotely monitor, manage, configure, and diagnose this WiFi 6 access point via TRENDnet’s reliable cloud service (Additional fee applies) *Effective wireless coverage may vary depending on the wireless device's output power, antenna gain, antenna alignment, receiving sensitivity, and radio interference. Additionally environmental factors such as weather conditions, physical obstacles, and other considerations may affect performance.
-
Page 6: Product Hardware Features
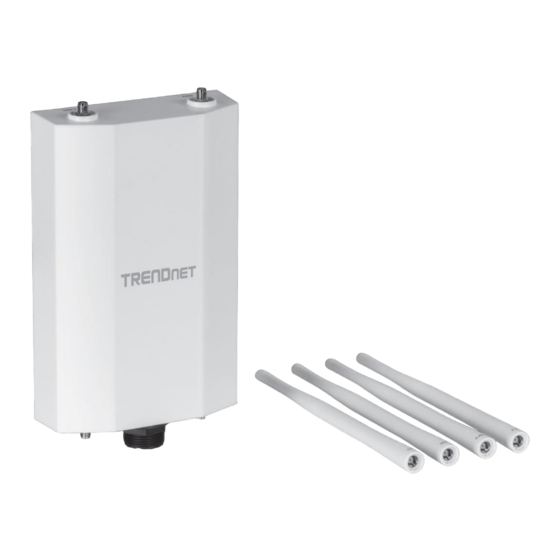
IP67 Weather Rated Housing with built-in directional sector antenna Waterproof kit Bottom View (without weatherproof kit) PoE+ Gigabit LAN port (power input) Top View 4 x RP-SMA (female) antenna connectors Back View Side View © Copyright 2024 TRENDnet. All Rights Reserved. - Page 7 LED is OFF, the wireless radio on the device has been disabled. • 5GHz LED – When the LED is ON, the wireless radio on the device is on. When the LED is OFF, the wireless radio on the device has been disabled. © Copyright 2024 TRENDnet. All Rights Reserved.
-
Page 8: Primary Product Application
WDS (Wireless Distribution System) Mode using AES encryption for security. The example application displays two TEW-941APBO access points establishing a wireless link between each other, both configured in WDS Bridge; allowing for network connectivity between two buildings over a point-to-point wireless link. -
Page 9: Minimum Installation Requirements
• RJ-45 Ethernet cables (not included) • Additional TRENDnet TEW-941APBO or TEW-940APBO (optional for point-to- 1. Adjust your wireless devices so that the signal is traveling in a straight path, rather point bridging) than at an angle. The more material the signal has to pass through the more signal •... -
Page 10: Quick Reference
Default Settings http://tew-941APBO LAN IP Address: 192.168.10.100 (DHCP) LAN Subnet Mask: 255.255.255.0 Channel Access Method: CSMA/CA Mode: Access Point (AP) Mode WPA2 Encryption Key: <predefined> User: admin Password: admin © Copyright 2024 TRENDnet. All Rights Reserved. -
Page 11: Tew-941Apbo Basic Installation And Configuration (Basic Access Point Setup)
1. Using a RJ-45 network cable, connect the cable from the LAN (PoE) port of your access point, to an available LAN PoE+ port on your networked switch or PoE+ The following installation procedure is for setting up the TEW-941APBO as a basic injector. - Page 12 3. Your new password settings will be applied. In the next screen, select the method of management for this AP. To manage the AP from the cloud remotely choose TRENDnet Hive (additional fees may apply). To manage the AP through your local GUI, choose Default Management.
- Page 13 1. Select the time zone from the drop-down menu and click Next to move to the next screen. 2. Input your TRENDnet Hive User Name and Password. Click Next to move to the next step. 2. Input your network configurations and click Next.
- Page 14 TRENDnet User’s Guide IMPORTANT NOTE: This device does not have a hardware reset button. When changing the administrator password to the access point configuration page, please make sure to write down your new password. © Copyright 2024 TRENDnet. All Rights Reserved.
-
Page 15: Hardware And Mounting Installation
4. Insert one end of an Ethernet cable into the sealing nut. 5. Insert the Ethernet cable into the seal. 8. Connect the Ethernet cable to the LAN (PoE) port on the bottom of the access point. © Copyright 2024 TRENDnet. All Rights Reserved. -
Page 16: Pole Mount Installation
10. By hand, screw the seal nut clockwise to secure it to the main body. 2. After installing the mounting bracket to the back of the access point, slide the mounting bracket left and install the locking screw by turning clockwise. © Copyright 2024 TRENDnet. All Rights Reserved. -
Page 17: Application Modes
A remote base station is the end point to accept connections from wireless clients and pass data upstream to a network wirelessly. Example: Access Point • It can be deployed as a traditional fixed wireless access point. © Copyright 2024 TRENDnet. All Rights Reserved. -
Page 18: Repeater
Make sure all of the settings of the wireless interface matches to your root or connecting wireless access points, same SSID, channel and wireless encryption settings. © Copyright 2024 TRENDnet. All Rights Reserved. -
Page 19: Accessing Your Access Point Management Page
IP address settings in the same subnet as the as the access point in order present), or the IP address assigned by your DHCP server. The TEW-941APBO by default to access the management page. (Ex. Access Point IP address changed to 192.168.0.100 is configured with DHCP IP settings. -
Page 20: Overview
Primary Domain Name Server – Displays the primary Domain Name Server (DNS) assigned to your access point. • Secondary Domain Name Server – Displays the secondary Domain Name Server (DNS) assigned to your access point. © Copyright 2024 TRENDnet. All Rights Reserved. - Page 21 Security Mode – Displays the encryption type for 5GHz radio • Channel Width – Displays the channel width currently used in 2.4GHz radio • Status – Displays if the radio is on or off for the 5GHz radio © Copyright 2024 TRENDnet. All Rights Reserved.
-
Page 22: 2.4Ghz Wireless/5Ghz Wireless Status
Action – Click on Blacklist will ban this device from accessing this radio band Total Clients & Total Throughput • This section displays the total clients connected to the access point and the throughput over time. © Copyright 2024 TRENDnet. All Rights Reserved. -
Page 23: System Log
IPv6 Default Gateway – Displays the IPv6 address of the default gateway • Primary IPv6 DNS Server – Displays the primary DNS Server in IPv6 Address • Secondary IPv6 DNS Server – Displays the secondary DNS server in IPv6 Address © Copyright 2024 TRENDnet. All Rights Reserved. -
Page 24: System
• Default Gateway – Enter the desired IPv4 Gateway. • Primary DNS – Enter the desired primary Domain Name Server (DNS). • Secondary DNS – Enter the desired secondary Domain Name Server (DNS). © Copyright 2024 TRENDnet. All Rights Reserved. -
Page 25: Ipv6 Settings
System > Cloud Settings This section allows you to setup your device for TRENDnet’s Cloud Management (Hive). With TRENDnet Hive, you will be able to manage and monitor your device through the TRENDnet Cloud portal remotely. 1. Log into your access point management page (see “Access your access point... -
Page 26: Spanning Tree Protocol (Stp) Settings
TEW-941APBO TRENDnet User’s Guide 3. Select Enabled on Cloud Mode to enable TRENDnet Hive settings, or Disable to disable it. 4. Enter your TRENDnet Hive account username and password. 3. Click Apply to apply the settings and click Save the changes permanently to the flash by clicking the Save button in the top right corner. -
Page 27: Airtime Fairness
Status – Select Enabled to enable VLAN isolation or Disabled to disable it • System Time – Displays the current date and time based off the settings • Time Zone – Select the time zone the unit is located in © Copyright 2024 TRENDnet. All Rights Reserved. -
Page 28: Schedule
Enable Daylight Saving – Check the box to enable automatic daylight savings time adjustment, then adjust the fields accordingly. 4. Review the information below for the Schedule settings • Rule Name – Input a name for this schedule rule © Copyright 2024 TRENDnet. All Rights Reserved. -
Page 29: Led Control
Save button in the top right corner. clicking Save, the settings are saved but not applied yet. 3. Select On to set the LED lights on and Off to set the LED lights off. UPnP System > UPnP © Copyright 2024 TRENDnet. All Rights Reserved. -
Page 30: Bonjour
“Access your access point management page” on page 27). 4. Click Apply to apply the settings and click Save the changes permanently to the flash by clicking the Save button in the top right corner. © Copyright 2024 TRENDnet. All Rights Reserved. - Page 31 Scan Period – Select how often a scan will be done Advanced Wireless Network 5. Advanced Wireless Network settings can be accessed from clicking on Edit from the previous step 6. Review the settings and click Apply to Apply the settings. © Copyright 2024 TRENDnet. All Rights Reserved.
-
Page 32: Bandwidth Control
AP will disassociate with STA 2. Click on Wireless Bandwidth Control under Wireless 2.4GHz / Wireless GHz from the left side menu. Please note, when clicking Save, the settings are saved but not applied yet. © Copyright 2024 TRENDnet. All Rights Reserved. -
Page 33: Wireless Mac Filter
4. Click Apply to apply the settings and click Save the changes permanently to the flash by clicking the Save button in the top right corner. Wireless Advanced Settings Wireless 2.4GHz / Wireless 5GHz > Wireless Advanced Settings © Copyright 2024 TRENDnet. All Rights Reserved. -
Page 34: Wps
27). 2. Click on WPS under Wireless 2.4GHz / Wireless GHz from the left side menu. Please note, when clicking Save, the settings are saved but not applied yet. © Copyright 2024 TRENDnet. All Rights Reserved. -
Page 35: Management
4. Click Apply to apply the settings and click Save the changes permanently to the flash by clicking the Save button in the top right corner. 1. Log into your access point management page (see “Access your access point management page” on page 27). © Copyright 2024 TRENDnet. All Rights Reserved. -
Page 36: Snmp Settings
4. Click Apply to apply the settings and click Save the changes permanently to the Read Write permissions. • flash by clicking the Save button in the top right corner. Trap Destination Address - Enter the IP address for the SNMP trap destination © Copyright 2024 TRENDnet. All Rights Reserved. -
Page 37: Settings Management
2. Select the file will have a .des3 file extension. Click Open or Upload to use the selected file. Reset to Factory Default / System Reboot • To reset the unit back to factory, click Load Default. © Copyright 2024 TRENDnet. All Rights Reserved. -
Page 38: System Log
Save button in the top right corner. management page” on page 27). 2. Click on Diagnostics under Management from the left side menu. Please note, when clicking Save, the settings are saved but not applied yet. Ping Test Parameter © Copyright 2024 TRENDnet. All Rights Reserved. - Page 39 Check Interval – Specify the interval between connectivity checks. • IPv4 Port – Enter the IPv4 Port for the destination endpoint of the speed test. • IPv6 Port – Enter the IPv6 Port for the destination endpoint of the speed test. © Copyright 2024 TRENDnet. All Rights Reserved.
-
Page 40: Technical Specifications
LED indicators Features Hive Cloud Management • • 802.11ax WiFi 6 support Configure, monitor, and manage through the TRENDnet Hive Cloud • IP67 rated housing Management Portal remotely via PC or Mac web browser, or through the • MU-MIMO mobile app •... - Page 41 5GHz: 36, 40, 44, 48, 149, 153, 157, 161 and 165 Modulation • DBPSK/DQPSK/CCK for DSSS technique • BPSK/QPSK/16-QAM/64-QAM/256-QAM/1024-QAM for OFDM/OFDMA Antenna Gain • 2.4GHz: 2 x 5 dBi external • 5GHz: 2 x 5 dBi external © Copyright 2024 TRENDnet. All Rights Reserved.
- Page 42 -22° – 60° C (-7.6° – 140° F) Operating Humidity • Max. 90% non-condensing Certifications • Dimensions Wireless Output Power • 122 x 205 x 45mm (4.8 x 8.07 x 1.77 in.) • 802.11a: 21 dBm (max.) © Copyright 2024 TRENDnet. All Rights Reserved.
- Page 43 1101Mbps use with an 1101Mbps 802.11ax wireless adapter. For maximum performance of up to 600Mbps, use with a 600Mbps 802.11n wireless adapter. Multi-User MIMO (MU-MIMO) requires the use of multiple MU-MIMO enabled wireless adapters. © Copyright 2024 TRENDnet. All Rights Reserved.
-
Page 44: Appendix
2. In the Network Preference window, next to "Show:", select Network Status. You'll see In MAC OS 10.5/10.6, in the left column, select Ethernet. your network status and your IP address settings displayed. e. Configure TCP/IP to use DHCP. © Copyright 2024 TRENDnet. All Rights Reserved. - Page 45 IP address. Click OK Windows XP/2000 a. Go into the Control Panel, double-click the Network Connections icon b. Right-click the Local Area Connection icon and the click Properties. c. Click Internet Protocol (TCP/IP) and click Properties. © Copyright 2024 TRENDnet. All Rights Reserved.
- Page 46 3. You may be prompted to enter a security key in order to connect to the network. 4. Enter in the security key corresponding to the wireless network, and click Connect. © Copyright 2024 TRENDnet. All Rights Reserved.
- Page 47 5725-5850 MHz shall be such that the equipment still complies with uncontrolled environment. This equipment should be installed and operated with the e.i.r.p. limits as appropriate; minimum distance 20cm between the radiator & your body. © Copyright 2024 TRENDnet. All Rights Reserved.
- Page 48 Cet équipement doit être installé et utilisé à plus de 20cm entre le radiateur et votre corps. Approved antenna list Manufacturer Part No. Antenna Type Peak Gain Master Wave 98143MRSX000 Dipole 5.17dBi Master Wave 98143URSX000 Dipole 5.17dBi © Copyright 2024 TRENDnet. All Rights Reserved.
- Page 49 An RMA number is required in order to initiate warranty service support the event that the RMA unit needs to be replaced, TRENDnet may replace it with a for all TRENDnet products. Products that are sent to TRENDnet for RMA service must refurbished product of the same or comparable model.
- Page 50 OF SUCH DAMAGES, AND LIMITS ITS LIABILITY TO REPAIR, REPLACEMENT, OR REFUND evidence of the original purchaser's date of purchase. Replacement products may be OF THE PURCHASE PRICE PAID, AT TRENDNET'S OPTION. THIS DISCLAIMER OF LIABILITY refurbished or contain refurbished materials. If TRENDnet, by its sole determination, is...
Need help?
Do you have a question about the TEW-941APBO and is the answer not in the manual?
Questions and answers