Table of Contents
Advertisement
Quick Links
Advertisement
Table of Contents

Related Manuals for TRENDnet TEW-940APBO


Summary of Contents for TRENDnet TEW-940APBO
- Page 1 Cover Page TRENDnet User’s Guide...
-
Page 2: Table Of Contents
Basic ................. Error! Bookmark not defined. Note the WiFi MAC Addresses ......... Error! Bookmark not defined. Wireless ................Error! Bookmark not defined. TEW-940APBO #1 ............Error! Bookmark not defined. Management ..........Error! Bookmark not defined. TEW-940APBO #2 ......................14 Advanced ................. Error! Bookmark not defined. -
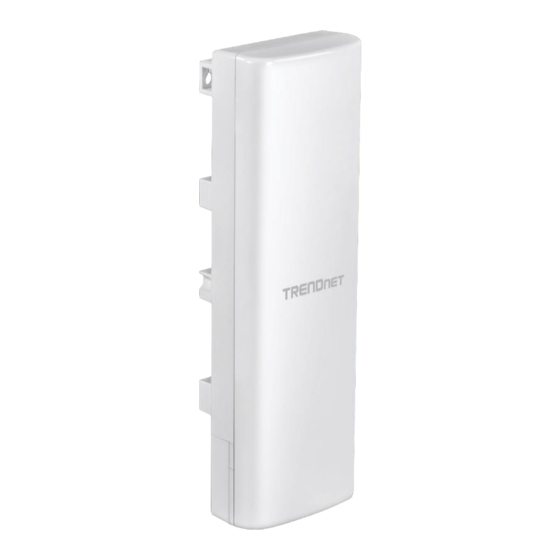
Page 3: Product Overview
TRENDnet User’s Guide Features Product Overview TRENDnet’s 14 dBi WiFi 6 AX1200 Outdoor Directional PoE Access Point, model TEW- 940APBO, is designed for point-to-point WiFi bridging applications. The 5GHz outdoor wireless access point supports wireless point-to-point installation scenarios with Access Point, Client Bridge, and Repeater modes. - Page 4 Supports Access Point, Client Bridge, and Repeater modes ** The distance listed in the specification is based on internal wireless connectivity between two TEW-940APBO units with consideration to acceptable data transmission rates performance throughput. Actual achievable connectivity and performance throughput may WiFi AX1200 (5GHz) vary based on environmental factors in the installed locations.
-
Page 5: Product Hardware Features
Using a paper clip, push and hold the reset button for 15 sec. and release. The LEDs will flash when the device reset has been initiated. © Copyright 2024 TRENDnet. All Rights Reserved. - Page 6 Link Quality LEDs (Client Bridge Mode only) – These LEDs will indicate the your Gigabit network or directly to a computer for initial device setup. wireless connection quality to the remote access point when configured in Client Bridge mode. © Copyright 2024 TRENDnet. All Rights Reserved.
-
Page 7: Primary Product Application
Access Point Mode and the other access point using Client Bridge Mode with WPA2/WPA3 AES encryption for security. The example application displays two TEW-940APBO access points establishing a wireless link between each other, one configured in Access point mode and the other access point in Client Bridge mode;... -
Page 8: Minimum Installation Requirements
2 x RJ-45 Ethernet cables (not included) per TEW-640APBO • Additional TRENDnet TEW-940APBO or TEW-941APBO (For TEW-940APBO 1. Adjust your wireless devices so that the signal is traveling in a straight path, rather single unit only, TEW-940APBO2K model includes two preconfigured units) than at an angle. -
Page 9: Model Differences
LAN Subnet Mask: 255.255.255.0 LAN Subnet Mask: 255.255.255.0 Single Unit Model Mode: Access Point Mode: Client Bridge The single access point requires another TRENDnet TEW-940APBO or a TEW-941APBO WPA2/WPA3 Key: <predefined> WPA2/WPA3 Key: <predefined> to point-to-point wireless bridge. User: admin User: admin Password: <predefined>... -
Page 10: Tew-940Apbo Setup & Installation
00:11:22:33:44:11 Router/Default Gateway IP Address: 192.168.10.1 Primary DNS: 192.168.10.1 Subnet Mask: 255.255.255.0 Using the above information, we will configure the TEW-940APBO access points will be configured with the following settings: TEW-940APBO #1 TEW-940APBO #2 © Copyright 2024 TRENDnet. All Rights Reserved. - Page 11 Note: By default, the TEW-940APBO access points are preconfigured to establish a point- to-point wireless bridge connection between each other using a unique predefined WPA3-SAE AES encryption key.
-
Page 12: Tew-940Apbo #1
5. Attach the power cord to the PoE injector and plug the connected power cord into a power outlet. 6. Confirm the device is powered on through the LED indicators. Please refer to the LED definition table below. © Copyright 2016 TRENDnet. All Rights Reserved. - Page 13 8. Open your web browser and type in the default IP address of the access point in the address bar, then press Enter. The default IP address of the access point is 192.168.10.100. © Copyright 2016 TRENDnet. All Rights Reserved.
- Page 14 Note: You will immediately need to log into the access point configuration page User Name: admin • with the new password settings. Password: admin 11. In the left navigation menu, click System and IP Settings. © Copyright 2016 TRENDnet. All Rights Reserved.
- Page 15 13. In the left navigation menu, click Wireless 5GHz and Wireless Network. 18. In the top right main menu, click on the Save button to commit the configuration changes. 14. For the first entry that is pre-configured, click Edit in the right column. © Copyright 2016 TRENDnet. All Rights Reserved.
-
Page 16: Tew-940Apbo #2
TEW-940APBO / TEW-940APBO2K TRENDnet User’s Guide TEW-940APBO #2 In the left navigation menu, click System and Operation Mode. When configuring TEW-940APBO #2, repeat all steps up to step 11 in previous section when configuring TEW-940APBO Assuming steps 1-11 from previous section…. -
Page 17: Confirm Connectivity
15 ft. (5 m) apart from one another with the front of access points directly facing each other. 6. In the Site Survey List, find the SSID configured on the first TEW-940APBO access point and select it by clicking on the entry. - Page 18 TEW-940APBO / TEW-940APBO2K TRENDnet User’s Guide 3. To verify connectivity, in the TEW-940APBO #2 access point management page, in the left navigation menu, click Management and click Diagnostics. Ping replies and 0% packet loss will indicate a successful ping result to across the point-to-point wireless bridge has been established between the two access points as shown below.
-
Page 19: Tew-940Apbo2K Setup And Installation
You can find the preconfigured access point settings on the wireless sticker or on the device label on the back of the unit. No additional configuration is required. The TEW-940APBO access points will be preconfigured with the following settings: TEW-940APBO #1 TEW-940APBO #2 IP Address 192.168.10.50... -
Page 20: Setup And Confirm Connectivity
5. Connect the other end of the RJ-45 network cable to your computer’s Ethernet port. 6. Attach the power cord to the PoE injector and plug the connected power cord into a power outlet. © Copyright 2019 TRENDnet. All Rights Reserved. - Page 21 8. Assign a static IP address to your computer’s network adapter in the subnet of 192.168.10.x (e.g. 192.168.10.10) and subnet mask of 255.255.255.0. Note: For information on how to statically assign your IP address, see the Appendix section. © Copyright 2019 TRENDnet. All Rights Reserved.
- Page 22 12. To verify connectivity on your computer, open a command prompt or terminal application window and type in the following commands. © Copyright 2019 TRENDnet. All Rights Reserved.
-
Page 23: Pole Mount Installation
4. Secure the access point to the mounting location by turning the mounting clamp screw clockwise. Note: When access point is set to Client Bridge mode operation, the TEW-940APBO features WiFi link/connection quality LEDs located on the back of the access point to assist in determining the optimal mounting position. -
Page 24: Completed Installation Reference
TEW-940APBO / TEW-940APBO2K TRENDnet User’s Guide Completed Installation Reference © Copyright 2019 TRENDnet. All Rights Reserved. -
Page 25: Channel Access Method
“communication medium” of wireless radio airspace. TRENDnet’s TEW-940APBO and TEW-940APBO2K supports Carrier-Sense Multiple Access with Collision Avoidance (CSMA/CA, shortened to just CSMA) and Time-Division Multiple Access (TDMA). -
Page 26: Application Modes
A remote base station is the end point to accept connections from wireless clients and pass data upstream to a network wirelessly. Example: Access Point • It can be deployed as a traditional fixed wireless access point. © Copyright 2019 TRENDnet. All Rights Reserved. - Page 27 SSID, channel and wireless encryption settings. Example: AP with repeater mode • It can be deployed as a traditional wireless repeater. © Copyright 2019 TRENDnet. All Rights Reserved.
-
Page 28: Accessing Your Access Point Management Page
This information will be printed on both the wireless stickers and device label located inside the access point enclosure. 2. TEW-940APBO Users: By default, the user name is admin and password is admin. TEW-940APBO2K Users: You can also find the wireless settings sticker included with the access points and on the device inside the access point enclosure. -
Page 29: Overview
Management > IP Settings section. • • This section displays the access point’s memory or RAM and CPU usage status. Subnet Mask – Displays the current IPv4 subnet mask assigned to your access point. © Copyright 2019 TRENDnet. All Rights Reserved. -
Page 30: Connections
Data Rate – Displays the current data rate between the WiFi connections • Signal Level – Displays the strength of the signal • Noise Level – Displays the noise level of the WiFi signal. © Copyright 2019 TRENDnet. All Rights Reserved. -
Page 31: System Log
2. Click on Dashboard and then click on System Log from the left side menu. • Secondary IPv6 DNS Server – Displays the IPv6 address of the secondary DNS server 3. Click on Refresh to refresh your logs and click on Clear to clear the system log. © Copyright 2019 TRENDnet. All Rights Reserved. - Page 32 Default Gateway – Set the default IP address of the gateway 4. Click Apply to apply the settings and Save to save the changes to the flash. 5. Input your Primary and Secondary DNS Server © Copyright 2019 TRENDnet. All Rights Reserved.
- Page 33 Select Use the following IPv6 DNS servers for the access point to manually Spanning Tree Settings input the DNS server address System > Spanning Tree Settings 1. Log into your access point management page (see “Access your access point management page” on page 29). © Copyright 2019 TRENDnet. All Rights Reserved.
- Page 34 Time and Date Settings 2. Input the date and time settings if Local Time is selected. System > Time and Date Settings This page lets you set your time and date settings for your access point. © Copyright 2019 TRENDnet. All Rights Reserved.
- Page 35 Days – Select the days for this rule to apply to Link Layer Discovery Protocol allows this device to advertise itself on the network. • Start Time / End Time – Select the time for the beginning of the rule and the end. © Copyright 2019 TRENDnet. All Rights Reserved.
- Page 36 4. Click Apply to apply the settings and Save to save the changes to the flash. 2. Click on System and then click on Gateway Monitor from the left side menu. 3. Select Enabled to enable Ping Watch Dog and Disabled to disable this feature. © Copyright 2019 TRENDnet. All Rights Reserved.
- Page 37 WPA Cipher – Select the type of the WPA cipher for the selected encryption mode • Pre-Shared Key – Input the password for the selected encryption • Key Update Interval – Input the time for the Key Update Interval © Copyright 2019 TRENDnet. All Rights Reserved.
- Page 38 • WPA Cipher – Select the type of the WPA cipher for the selected encryption Wireless 5GHz > Wireless Bandwidth Control mode • Pre-Shared Key – Input the password for the selected encryption © Copyright 2019 TRENDnet. All Rights Reserved.
- Page 39 Save button in the top right corner. 4. Click Apply to apply the settings and click Save the changes permanently to the flash by clicking the Save button in the top right corner. © Copyright 2019 TRENDnet. All Rights Reserved.
- Page 40 A-MPDU – Select Enabled to enable A-MPDU or Disabled to disable it. Input the amount of Frames and select the maximum KB to support. Wireless Advanced Settings Wireless 5GHz > Wireless Advanced Settings © Copyright 2019 TRENDnet. All Rights Reserved.
- Page 41 1. Log into your access point management page (see “Access your access point flash by clicking the Save button in the top right corner. management page” on page 27). 2. Click on Wireless 5GHz and then click on WPS. © Copyright 2019 TRENDnet. All Rights Reserved.
- Page 42 Community Name (Read Write) – Enter the community name designated with management page” on page 27). Read Write permissions. • Trap Destination Address - Enter the IP address for the SNMP trap destination © Copyright 2019 TRENDnet. All Rights Reserved.
- Page 43 4. Click Apply to apply the settings and click Save the changes permanently to the • To reboot the unit, click on Reboot. flash by clicking the Save button in the top right corner. © Copyright 2019 TRENDnet. All Rights Reserved.
- Page 44 “Access your access point management page” on page 27). 2. Click on Log under Management from the left side menu. Please note, when clicking Save, the settings are saved but not applied yet. © Copyright 2019 TRENDnet. All Rights Reserved.
- Page 45 • IPv6 Port – Enter the IPv6 Port for the destination endpoint of the speed test. • Ping – Click Ping to begin the ping test • Press Speed to begin the test. © Copyright 2019 TRENDnet. All Rights Reserved.
- Page 46 TEW-940APBO / TEW-940APBO2K TRENDnet User’s Guide © Copyright 2019 TRENDnet. All Rights Reserved.
-
Page 47: Technical Specifications
802.1Q VLAN assignment per SSID • IPv6 support • • LEDs on/off • Bandwidth control per SSID • 802.11k intelligent radio resource management • RSSI Threshold (client signal strength and connectivity control) • LLDP SSID • Bonjour/UPnP © Copyright 2019 TRENDnet. All Rights Reserved. - Page 48 802.11ac: 22 dBm (max.) • 802.11ax: 22 dBm (max.) Receiving Sensitivity (per chain) • 802.11a: -71 dBm (typical) @ 54Mbps • 802.11n: -66 dBm (typical) @ 300Mbps • 802.11ac: -55 dBm (typical) @ 867Mbps © Copyright 2019 TRENDnet. All Rights Reserved.
- Page 49 82 x 257 x 50mm (7.3 x 3.9 x 1.4 in.) Weight • 598g (21.09 oz.) Warranty • 3 year Package Contents • TEW-940APBO • Quick Installation Guide • Proprietary/Passive PoE injector (54V DC, 0.6A) • Mounting hardware Disclaimer © Copyright 2019 TRENDnet. All Rights Reserved.
-
Page 50: Appendix
Note: If you are experiencing difficulties, please contact your computer or operating 2. In the Network Preference window, next to "Show:", select Network Status. You'll see system manufacturer for assistance. your network status and your IP address settings displayed. © Copyright 2019 TRENDnet. All Rights Reserved. - Page 51 3. On the Ethernet tab, the Ethernet ID is your MAC Address. In MAC OS 10.5/10.6, 1. Apple Menu > System Preferences > Network 2. Select Ethernet from the list on the left. 3. Click the Advanced button. © Copyright 2019 TRENDnet. All Rights Reserved.
- Page 52 3. In the command prompt, type ping –c <#> <ip_address> with the <#> ping being the number of time you want to ping and the <ip_address> being the IP address you want ping and check for connectivity. Example: ping –c 4 192.168.10.100 © Copyright 2019 TRENDnet. All Rights Reserved.
- Page 53 20cm between the radiator & your body. This transmitter must not be co-located or operating in conjunction with any other antenna or transmitter. Country Code selection feature to be disabled for products marketed to the US/CANADA © Copyright 2019 TRENDnet. All Rights Reserved.
- Page 54 An RMA number is required in order to initiate warranty service support the event that the RMA unit needs to be replaced, TRENDnet may replace it with a for all TRENDnet products. Products that are sent to TRENDnet for RMA service must refurbished product of the same or comparable model.
- Page 55 MAINTENANCE, OR USE OF TRENDNET'S PRODUCTS. and search for the desired TRENDnet product to access to the GPL Code or LGPL Code. These codes are distributed WITHOUT WARRANTY and are subject to the copyrights of TRENDNET SHALL NOT BE LIABLE UNDER THIS WARRANTY IF ITS TESTING AND the developers.
Need help?
Do you have a question about the TEW-940APBO and is the answer not in the manual?
Questions and answers