
Subscribe to Our Youtube Channel
Related Manuals for Vivo CART-LAPC1


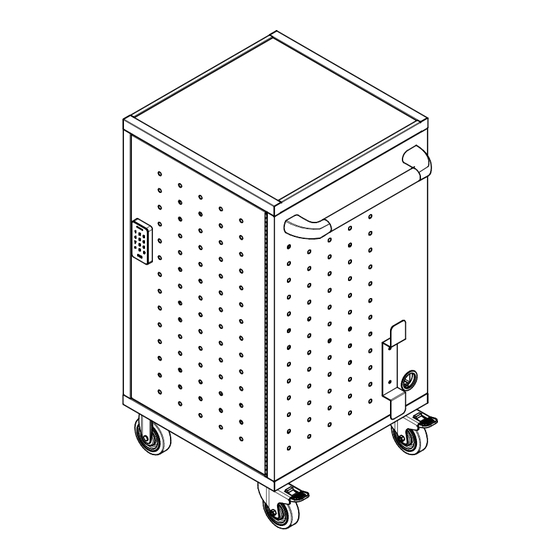
Summary of Contents for Vivo CART-LAPC1
- Page 1 DEXU D208 Black Laptop Charging Cart with Keypad Lock SKU: CART-LAPC1 Instruction Manual Assembly Video & Product Info www.vivo-us.com/products/cart-lapc1...
- Page 2 7AM - 7PM Monday-Friday Give us a Call: Chat Us: Email Us: 309-278-5303 www.vivo-us.com help@vivo-us.com We’re Here for You! Our customer-minded support team is here for YOU, Monday-Friday 7am-7pm CST. We offer immediate assistance with rapid response times from customer service agents and product techncians to...
-
Page 3: Cart Assembly
User Guide Cart Assembly pg.7-17 Keypad & RFID Set Up pg.19-25 DEXU D208... - Page 4 If you do not understand these directions, or if you have any doubts about the safety of the installation, please contact our product support team at 309-278-5303 or help@vivo-us.com for further assistance. Check carefully to make sure there are no missing or defective parts.
- Page 5 Package Contents A (x1) B (x1) C (x1) D (x1) Top Panel Left Side Panel Right Side Panel Bottom Panel E (x3) F (x2) G (x1) H (x1) Shelf Baffle Front Door Back Door I (x1) J (x4) K (x2) L (x2) Handle Power Strip...
-
Page 6: Tools Needed
Tools Needed: Phillips 8mm Socket Wrench Screwdriver Allen Wrench Included Hardware & Tools S-A (x12) S-B (x40) S-C (x16) S-D (x16) S-E (x2) ST4x10mm M6x12mm M4x10mm M8x16mm M8x40mm Screw Screw Screw Screw Screw S-F (x16) S-G (x16) S-H (x2) S-I (x56) S-J (x8) M8 Lock Black M8... -
Page 7: Assembly Steps
ASSEMBLY STEPS STEP 1 Flip Top Panel (A) so that the underside is facing up. Install Side Panels (B,C) by inserting Tabs into corresponding slots on Top Panel. Slide them back to secure them in place. Note orientation of underside of Top Panel (A) Cable routing holes indicate the rear of the Side Panels (B,C). - Page 8 STEP 2 Install Corner Brackets (O) to Side Panels (B,C) and Top Panel (A) using M6x12mm Screws (S-B) and a Phillips screwdriver.
- Page 9 STEP 3 Turn the assembly around and mount Shelves (E) and Baffles (F) to Side Panels (B,C) using M6x12mm Screws (S-B) and Phillips screwdriver. Note orientation of Shelf (E). Note orientation of Baffle (F).
- Page 10 STEP 4 Slide Power Strip Brackets (N) into the top and bottom of Power Strips (J). Mount Power Strip Brackets (N) to Side Panels (B,C) using M4x10mm Screws (S-C) and a Phillips screwdriver.
- Page 11 STEP 5 Connect Bottom Panel (D) to Side Panels (B,C) by inseting tabs on Side Panels to corresponding slots on Bottom Panel, then slide it forward to secure in place.
- Page 12 STEP 6 Secure Casters (L) and Locking Casters (M) to Bottom Panel (D) using M8x16mm Screws (S-D) with M8 Lock Washers (S-G) and M8 Washers (S-F). Tighten with Phillips screwdriver. Install Locking Casters (M) on the same side that you intend to install the Handle (I).
- Page 13 STEP 7 Flip assembly top-side up. Install Corner Brackets (O) to Side Panels (B,C) and Bottom Panel (D) using M6x12mm Screws (S-B) and a Phillips screwdriver.
- Page 14 STEP 8 Secure Rubber Mats (P) to middle and bottom Shelves (E) using Rubber Mat Clips (S-J). Thread M5 Nuts (S-I) onto Laptop Dividers (Q). Secure Laptop Dividers into bottom Shelves and Baffles (F) using an 8mm socket wrench.
- Page 15 STEP 9 Insert Cable Management Clips (R) into the underside of top and middle Shelves (E). Remove protective backing from Adhesive Cable Clips (S) and apply where desired.
- Page 16 STEP 10 HANDLE INSTALLATION Remember to install Handle (I) on same side as Locking Casters (M). Slide plastic covers off of Handle (I). Install using M8x40mm Screws (S-E), black M8 Washers (S-H), and 6mm Allen Wrench. Reapply covers. Assemble Cable Storage Hooks (K) to Side Panels (B,C) using M6x12mm Screws (S-B) and a Phillips screwdriver.
- Page 17 STEP 11 Install Doors (G,H) to the assembly using ST4x10mm Screws (S-A) and a Phillips screwdriver.
- Page 18 [ THIS PAGE INTENTIONALLY LEFT BLANK ]...
- Page 19 KEYPAD & RFID Setup & Troubleshooting DEXU D208...
-
Page 20: Getting Started
Components DEXU D208 Keypad (x1) RFID Tags (x3) Back Access Key (x2) Micro USB Cable (x1) 4 AA Batteries (Not Included) Getting Started Install 4x AA Bateries Remove back cover of Keypad and install 4 AA batteries (not included). Reinstall cover after. PLEASE NOTE: The keypad unlocks the cabinet through two methods: codes and RFID tags. -
Page 21: Changing The Master Code
Operating Instructions LED INDICATOR CONFIRM DELETE RFID TAG READER DEXU D208 USING KEYPAD FIRST TIME When unlocking the Keypad for the first time, the default setting will be in Private Mode and the User Code will be “1111”, with the Master Code “00000000”. The three included RFID Tags will need to be synced. -
Page 22: Operating Modes
Operating Modes There are two modes that this keypad can be used in: Public and Private. 1. Public Mode Public Mode allows the keypad to stay Note: The cart comes with three tags. Tags can unlocked until the user code is reentered. After only be programmed in one mode;... -
Page 23: Private Mode
2. Private Mode Private Mode requires the User Code to be entered each time the user wants to open the Note: The cart comes with three tags. Tags can cabinet. After the code is entered, the lock will only be programmed in one mode; switching stay open for 4 seconds and then automatically from one mode to another will erase the RFID lock. - Page 24 How to Switch Between Modes Switch from Private to Public Mode: Press # 4 #, enter the Master Code, and press # to confirm. The lock will automatically disengage. Switch to Private Mode: Press # 5 #, enter the Master Code, and press # to confirm. The lock will automatically engage (if previously unlocked).
-
Page 25: Troubleshooting
Troubleshooting Problem Solution Low Power Alarm When the batteries are running low, a Red LED will flicker with 4 beeps. At this point, the lock has about 100 uses remaining until completely drained. Once the alarm sounds, we recommend changing the batteries as soon as possible. Lock Has No Power If the lock lacks sufficient power to run, plug the provided Micro USB Cable into the bottom of the front lock to temporarily... - Page 26 WHO WE ARE VIVO is more than a brand of ergonomic office furniture. We are a team of creative and innovative indivuduals working together to offer high quality, affordable ergonomic solutions. We think and work outside of the box to serve...
-
Page 27: Need Assistance
Call Us: 309-278-5303 Average Resolution Time: 5m 4s Chat Us: www.vivo-us.com Average Resolution Time: < 15m Email Us: help@vivo-us.com Average Resolution Time: 1HR 8M 23% within < 15m 38% within <... - Page 28 LAST UPDATED: 07/02/2024 REV2LF Need Help? Get In Touch Monday-Friday from 7:00am-7:00pm CST help@vivo-us.com www.vivo-us.com 309-278-5303 Chat live with an agent! FOR MORE GREAT VIVO PRODUCTS, CHECK OUT OUR WEBSITE AT: WWW.VIVO-US.COM VIVO-us @vivo_us...
Need help?
Do you have a question about the CART-LAPC1 and is the answer not in the manual?
Questions and answers