Table of Contents
Advertisement
Quick Links
Advertisement
Table of Contents

Related Manuals for BIGHORN SRGG62301


Summary of Contents for BIGHORN SRGG62301
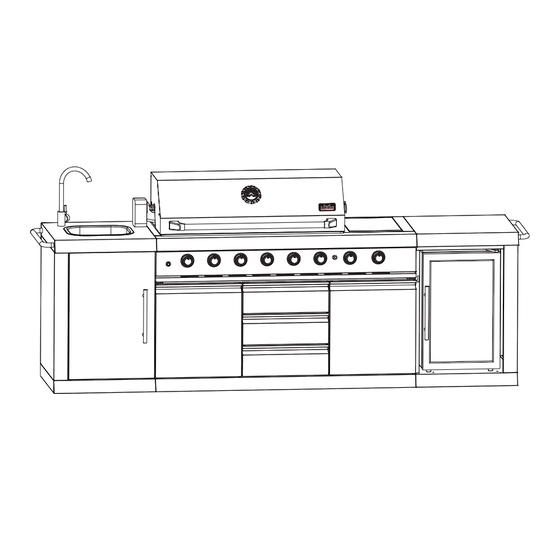
- Page 1 Assembly Instructions & User’s Manual...
-
Page 2: Before Lighting
RECOGNIZED SAFETY SYMBOLS, WORDS AND LABELS WARNING GAS INSTALLATION CODES DO NOT LEAVE THE GRILL UNATTENDED WHILE COOKING. LP gas cylinder must be fitted with Overfill WARNING: Always keep your face and body Protection Device (OPD). as far away from the burner as possible when lighting. - Page 3 Read this User Manual carefully and completely before using your grill to reduce the risk of fire, burn hazard or other injury. Note: Before beginning assembly of product, make sure all parts are present. Compare parts with package content list and hardware contents. If any part is missing or damaged, do not attempt to assemble the unit.
-
Page 4: Safety Practices To Avoid Personal Injury
· SAFETY PRACTICES TO AVOID PERSONAL INJURY Only certain types of glass, heatproof glass THIS OUTDOOR COOKING GAS APPLIANCE SHALL ceramic, earthenware, or other glazed utensils are BE USED ONLY OUTDOORS. NEVER suitable for grill use. These types of materials may break with sudden temperature changes. -
Page 5: Safety Warning
SAFETY WARNING Keeping outdoor cooking gas appliance area clear and When using the grill, do not touch the grill rack, free from combustible materials, gasoline and other flam- burner grate or immediate surroundings as these mable vapors and liquids. areas become extremely hot and could cause burns. -
Page 6: Minimum Clearance
MINIMUM CLEARANCE: LOCATION... -
Page 7: Exploded View
EXPLODED VIEW Please check the contents of the packaging to ensure all parts are included. If missing parts please contact customer service. -
Page 8: Part List
PART LIST Part # Picture Part # Picture (pre-assembled) (pre-assembled) HARDWARE Hardware # Description Picture M6 x 10 Screw M5 x 10 Screw (pre-assembled) M5 x Nuts (pre-assembled) M6 x 16 Screw (pre-assembled) - Page 9 ASSEMBLY INSTRUCTIONS DD x 4 M6x16 (Pre-assembled) AA x 8...
- Page 10 ASSEMBLY INSTRUCTIONS Step 3 AA x 10 Step 4...
- Page 11 ASSEMBLY INSTRUCTIONS Step 5 Step 6 BB x 2 M5x10 (pre-assembled) CC x 2 M5 Nuts (pre-assembled)
- Page 12 ASSEMBLY INSTRUCTIONS Step 7 Step 8...
- Page 13 GAS CYLINDER INSTALLATION INSTRUCTIONS STEP 1 Place gas cylinder (not included) into the hole at cart bottom panel. Screw cylinder locking bolt (pre-installed) to the cart bottom panel from behind until the cylinder locking bolt touch the bottom rim of gas cylinder. STEP 2 1) Check to ensure that the valve of gas cylinder is securely turned off prior to making the connection.
-
Page 14: Lp Gas Hook-Up
GAS HOOK-UP Only the pressure regulator and hose assembly supplied Main Manifold operating pressure: 11” water column (W.C.) /2.74kPa. with the grill must be used. Any replacement pressure regulator and hose assembly must be specified by the P Gas Cylinder must be fitted with Overfill Prevention grill manufacturer. -
Page 15: Gas Safety
GAS SAFETY To disconnect LP gas cylinder: QCC-1 QUICK CLOSING COUPLING This appliance is designed to be used with an LP gas 1. Turn the burner valves off. cylinder equipped with the QCC-1 Type 1 Quick Closing 2. Turn the cylinder valve off fully (turn clockwise to stop). Coupling system which incorporates new safety features Detach the regulator assembly from the cylinder valve required by the American National Standard Institute... -
Page 16: Leak Testing
LEAK TESTING GAS FLOW CHECK GENERAL Each grill burner is tested and adjusted at the factory prior Although all gas connections on the grill are leak to shipment; however, variations in the local gas supply tested at the factory prior to shipment, a complete gas may make it necessary to adjust the burners, the flames tightness check must be performed at the installation of the burners should be visually checked. -
Page 17: Lighting Instructions
LIGHTING INSTRUCTIONS WARNING: IMPORTANT! BEFORE LIGHTING… Inspect the gas supply hose prior to turning the gas “ON”. If it is evident there is excessive abrasion or wear, or the hose is cut, it must be replaced prior to the grill being put into operation. The replacement pressure regulator and hose assembly shall be that specified by the manufacturer. - Page 18 LIGHTING INSTRUCTIONS ROTISSERIE OPERATING INSTRUCTIONS 11. Always attach power cord to appliance first, then plug cord into the wall outlet. If the plug does not fit in the outlet, contact a qualified electrician. DO NOT attempt to modify the plug or override this safety feature. Use Your grill may be equipped with rotisserie burner.
- Page 19 LIGHTING INSTRUCTIONS ROTISSERIE OPERATING INSTRUCTIONS SIDE BURNER Inspect the gas supply hose prior to turning the gas IMPORTANT: Do not use the rotisserie burner and the main burner at the same time. “ON”. If there is evidence of cuts, wear or Do not use side burner when the rotisserie is in use to abrasion, it must be replaced prior to use.
- Page 20 LIGHTING INSTRUCTIONS Charcoal pan instructions Caution...
- Page 21 LIGHTING INSTRUCTIONS TO MATCH LIGHT THE GRILL If the burner will not light after several attempts then the burner can be match lit. 1. Open lid before lighting. 2. Turn the burner control knobs to "OFF". 3. Place a paper match in the end of the match lighter. Strike the match and place through the cooking grate to the LEFT burner, 1 /2"...
- Page 22 DIRECT COOKING PREHEATING LID POSITION INDIRECT COOKING...
-
Page 23: Grilling Guide
GRILLING GUIDE USING THE GRILL Cooking Tips: Grilling requires high heat for searing and proper To prevent foods from sticking to the grill it is essential to coat the grill with oil. Then light up the burners on browning. Most foods are cooked at the “MAX” heat high for 3-5 mins to warm up the barbeque. -
Page 24: Care And Maintenance
CARE & MAINTENANCE CAUTION: GREASE TRAY CLEANING The grease tray should be emptied and wiped down All cleaning and maintenance should be done when grill periodically and washed in a mild detergent and warm is cool and with the gas supply turned off at the propane water solution. -
Page 25: Troubleshooting
TROUBLE SHOOTING BEFORE CALLING FOR SERVICE If the grill does not function properly, use the following checklist before contacting your dealer for service. You may save the cost of a service call. PROBLEM SOLUTION When I light the grill, it does -- Make sure you have turned on the gas. - Page 26 TROUBLE SHOOTING BEFORE CALLING FOR SERVICE Problem PossibleCause Prevention/Solution Burner(s) will not Wire and/or electrode covered with cooking residue. light using ignitor. alcohol and clean swab. Electrode cracked or broken "sparks at crack”. assembly. Electrode tip not in proper position. Wires are loose or disconnected.
- Page 27 TROUBLE SHOOTING BEFORE CALLING FOR SERVICE Problem Possible Cause Check Procedure Prevention/Solution No s y no in i ion bu on is d; no nois d f m s H s b n us d p vious y? k n b u on b d no k o ins...
-
Page 28: Warranty Information
WARRANTY INFORMATION The appliance has been manufactured under the highest standard of quality and workmanship. We warrant to the original consumer purchaser that all aspects of this product will be free of defects in material and workmanship for one (1) year from the date of purchase. A replacement for any defective part will be supplied free of charge for installation by the consumer.
Need help?
Do you have a question about the SRGG62301 and is the answer not in the manual?
Questions and answers