BIGHORN SRPG18003 Manual
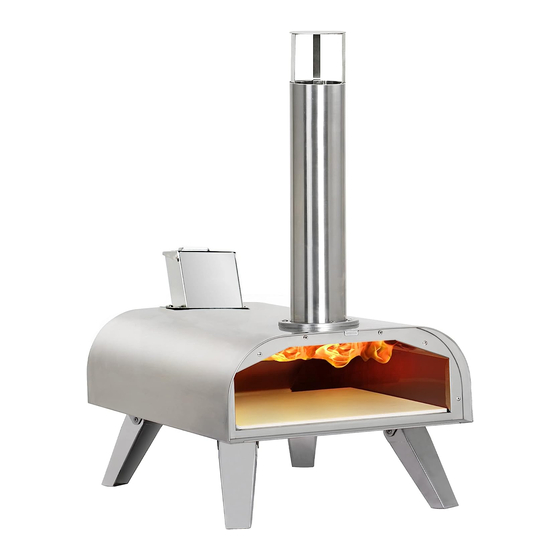
Pellet pizza oven
Hide thumbs
Also See for SRPG18003:
- User instruction manual (58 pages) ,
- Instruction manual (15 pages) ,
- Manual (32 pages)

Related Manuals for BIGHORN SRPG18003


Summary of Contents for BIGHORN SRPG18003
- Page 1 Pellet Pizza Oven Model# SRPG18003 Questions, problems, missing parts? Please kindly e-mail our customer service : cs@shinerichgroup.com.
-
Page 2: Before You Start
Before you start These instructions are for your safety. Please read through them thoroughly before use and retain them for future reference. Please dispose all plastic bags carefully and keep it away from children. Check the part and make sure you have all of the parts listed. If not, contact your local store who will be able to help you. Take a few moments to familiarize yourself with the contents &... - Page 3 Protection Always use heat resistant gloves when handling the product. Things to check before you start Please dispose all plastic bags carefully and keep it away fro m children. Check the part and make sure you have all of the parts listed. If not, contact our customer service department who will be able to help you.
-
Page 4: Product Maintenance
Product maintenance The golden rules for care Good and regular care can extend the life and maintain the condition of your pizza oven. IMPORTANT - Please note that it is normal, when in use, that the coated metal surfaces on the pizza oven may discolour due to the heat generated by the burning pellet. -
Page 5: Exploded View
Exploded View Parts List PART DESCRIPTION QUANTITY PART DESCRIPTION QUANTITY Pizza Oven Body Assembly Ash Tray Chimney Pipe Chimney Lid & Hopper Shovel Poker Hopper Assembly Pizza Stone Pellet Grid Door Door Handle Fire Box Assembly Handle M4 Bolt... - Page 6 Assembly Instructions Step 1 With assistance, place the pizza oven body assembly (A) upside down on a soft, level surface. Then open four legs (completed pre-installed) as illustrated. Step 2 Install the ash tray (H) to the pizza oven body assembly (A) as illustrated.
- Page 7 Assembly Instructions Step 3 Flip over the pizza oven body assembly (A) as illustrated. Step 4 Take out two M4x10 screws(M) from pizza oven body assembly(A), install the hopper assembly(D) to the pizza oven body assembly(A) with two M4x10 screws (M) as illustrated.
- Page 8 Assembly Instructions Step 5 Put the pizza stone (J) into the pellet pizza oven assembly (A) as illustrated. Step 6 Whirl the door handle (L) clockwise by hand to the door (K) as illustrated.
- Page 9 Assembly Instructions Step 7 Install and whirl the chimney pipe (B) clockwise by hand to the pizza oven body assembly (A) as illustrated. Step 8 Place the pellet grid (E) to the fire box assembly (G) first, then put into the pizza oven body assembly (A) as illustrated.
- Page 10 Assembly Instructions Step 9 Install the ash tray assembly handle (F) to the pizza oven body assembly (A) as illustrated. Step 10 The chimney lid & hopper shovel (C) can be used to cover the chimney pipe (B) , or to shovel particles as illustrated.
-
Page 11: Use Instruction
Use Instruction Cleaning 1.Make sure clean the ash inside the whole pizza oven carefully after each use, and tap the chimney pipe slightly to shake off the dust; 2.Clean the combustion chamber( where the food put inside) and pizza stone with kitchen paper; Lightening 1.Remove the hopper shovel(C) from the top of the chimney pipe(B);... - Page 12 Use Instruction 7.Close hopper lid with handle and wait for 8.When burning time exceeds 1 hour, please use the 2-3 minutes. When the flame being watched on poker to remove the ash/dust in the ash grid, so that top of the chimney again, it’s right time to cook it can achieve better burning with air venting.
- Page 13 Use Instruction 2. Cooking Steak 1) Put the marinated steak to pizza stone; 2) Close the door and cook 20 seconds, After 20 seconds, open the door and rotated the steak 180 degrees with tools, then close the door and cook another 20 seconds; 3) Flip over the steak and repeat above operateion for another side of the steak;...
-
Page 14: Warranty Information
Warranty Information The appliance has been manufactured under the highest standards of quality and workmanship. We warrant to the original consumer purchaser that all aspects of this product will be free of defects in material and workmanship for one year from the date of purchase. A replacement for any defective part will be supplied free of charge for installation by the consumer.
Need help?
Do you have a question about the SRPG18003 and is the answer not in the manual?
Questions and answers