Table of Contents
Advertisement
Quick Links
Advertisement
Table of Contents

Related Manuals for Belleze 050-HA-50036


Summary of Contents for Belleze 050-HA-50036
- Page 1 36" Fireplace Heater 42" Fireplace Heater FOLLOW US: CONTACT INFO: ITEM NO. 050-HA-50036 / 050-HA-50042 The instruction booklet contains IMPORTANT support@belleze.com @bellezefurniture safety information. Please read it in full and 1-800-682-6376 keep it for future reference. www.belleze.com...
- Page 2 Package Contents Installation...
- Page 3 READ ALL INSTRUCTIONS BEFORE USE AND KEEP THESE INSTRUCTIONS v.08112022...
- Page 4 Model No.: 050-HA-50 050-HA-50042 This device complies with Part 15 of the FCC Rules. Operation is subject to the following two conditions: (1) this device may not cause harmful interference, and (2) this device must accept any interference received, including interference that may cause undesired operation.
- Page 5 Assemble the furniture on an empty carton, carpet, or rug to prevent scratches or damage. For safety, please keep pets and children away from the assembly area. Ensure the product is fully assembled before use. If you are missing any hardware or products, do not use it until you have restored the missing parts.
-
Page 6: Technical Specification
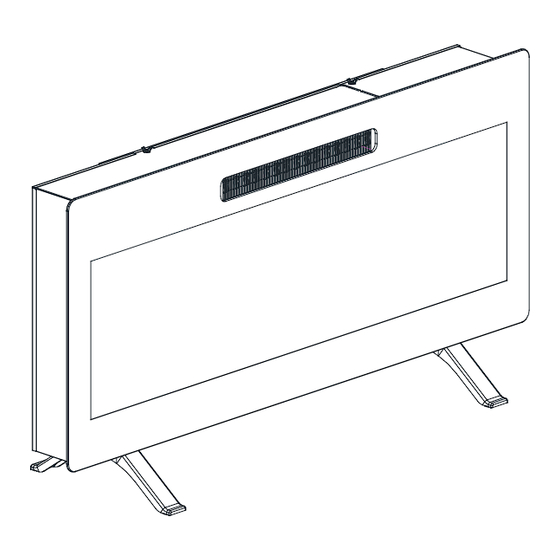
TECHNICAL SPECIFICATION Model Number 050-HA-50036 050-HA-50042 Dimensions(WxDxH) 36”x4.2”x16” 42”x4.2”x16” Net Weight 23.8 lbs 27.3 lbs Gross Weight 28.0 lbs 32.6 lbs Power Rating 1400 W 1400 W Voltage 120 V 120 V Frequency 60 Hz 60 Hz PACKAGE CONTENTS... - Page 7 PACKAGE CONTENTS CODE DESCRIPTION Heater Glass Front Panel Mounting Bracket Decorative Crystals 1 bag Table Top Support screw A screw B screw C screw D v.08112022...
-
Page 8: Installation (Table Top)
INSTALLATION (TABLE TOP) Required tools for assembly (Not included) Attach the table top supports underneath the heater. Place decorative crystals inside the heater. - Page 9 INSTALLATION (TABLE TOP) Put the glass front panel on the heater. ⚠ CAUTION Careful when handling glass to prevent injury or damage. Secure the glass front panel to the heater with the provided screws v.08112022...
-
Page 10: Installation (Wall Mounting)
INSTALLATION (WALL MOUNTING) Required tools for assembly (Not included) Remove the mounting bracket from the back of the heater. - Page 11 INSTALLATION (WALL MOUNTING) Attach the mounting bracket to a wall. NOTE: Wall anchor is not needed if the bracket is to be mount directly on the wall studs. Mount the heater to the mounting bracket. wall v.08112022...
- Page 12 INSTALLATION (WALL MOUNTING) Place decorative crystals inside the heater. Put the glass front panel on the heater. ⚠ CAUTION Careful when handling glass to prevent injury or damage.
- Page 13 INSTALLATION (WALL MOUNTING) Secure the glass front panel to the heater with the provided screws wall v.08112022...
-
Page 14: User Instruction
USER INSTRUCTION Before use • Check that the air intake and exhaust is not covered or obstructed in anyway. • Keep combustible objects at least 3 ft (0.9 m) away from the unit. • Plug the unit to a grounded power socket. Grounding •... - Page 15 USER INSTRUCTION (CONTROL PANEL) Brightness Timer Flame Button Button Button Ember Bed Heat Power Display Button Button Button Control Panel The control panel is located on the top right corner of the unit. all other buttons will light up. Power ON / OFF Press the power button to turn on the unit.
- Page 16 USER INSTRUCTION (CONTROL PANEL) Flame Control Press the Flame button multiple times to cycle through color rotation option (01), 15 color options (02, 03, 04, 05, 06, 06, 07, 08, 09,10, 11, 12, 13, 14, 15, 16) and flames OFF. Ember Bed Control Press the Ember Bed button multiple times to cycle through color rotation option (01), 15 color options (02, 03, 04, 05, 06, 06, 07, 08, 09, 10, 11, 12, 13, 14, 15, 16) and ember bed OFF.
- Page 17 USER INSTRUCTION (REMOTE CONTROL) Power Button Flame Button Heat Button Timer Button Ember Bed Button Brightness Button Speed Button Remote Control The operation of the remote control buttons work the same as the button on the control panel. NOTE: Remote control cannot be used to lock or unlock the heat function on the heater. NOTE: Remote control cannot be used to change temperature unit on the heater.
- Page 18 USER INSTRUCTION (REMOTE CONTROL) Install / Replace Battery The remote control is provided with 2 AAA batteries. 1. Press and slide off the back cover from the remote control. 2. Insert 2 AAA betteries into the battery compartment and make sure to intall batteries in the correct polarity.
-
Page 19: Troubleshooting
TROUBLE SHOOTING Error Code Possible Cause Solution The heater is overheating Call Customer Service NTC is defective Call Customer Service Make sure the vents are not dirty or clogged. Unplug the power and wait for 5 minutes. Plug in the power again and The heat is not working turn on the heater. - Page 20 FURNITURE CARE AND MAINTENANCE Thank you for your purchase. We want your item to last as long as possible. To ensure the product gives you years of longevity, please follow the recommendations in this care and maintenance guide. CLEANING • Always turn off and unplug the unit from the power outlet before cleaning.
- Page 21 © All copyright of this document belongs to BELLEZE . This document may not be printed, translated, reproduced, or distributed in whole or in part without written permission from BELLEZE. v.08112022...
-
Page 22: Warranty
WARRANTY BELLEZE products come with a 1-year warranty from the date of delivery. Register your product on our website to enjoy our limited lifetime warranty! AFTER-SALE SERVICE Encounter any difficulties or missing parts? Contact us at 1-800-682-6376 or email us at support@belleze.com We will send you replacement.
Need help?
Do you have a question about the 050-HA-50036 and is the answer not in the manual?
Questions and answers