Table of Contents
Advertisement
Quick Links
Advertisement
Table of Contents

Related Manuals for Belleze 050-FM18


Summary of Contents for Belleze 050-FM18
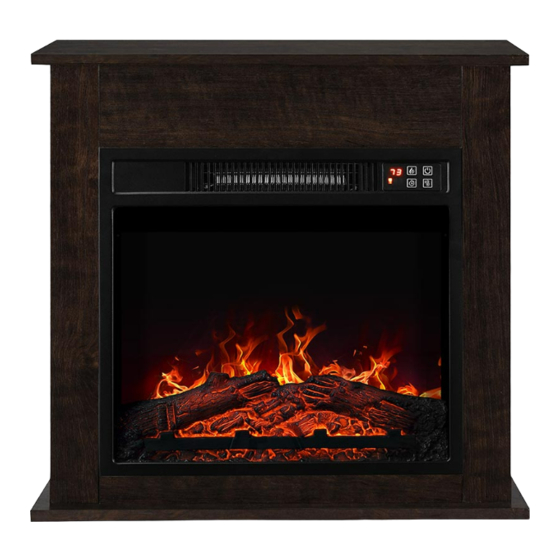
- Page 1 Mantel with 18” Insert Firebox item no. 050-FM18 www.bellezefurniture.com FOLLOW US: CONTACT INFO: NOTE: The instruction booklet contains IMPORTANT safety support@bellezefurniture.com @bellezefurniture 1-800-682-6376 information Please read and keep for future reference.
-
Page 2: Table Of Contents
Every Belleze product is carefully selected to ensure they meet our standards as well as your standards. We believe quality should never be determined by price which is why Belleze is committed to providing high end merchandise at the absolute lowest cost. PLEASE LIKE, COMMENT AND FOLLOW. -
Page 3: Safety Information
When using electrical appliances, basic safety precautions should always be followed including the following: READ ALL INSTRUCTIONS BEFORE USE 1. Read all instructions before using this ⚠ WARNING: There is no user serviceable heater. parts inside fireplace/heater. If the unit appears to malfunction, turn the unit off and unplug from 2. -
Page 4: Technical Specification
TECHNICAL SPECIFICATION Model Number 050-FM18 Dimensions (W x D x H) (FIREPLACE) 18.7” x 5.03” x 17.1” Power Rating 1400 W Voltage 120 V Frequency 60 Hz Weight Limitation Maximum Load 77 lb / 35 kg... -
Page 5: Package Content
PACKAGE CONTENT (FIREPLACE) Top Trim Side Trim (L/R) Fireplace Unit Screw x18 Remote Control... - Page 6 PACKAGE CONTENT (MANTEL)
- Page 7 CODE DESCRIPTION Top Panel Case Panel Side Panel Left Insert Baffle Right Insert Baffle Upper Insert Baffle Front Lower Panel Insert Holder CODE PICTURE DESCRIPTION Cam Bolt 18+1 Cam Lock 18+1 Wood Dowel Flat Head Screw Round Head Screw Metal Plate...
-
Page 8: Assembly Instruction
ASSEMBLY INSTRUCTION (MANTEL) Estimated Time for Assembly 35 - 40 min Tools Needed... - Page 13 ASSEMBLY INSTRUCTION Estimated Time for Assembly 20:00 STEP 1 Take out the unit from the box and layout all the spare parts for easy assembly. Make sure all small items are not left in packaging materials. ⚠CAUTION • This unit has a glass front panel. Use extreme caution when handling glass to prevent personal injury or damage.
- Page 14 STEP 3 Carefully set the unit from the back of the mantel and center it in the opening. Check the alignment and attach the unit to the mantel by inserting screws through the drilled holes on the trim to the mantel. NOTE: Do not attempt to install the unit from the front of the mantel.
-
Page 15: Users Instruction
USER INSTRUCTION Before use Check that the air intake and exhaust is not covered or obstructed in anyway. Keep combustible objects at least 3ft away from the unit. Plug the unit to a grounded power socket. Grounding This product must be grounded. If it should malfunction or breakdown, grounding provides a path of least resistance for electric current to reduce the risk of electric shock. -
Page 16: Control Panel
USER INSTRUCTION (CONTROL PANEL) Flame Control Power Button Display Function Indicator Heater Control Timer Control Control Panel The control panel is located on the top right corner of the unit. Power ON / OFF Press the power button to turn on the unit. Press again to turn off the unit. NOTE: There is a thermostat limiter inside the unit. - Page 17 Heater Control Press the heater control to turn on and off the heater. When the heater is turned on, press and hold the heater control button for 5 seconds to enter temperature adjustment mode. The LED indicator is red. In adjustment mode, the display will flashes.
-
Page 18: Remote Control
USER INSTRUCTION (REMOTE CONTROL) Heater Control Power Button Heater Up Flame Control Heater Down Timer Control Remote Control The operation of the remote control buttons work the same as the button on the control panel. NOTE: The remote control cannot be used to switch between degree Fahrenheit and degree Celsius. -
Page 19: Care And Maintenance
CARE AND MAINTENANCE Cleaning the unit: Always turn off and unplug the unit from power outlet before cleaning. Allow the unit to cool down completely before performing any maintenance or cleaning. Use a vacuum cleaner or duster to regularly remove any accumulated dust on the unit Use a damp soft cloth to clean the surface and buff with a dry cloth. - Page 20 Warranty Belleze products come with a 1 year warranty from the date of purchase. In any event that the product arrives damaged or missing parts, we are more than happy to provide you with replacement part(s). Register your product on our website to enjoy extended warranty!!
Need help?
Do you have a question about the 050-FM18 and is the answer not in the manual?
Questions and answers