Advertisement
Quick Links
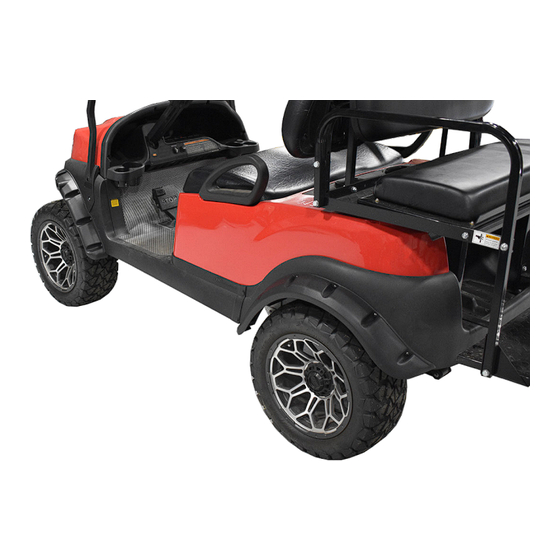
Part# 03-099
FENDER FLARES will fit CLUB CAR
TEMPO
®
®
Installation Instructions
included:
Optional Orange Reflectors
Rear Fender Flares
20 x Mounting Screws
Front Fender Flares
We recommend professional installation. If you choose to not have this product installed by a professional, we
highly recommend that you exercise caution, care, and patience when installing this product as it involves drilling
holes into your car's body.
(A)
Driver side Front
The back side of each Fender Flare is
marked with it's abbreviated location. FL
is for Front Left (Driver side), front flares
also have a molded in reflector that can be
changed out to the supplied orange lens if
desired.
(B)
A) Hold the fender flare in place using the
middle notched section
middle notched section to clear the strut
cover and the bottom flange
bottom flange to hook under
the front edge of the side skirt. Front point of
flare should meet bottom edge of front fasci.
Make sure all screw holes are positioned
over the plastic fascia/side skirt and mark
mounting locations.
(C)
B) Using a 1/8" bit, drill out the mounting
positions for screws to avoid chewing of
plastic fascia/side skirts.
C) Secure Fender Flare to cart using a #3
Phillips tip and supplied mounting screws.
Repeat on Passenger side.
Advertisement

Related Manuals for GTW 03-099


Summary of Contents for GTW 03-099
- Page 1 Part# 03-099 FENDER FLARES will fit CLUB CAR TEMPO ® ® Installation Instructions included: Optional Orange Reflectors Rear Fender Flares 20 x Mounting Screws Front Fender Flares We recommend professional installation. If you choose to not have this product installed by a professional, we highly recommend that you exercise caution, care, and patience when installing this product as it involves drilling holes into your car’s body.
- Page 2 Driver side Rear Find the Fender Flare marked RL, for Rear Left (Driver side). A) Hold the fender flare in place using the bottom flange bottom flange on the front end of flare to hook under the underbody. The rear pointed edge of flare will be flush with rear underbody.
Need help?
Do you have a question about the 03-099 and is the answer not in the manual?
Questions and answers