Table of Contents
Advertisement
Quick Links
Advertisement
Table of Contents

Related Manuals for Teledyne LightHawk 560ES


Summary of Contents for Teledyne LightHawk 560ES
- Page 1 ® LightHawk 560ES/560DI Compliance Opacity Monitor Operations Manual...
- Page 2 (This page intentionally left blank.)
- Page 3 SERIAL NUMBER: _____________________ DOCUMENT NO.: 1860-3410-01 REV B...
- Page 4 July 2015 Proprietary Information. All rights reserved by Teledyne Monitor Labs. No part of this book may be reproduced or copied in any form or by any meansgraphic, electronic, or mechanical, including photocopying, taping, or information storage and retrieval systemswithout written permission of the publisher.
-
Page 5: Table Of Contents
TABLE OF CONTENTS Page 1.0 SYSTEM OVERVIEW ......................... 1-1 1.1 System Description, Standard Equipment ................... 1-2 1.1.1 Optical Head Assembly ....................1-2 1.1.2 Retroreflector Assembly ....................1-3 1.1.3 Protective Purge Air System (Single) ................1-3 1.1.4 Enhanced Remote Panel with Multi I/O Board.............. 1-3 1.1.4.1 Ethernet Module ...................... - Page 6 TABLE OF CONTENTS (Continued) Page 4.4.2 Main Menu Screen ...................... 4-16 4.4.3 Service Data Menu ...................... 4-16 4.4.4 View Service Data ....................... 4-16 4.4.5 View Head Mode ......................4-16 4.4.6 View Audit Data ......................4-16 4.4.7 Change Attenuator Values ..................4-17 4.4.8 Clear Audit Data ......................
- Page 7 6PT I/O APPENDIX A, Specifications • SIX POINT I/O BOARD ANALOG OUTPUTS • SIX POINT I/O BOARD DIGITAL INPUTS • SIX POINT I/O BOARD RELAY OUTPUTS • SIX POINT I/O BOARD DEFAULT JUMPER SETTINGS 6PT I/O APPENDIX B, DRAWINGS Description 6PT I/O LOCATION 6PT I/O WIRING DIAGRAM TABLE OF CONTENTS...
- Page 8 TABLE OF CONTENTS (Continued) Page 9.8 Cal Mechanism Neutral Density Window Replacement ............9-18 9.9 Cal Kit Neutral Density Window Replacement ................9-20 9.10 Off-Stack Calibration History ....................9-22 10.0 INSTALLATION ........................10-1 10.1 Flange Mounting ........................10-1 10.1.1 Mounting Pipe Considerations ..................10-1 10.2 Distance Determination ......................
- Page 9 ® 1802-0015 3 of 3 LightHawk 560 Retro Installation (With Shutter Hi-Temp) 1803-2003 2 of 2 Enhanced Remote Panel Assembly ® 560DI Opacity w/Blower(s) 1860-0001 1 of 4 Wiring Diagram LightHawk ® 1860-0001 2 of 4 Wiring Diagram LightHawk Opacity w/Remote Display and Blower(s) ®...
-
Page 10: System Overview
SECTION 1.0, SYSTEM OVERVIEW 1.0 SYSTEM OVERVIEW This manual describes the installation, operation, calibration and routine ® maintenance of the Teledyne Monitor Labs LightHawk Model 560ES Opacity/Dust Monitor. This instrument is based on the principle of transmissometry. A light beam with specific spectral characteristics is projected through the effluent stream of a stack or duct exhausting combustion or process gases. -
Page 11: System Description, Standard Equipment
® LIGHTHAWK 560ES OPACITY/DUST MONITOR Optional items include: Protective Purge Air System (Dual) Weather Cover Retro Purge Shutter Assemblies (Optical Head and Retroreflector) Instrument Air Purge System High Efficiency Purge Air Filtration System Hinged Fiberglass Weather Covers ... -
Page 12: Retroreflector Assembly
SECTION 1.0, SYSTEM OVERVIEW beam travels through the medium twice before it is measured by the Optical Head circuitry. A numeric display and keypad are available for operator interface. Data transfer with the Enhanced Remote Panel, or other optional components, is via a commercial network communication protocol. -
Page 13: Calibration Kit
® LIGHTHAWK 560ES OPACITY/DUST MONITOR 560ES. At the same time the Ethernet Module can provide HTML web pages for user interface and fast Modbus TCP access to instrument data and parameters. The details of this powerful ERP feature are described in its own instruction manual which is provided with the instrument. -
Page 14: Specifications (Standard System)
SECTION 1.0, SYSTEM OVERVIEW 1.2 SPECIFICATIONS (STANDARD SYSTEM) PHYSICAL DIMENSIONS Optical Head (w/o Purge Shutter) 17”(423mm)(L) X 9-1/4”(235mm)(W) X 15”(381mm)(H) Optical Head (with Purge Shutter) 22”(559mm)(L) X 9-1/4”(235mm)(W) X 15”(381mm)(H) Retro Assembly (w/o Purge Shutter) 10”(254mm)(L) X 7”(178mm)(Diameter) Retro Assembly (with Purge Shutter) 15”(381mm)(L) X 7”(178mm)(Diameter) Single Purge Blower Assembly 22-1/4”(565mm)(L) X 20”(508mm)(W) X 33”(838mm)(H) - Page 15 ® LIGHTHAWK 560ES OPACITY/DUST MONITOR AMBIENT OPERATING CONDITIONS ° ° Optical Head Temperature Range:-4 to +140 F (-20 to +60 C)(startup) ° ° -25 to +140 F (-32 to +60 C)(operating) Relative Humidity Range: 0 to 100% condensing ° ° Enhanced Remote Panel Temperature Range: +32 to +104...
- Page 16 SECTION 1.0, SYSTEM OVERVIEW MULTI I/O BOARD ANALOG OUTPUTS Number Isolation Type Optical & capacitive barriers; channel to channel, channel to circuit common & earth Minimum Isolation Voltage 500Vpeak*, 500VDC* Output Type 4-20mA with live 4mA zero Maximum Load Resistance 900 ohms Maximum Offset ±0.05% of full scale...
-
Page 17: Measurement Units
® LIGHTHAWK 560ES OPACITY/DUST MONITOR 1.3 MEASUREMENT UNITS The amount of light received after passage through the gas stream is compared with the light returned when no effluent is present. This is an indication of the transmittance of the effluent. The amount of attenuation is defined as opacity and is usually expressed as a percentage. -
Page 18: Correction For Exit Path Length
SECTION 1.0, SYSTEM OVERVIEW 1.3.1 Correction for Exit Path Length In many applications the path length where the effluent exits to the atmosphere is different from the path length at the monitor location. Most opacity emission regulations are specified to be in terms of the opacity at the stack exit. In order to make this correction properly, the distance the light is traveling through the medium (inside dimension of the stack or duct) at the measurement path must be monitoring pathlength... -
Page 19: Optional Equipment
SECTION 2.0, OPTIONAL EQUIPMENT 2.0 OPTIONAL EQUIPMENT ® The components listed below are optional on the LightHawk 560ES Opacity/Dust system. They are not included on a standard system. Please consult the Site Specification Data Sheets in the back of this manual for the details of your particular system. -
Page 20: Hinged Fiberglass Weather Covers
Also available in a side hinge design. Consult Teledyne Monitor Labs for additional pricing, clearance and application information. -
Page 21: Optical Head Transport Cover
SECTION 2.0, OPTIONAL EQUIPMENT 2.10 OPTICAL HEAD TRANSPORT COVER The Rear Optical Section Transport Cover is a very useful optional device. It may be used whenever the Rear Optical Section of the transceiver is removed from the stack for maintenance, calibration or repair. The cast aluminum Transport Cover will protect the exposed Cal Mechanism and optical surfaces while providing a convenient and secure carrying handle to facilitate safe... - Page 22 ® LIGHTHAWK 560ES OPACITY/DUST MONITOR (This page intentionally left blank.) ® SEC 2 LIGHTHAWK 560ES OPTIONS.DOC...
-
Page 23: Optical Head Assembly
SECTION 3.0, OPTICAL HEAD ASSEMBLY 3.0 OPTICAL HEAD ASSEMBLY 3.1 OVERVIEW Section 3.0 describes the Optical Head mechanical, optical, electrical and user interface configurations. It also defines the Optical Head status and mode codes and status LEDs. A numeric display and keypad are mounted directly on the ®... -
Page 24: Electrical Description
® LIGHTHAWK 560ES OPACITY/DUST MONITOR Figure 3-1 3.4 ELECTRICAL DESCRIPTION The electrical configuration of the Optical Head includes connections for AC power wiring from user supplied circuits, internal signal processing electronics and Calibration Mechanism drive and position decode circuitry. 3.4.1 AC Power Connections The Optical Head has been designed to operate over a wide range of international power supply ranges and frequencies without the need for modifications or adjustments. -
Page 25: Simulated Zero/Upscale Device Drive Components
SECTION 3.0, OPTICAL HEAD ASSEMBLY 3.4.3 Simulated Zero/Upscale Device Drive Components A DC motor and associated position encoder are also located inside the Rear Optical Section cover. They drive and control the simulated zero/upscale device position. The position signals are transmitted through the Optical Amplifier Board and allow the signal processing electronics to determine whether the detector signals are being generated from the cross stack Retroreflector or the zero/upscale device. -
Page 26: User Interface Description
® LIGHTHAWK 560ES OPACITY/DUST MONITOR 3.5 USER INTERFACE DESCRIPTION The Optical Head Assembly user interface consists of a six character LED display and a keypad for data entry and display control. 3.5.1 Six Character LED Display The Optical Head Assembly contains a 6 character, 7 segment display and a keypad. - Page 27 SECTION 3.0, OPTICAL HEAD ASSEMBLY "DISP": Increments the variable number and bank displayed, when used in conjunction with the ↑ ↓ or ← keys. "↑": Increases the value of the parameter displayed. For example if the value of location F3 is 1.32, pressing "↑" increases the F3 value to 1.33.
- Page 28 ® LIGHTHAWK 560ES OPACITY/DUST MONITOR DISPLAY*LEFT: Toggles the display from User data (U) to Service data (S) and parameter (F, C, A) banks when pressed and held for about a second. After 10 minutes with no keypad activity, the display defaults back to the User data bank (U).
-
Page 29: Status Leds
SECTION 3.0, OPTICAL HEAD ASSEMBLY this key combination to propagate the data value over the network. 3.5.3 Status LEDs The status LEDs in the Optical Head overlay are defined as follows: IN CAL: Lights when the calibration mechanism is in UPSCALE or ZERO position. - Page 30 ® LIGHTHAWK 560ES OPACITY/DUST MONITOR A laminated card describing the memory location definitions and display information is secured at the Optical Head for quick reference. 3.5.4.1 Data Codes Data are not user configurable. They are primarily measurements that the instrument produces. There are two data banks: 1.
- Page 31 SECTION 3.0, OPTICAL HEAD ASSEMBLY Primary Status Code Primary Status Code Definition The following is the definition of the 4 digit Status Code displayed at location U3. 4 X X X = CLEAR STACK SET voltage out of range 2 X X X = BACKGROUND SET in progress 1 X X X = ZERO SET in progress X 4 X X = CLEAR STACK SET in progress X 2 X X = UPSCALE position not achieved...
- Page 32 ® LIGHTHAWK 560ES OPACITY/DUST MONITOR Mode Code Mode Code Definition The following is the definition of the 4 digit Mode Code displayed at location U5. Calibration Mechanism Condition XXX0 = Unknown Mode XXX1 = NORMAL (Stack) Mode XXX2 = ZERO Calibration Mode XXX3 = UPSCALE Calibration Mode Audit Mode Filter Value X0XX = ZERO VALUE or Not in Audit Mode...
- Page 33 SECTION 3.0, OPTICAL HEAD ASSEMBLY Last UPSCALE Calibration {UPSCALE Optical Density}[UPSCALE Particulate Mass] Dust Compensation {Dust Comp. Optical Density}[Dust Comp. Particulate Mass] ML Correction Factor {Particulate Mass Load Correction Factor} [multiplicative correction of Particulate Mass data to standard temperature and pressure conditions] 332 Version.
- Page 34 ® LIGHTHAWK 560ES OPACITY/DUST MONITOR Stack Temperature, °C Stack Pressure, kPa 3.5.4.2 Parameter Codes Parameters are configuration-oriented variables. All are user configurable only after password entry, except F7 (PLCF), which must be factory configured. They are divided into F, C and A Banks, where F represents Fundamental, C represents Calibration and A signifies Auxiliary.
- Page 35 SECTION 3.0, OPTICAL HEAD ASSEMBLY Signal Gain Reference Gain Common Gain Averaging Interval, minutes Reference Temperature, °C Reference Pressure, kPa Six Point I/O Full Scale (may be % opacity, optical density, or mg/^3 depending on Measurement Unit [F0]) Six Point I/O Zero/Dust Comp Scaling Flag (0 = NORMAL mode scaling;...
- Page 36 ® LIGHTHAWK 560ES OPACITY/DUST MONITOR 3.5.4.2.3 A Bank (Auxiliary Parameter Bank) Instantaneous Alarm 1 Level Selectable Average Alarm 1 Level Password: (Password = 9860, expires after 2 hour boundaries are crossed, cleared at RESET) A3 through A8 contain the three point Optical Density to Particulate Mass correlation curve X1, Input Point #1, Optical Density Y1, Output Point #1, Particulate Mass, mg/m^3...
-
Page 37: Enhanced Remote Panel With Multi I/Omodule
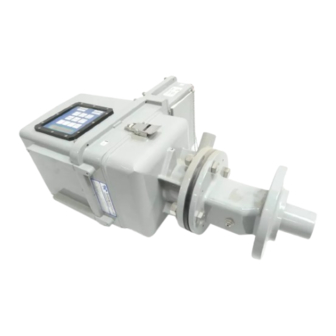
SECTION 4.0, ENHANCED REMOTE PANEL W/MULTI I/O MODULE 4.0 ENHANCED REMOTE PANEL WITH MULTI I/O MODULE 4.1 OVERVIEW The Enhanced Remote Panel is menu driven. It features a touch sensitive keypad, a 4 ½” (11.4 cm) LCD display, key lockout, RS-232 and RS-422/485 serial communication capability, and a commercial network communication node. -
Page 38: Electrical Description
® LIGHTHAWK 560ES OPACITY/DUST MONITOR Power Entry Module Keypad / Front Panel Assembly Ethernet Module Board 4.3 ELECTRICAL DESCRIPTION 4.3.1 Input Power Requirement The Enhanced Remote Panel has been designed to operate over a wide range of international power supply ranges and frequencies without the need for modifications or adjustments. - Page 39 SECTION 4.0, ENHANCED REMOTE PANEL W/MULTI I/O MODULE 4.3.2.5 Power Supply Board The Power Supply Board produces the +5 VDC logic power for the Enhanced Remote. It has two connectors -- one for input and one for output. The input wires come from the input power module that contains the line cord connector power switch, and initial filtering.
- Page 40 ® LIGHTHAWK 560ES OPACITY/DUST MONITOR RS-422 ports. The RS-422 port can be converted to a RS-485 port with an internal jumper located on the Mother Board. The protocol is strictly a polled mode. The user sends a command in ASCII characters in the format ‘nnn?<CR>’, where nnn is a number from 1 to 255 from a list of available network variables provided to the user, and <CR>...
- Page 41 SECTION 4.0, ENHANCED REMOTE PANEL W/MULTI I/O MODULE RS 232 Surge Protection Serial Port Reset Buffer Driver To keypad rows Processor Processor Interface Buffer To keypad columns Driver Processor Serial Comm. Port 422 or 485 Intensity Driver Surge Data Converter Buss Protection Buffer...
- Page 42 ® LIGHTHAWK 560ES OPACITY/DUST MONITOR Enhanced Remote Display Mother Board Jumper Definitions Jumper # Selections Functional Description IRQ1 IRQ2 IRQ3 IRQ4 IRQ5 IRQ6 Out Selects IRQ for reset signal IRQ1 IRQ2 IRQ3 IRQ4 IRQ5 IRQ6 RS422/485 Receive IRQ Selects where to send received data UART UART Selects UART or TPU data for transmit to J6...
- Page 43 SECTION 4.0, ENHANCED REMOTE PANEL W/MULTI I/O MODULE The Multi I/O is capable of driving eight digital outputs (dry relay contacts) and four analog outputs. It can read up to eight digital inputs. The digital inputs are jumper configurable to be either dry contacts or 0 – 5 VDC signals. Dry contacts are standard.
- Page 44 ® LIGHTHAWK 560ES OPACITY/DUST MONITOR Multi I/O Test Point Descriptions Test Point # Functional Description Output 24vdc isolated drive voltage for analog output #1. Referenced to TP2 GND reference for TP1 and all points within #1 output circuit Output #1 TP3 &...
- Page 45 SECTION 4.0, ENHANCED REMOTE PANEL W/MULTI I/O MODULE The Optical Head Mode Change and Analog Output Isolators operate independently. If an Optical Head Mode Change Isolator is actuated simultaneously with an Analog Output Isolator, both commands will be issued without interference with the other. For interpretation of simultaneous actuation of Isolator Inputs of the same type, consult both isolator tables.
- Page 46 ® LIGHTHAWK 560ES OPACITY/DUST MONITOR Optical Head Mode Change Isolators Table Input #1 Input #2 Input #3 Input #4 Input #5 Command No action results. No command request recognized. FORCE UPSCALE FORCE ZERO DUMP DUST COMPENSATION DUMP PLCF DUMP DUST COMPENSATION FORCE CAL CYCLE All other combinations of Inputs #1 through #5.
- Page 47 SECTION 4.0, ENHANCED REMOTE PANEL W/MULTI I/O MODULE Parameters for Analog Output Parameter Name Functional Description Instant Opacity Instantaneous opacity corrected for the system’s PLCF. Update time is 6-8 seconds. Minute Ave Opacity A one minute average of the instantaneous opacity reading. This value is PLCF corrected. The period is minute to minute according to the real time clock in the Optical Head.
- Page 48 ® LIGHTHAWK 560ES OPACITY/DUST MONITOR Multi I/O Output Modes Mode Analog Output Function Digital Output Function NORMAL MODE Causes the analog outputs to display the data that they are Any relay configured for one of Initiated by: configured for under normal operation. the calibration modes will drop Enhanced Remote Display out if already actuated.
-
Page 49: Operational Description
SECTION 4.0, ENHANCED REMOTE PANEL W/MULTI I/O MODULE Zero and Dust Compensation Calibration Scaling Table “WITH” Field in Output Value at ZERO SCALE (4mA) During Value at FULL SCALE (20mA) During Module Configuration Zero and Dust Compensation Modes Zero and Dust Comp. Modes Equal to NORMAL mode ZERO SCALE Equal to NORMAL mode FULL SCALE (typically 0% opacity) - Page 50 ® LIGHTHAWK 560ES OPACITY/DUST MONITOR 4.4.1.1 Memory Test The memory test runs at power up before the logo screen is displayed. It tests all the used areas of the RAM ICs. If they pass, a message is briefly displayed on the screen before the logo.
- Page 51 SECTION 4.0, ENHANCED REMOTE PANEL W/MULTI I/O MODULE ® LightHawk 560ES Menu Tree Main Main Main Main Main Main Display Display Display Display Display Display Page #1 Page #2 Page #5 Page #6 Page #3 Page #4 View Alarms MAIN History Service Data 1-20 pages...
-
Page 52: Main Menu Screen
® LIGHTHAWK 560ES OPACITY/DUST MONITOR 4.4.2 Main Menu Screen This is the first level of the menu structure. From this screen you can choose one of the submenus that lead to the information of interest. For a detailed description of the information available under a particular sub menu refer to the section about that submenu. -
Page 53: Change Attenuator Values
SECTION 4.0, ENHANCED REMOTE PANEL W/MULTI I/O MODULE screen is for assistance and reference during the audit process and is not suitable as actual quarterly audit data. Audits are typically conducted using three values of attenuators: LOW, MID and HIGH. Five runs of each attenuator are typically performed. As each analyzer response to an attenuator is received from the Optical Head Assembly, it is displayed in the appropriate row and column. -
Page 54: Output & Cal Tests
® LIGHTHAWK 560ES OPACITY/DUST MONITOR continuously. The CURRENT STATUS word will be equal to the sum of the active codes on both pages. For example a “7” in any status word digit would mean that three errors were present, the 1, 2, and 4 errors of that digit. Use the “Page Up”... -
Page 55: Analog Outputs 1,2
SECTION 4.0, ENHANCED REMOTE PANEL W/MULTI I/O MODULE This menu allows you to choose between the four configuration menus of the output module. The menus titled ANALOG OUTPUTS 1, 2 and ANALOG OUTPUTS 3, 4 configure their respective analog output parameter mapping and scaling. -
Page 56: Analog Outputs 3,4
® LIGHTHAWK 560ES OPACITY/DUST MONITOR 4.4.13 Analog Outputs 3,4 This screen is password protected. The ANALOG OUTPUTS 3,4 menu screen functions exactly the same as the ANALOG OUTPUTS 1,2 menu screen. Only the output # references have changed. Refer to the Analog Outputs 1,2 section for ®... -
Page 57: View System Properties
SECTION 4.0, ENHANCED REMOTE PANEL W/MULTI I/O MODULE CONFIG. with the “↑” or “↓” keys and press “↵”. Press ESC to leave this screen when you are done. 4.4.17 View System Properties This screen is provided to view the opacity system set points. It is view only. No set point changes are permitted from this screen. -
Page 58: Change Optics Properties
® LIGHTHAWK 560ES OPACITY/DUST MONITOR diagram of Section 4.0 to find the menu/submenu location of individual screens.) 4.4.20 Change Optics Properties ® This screen is password protected. (Consult the LightHawk 560ES Menu Tree diagram of Section 4.0 to find the menu/submenu location of individual screens.) There are three parameters available on the screen: SIGNAL GAIN, REFERENCE GAIN and COMMON GAIN. -
Page 59: Change Password
SECTION 4.0, ENHANCED REMOTE PANEL W/MULTI I/O MODULE respectively. Year is displayed as a two-digit field but four-digit entry, i.e.,2000, 2001, etc. is supported and encouraged. Use the "↑" and "↓" keys to select a field and the numerical keys to enter the values for all data fields except month, which is changed by the "Page Up"... -
Page 60: View Part. Mass Points
® LIGHTHAWK 560ES OPACITY/DUST MONITOR ® “ESC” to exit this screen. (Consult the LightHawk 560ES Menu Tree diagram of Section 4.0 to find the menu/submenu location of individual screens.) 4.4.25 View Part. Mass Points This screen is for viewing the points used to develop the correlation curve that converts Optical Density into Particulate Mass loading. -
Page 61: Display Properties Menu
SECTION 4.0, ENHANCED REMOTE PANEL W/MULTI I/O MODULE X3,Y3 X2,Y2 X1,Y1 Optical Density Figure 4-2 Particulate Mass / Optical Density Correlation Curve 4.4.27 Display Properties Menu This screen permits adjustment of the Brightness and Contrast of the Display. Use the “↑” and “↓” keys to select the parameter you want to adjust. Then use the “Page Up”... -
Page 62: View Alarm Set Points
A full description of these errors is beyond the scope of this manual. If necessary, please consult Teledyne Monitor Labs technical support for more information. The lower portion of this page shows the software versions being run by each of the systems processors. -
Page 63: View Status History
SECTION 4.0, ENHANCED REMOTE PANEL W/MULTI I/O MODULE ® (Consult the LightHawk 560ES Menu Tree diagram of Section 4.0 to find the menu/submenu location of individual screens.) 4.4.32 View Status History This screen has up to twelve pages depending on the number of system status changes that have taken place. - Page 64 ® LIGHTHAWK 560ES OPACITY/DUST MONITOR (This page intentionally left blank.) ® 4-28 SEC 4 LIGHTHAWK 560ES ERP VER 2.DOC...
-
Page 65: Overview
SECTION 5.0, SIX POINT I/O BOARD 5.0 SIX POINT I/O BOARD FOR 560DI SYSTEM 5.1 OVERVIEW ® This chapter describes the Six Point I/O Board (6PIO) in the LightHawk 560ES system. The Six Point I/O Board (P/N 1860-0700) is used in Direct Interface ®... -
Page 66: Analog Output Current Range Selection
® LIGHTHAWK 560DI OPACITY/DUST MONITOR 5.2.2 Analog Output Current Range Selection Two output current options are available from the 6PIO Board (either 4 – 20mA or 0 – 20mA). This range will apply to any measurement unit configuration selected above. Both analog channels are configured identically and the current range selected by the placement of jumper JU9 on the 6PIO Board. -
Page 67: Discrete Isolator Inputs And Jumper Settings Effect On Analog Outputs
SECTION 5.0, SIX POINT I/O BOARD ZERO UPSCALE PLCF DUST Analog Output Normal Relay Zero Relay Upscale Relay Relay Figure 5-1 560ES Analog Output Cal Cycle Sequence PLCF scaling for the Analog Output Cal Cycle (AOCC) is fixed and not user adjustable due to security considerations. - Page 68 ® LIGHTHAWK 560DI OPACITY/DUST MONITOR • FORCE UPSCALE and FORCE ZERO: (JU7 in position “A”, JU8 in position “A”, Isolators 1 and 2 engaged): The calibration mechanism moves to NORMAL position. Real time stack data appears on the LED readout and on analog output #1.
-
Page 69: Other Jumpers That Effect Analog Outputs
SECTION 5.0, SIX POINT I/O BOARD Available Jumper Position Function Isolator JU7 “A” FORCE UPSCALE ISO1 JU8 “A” FORCE ZERO ISO2 JU7 “B” or JU8 “B” DUMP PLCF ISO1 or ISO2 JU8 “C” DUMP DUST ISO2 JU7 “C” FORCE CALIBRATION CYCLE ISO1 Table 4-2 Isolator Configuration Jumpers... -
Page 70: Relay Outputs
® LIGHTHAWK 560DI OPACITY/DUST MONITOR 5.4 RELAY OUTPUTS Two relays are available. Contacts are SPDT Form C. The configuration of the relays is jumper selectable per the following table. K1 (JU12 position) K2 (JU13 position) Function Calibration Data on Analog Outputs Instrument Malfunction (Not Fail-safe) Instantaneous Alarm 1 Actuated Selectable Average Alarm 1 Actuated... -
Page 71: Data Cables
4 conductor #20 AWG (0.5 mm ) cable for connecting the contacts from the two relays. The other one Teledyne Monitor Labs recommends is a 6-pair #24 AWG (0.25 mm ) shielded cable for connection to the two analog outputs and two isolators. - Page 72 ® LIGHTHAWK 560DI OPACITY/DUST MONITOR Appendix A Six Point I/O Board Specifications SIX POINT I/O BOARD ANALOG OUTPUTS Number Isolation Type Optical & capacitive barriers; channel to channel, channel to circuit common & earth Minimum Isolation Voltage 500Vpeak*, 500VDC* Output Type 4-20mA with live 4mA zero, OR 0-20mA w/o live zero Maximum Load Resistance 900 ohms...
- Page 73 SECTION 5.0, SIX POINT I/O BOARD (This page intentionally left blank.) ® SEC 5 LIGHTHAWK 560DI SIX POINT IO.DOC...
- Page 74 ® LIGHTHAWK 560DI OPACITY/DUST MONITOR APPENDIX B DRAWINGS ® 5-10 SEC 5 LIGHTHAWK 560DI SIX POINT IO.DOC...
- Page 75 SECTION 5.0, SIX POINT I/O BOARD 6PT I/O PC BOARD LOCATION ® SEC 5 LIGHTHAWK 560DI SIX POINT IO.DOC 5-11...
- Page 76 ® LIGHTHAWK 560DI OPACITY/DUST MONITOR 6PT I/O WIRING DIAGRAM ® 5-12 SEC 5 LIGHTHAWK 560DI SIX POINT IO.DOC...
-
Page 77: Purge System Overview
SECTION 6.0, PURGE SYSTEM OVERVIEW 6.0 PURGE SYSTEM OVERVIEW The Protective Purge Air System provides clean air to both the Optical Head and Retroreflector Assemblies. The filtered air is directed in a way that prevents the sample medium from touching the optical surfaces. The purge air is injected into the stack through the nozzles of the Optical Head and Retroreflector Assemblies. -
Page 78: Operation
® LIGHTHAWK 560ES OPACITY/DUST MONITOR 6.3 OPERATION The air intake filter and purge system must be maintained in good working condition in order to adequately protect the Optical Head and Retroreflector Assemblies. NOTE: Interruption of the Protective Purge Air System requires immediate corrective action by the user. -
Page 79: Instrument Air Purge Option
SECTION 6.0, PURGE SYSTEM OVERVIEW NOTE: The Purge Air Shutters are designed to provide short-term protection for the optical components in the case of a purge air failure. “Purge Fail” faults must be evaluated and corrected immediately in order to prevent significant damage to the stack mounted equipment. - Page 80 ® LIGHTHAWK 560ES OPACITY/DUST MONITOR (This page intentionally left blank.) ® SEC 6 LIGHTHAWK 560ES PURGE SYS.DOC...
-
Page 81: Calibration Kit Overview
SECTION 7.0, CALIBRATION KIT OVERVIEW 7.0 CALIBRATION KIT OVERVIEW The Calibration Kit consists of a black external zero device fixture and a filter case. The fixture is made to mount on the Optical Head to simulate a clear path zero condition and hold the calibrated attenuators used to check system response. -
Page 82: Storage
® LIGHTHAWK 560ES OPACITY/DUST MONITOR pins go into the subassembly face to their full extent before beginning to tighten the thumbscrew by hand. A small common screwdriver may be used to tighten the captive thumbscrew to hold the fixture firmly in place. CAUTION: Take care not to over torque the thumbscrew as this may damage the threads in the instrument mounting plate. -
Page 83: Maintenance & On-Stack Calibration
30.0 and 35.0 mA, currents of up to 40.0 mA are perfectly normal for your monitor and do not require readjustment. LED currents beyond 40 mA should be investigated and Teledyne Monitor Labs recommends an Off- Stack Calibration described in Section 8.0 of this manual. - Page 84 When it indicates a pink color, it is completely spent. The desiccator will prevent moisture from condensing on the optical surfaces inside the Rear Optical section. Teledyne Monitor Labs recommends the desiccator be changed if it is not blue, or whenever the rear cover is removed.
- Page 85 SECTION 8.0, MAINTENANCE & ON-STACK CALIBRATION 4. Alignment Optical Head Assembly The across stack alignment of the Optical Head is performed by observing the Retroreflector image through the eyepiece and adjusting the Optical Head mounting nuts, that rest against the swivel washers on the four mounting bolts, which support the Optical Head Assembly on the blower plate.
- Page 86 ® LIGHTHAWK 560ES OPACITY/DUST MONITOR Retroreflector Assembly Retroreflector Assembly alignment is achieved by use of the Integral Retro Alignment Site. The Retro Alignment Site provides a visual indication during alignment. The alignment sight protrudes from the rear of the Retro Cap and has a frosted glass screen. The frosted glass screen has a circular target etched into it and a portion of the beam from the Optical Head is projected onto the target.
-
Page 87: On-Stack Calibration
Appendix B of this manual contains an On-Stack Calibration Checklist to aid the user in performing the calibration. Teledyne Monitor Labs recommends this data be retained to provide a historical record of the opacity monitoring system. 8.2.1 Procedure for On-Stack Calibration Checklist TOOLS: ... - Page 88 Lint free, untreated lens cleaning cloth (Kimwipe or equivalent) ® Teledyne Monitor Labs On-Stack Calibration Checklist for LightHawk 560ES Opacity System (Appendix B) The checklist begins at the Enhanced Remote Display, moves to the DAS/recording device for a few readings before going to the stack mounted equipment.
- Page 89 SECTION 8.0, MAINTENANCE & ON-STACK CALIBRATION Increment the display to the VIEW SYSTEM PROPERTIES screen. Record the calibration set points, CAL FAIL LEVEL and PLCF in the BEFORE column. NOTE: To get to VIEW SYSTEM PROPERTIES from the MAIN ↵ DISPLAY, first press the enter key ( ) to go to the SYSTEM ↓...
- Page 90 30.0 and 35.0 mA, currents of up to 40.0 mA are perfectly normal for your monitor and do not require readjustment. LED currents beyond 40 mA should be investigated and Teledyne Monitor Labs recommends an Off-Stack Calibration described in Section 8.0 of this manual.
- Page 91 SECTION 8.0, MAINTENANCE & ON-STACK CALIBRATION desiccator be changed if it is not blue, or anytime the rear cover is removed. C. Alignment Observe the projected beam image from the alignment eyepiece window at the rear of the Optical Head Assembly. The cross hairs of the reticule should be centered on the beam image and the outside edge of the GREEN Retro image must be inside of the # 1 ring of the eyepiece.
- Page 92 EXTENDED STATUS indicates a XXX1 malfunction (ZERO SET voltage out of range), the energy ratio returned by the Cal Zero section of the Cal Mechanism and the Cal Kit are outside the allowable range. Teledyne Monitor Labs strongly suggests an Off-Stack Calibration as ® 8-10 SEC 8 LIGHTHAWK 560ES ON STACK MAINT.DOC...
- Page 93 SECTION 8.0, MAINTENANCE & ON-STACK CALIBRATION outlined in Section 8.0 of this manual to determine the source of the malfunction and correct this problem. J. Command Cal Cycle Run through a complete Cal Cycle by simultaneously depressing the “ZERO” and “UPSCALE” keys on the keypad. When the Cal Cycle is complete, check that the last Zero Calibration (location U6) is the same value as Dust Compensation (location U8).
-
Page 94: Attenuator Audit
The Enhanced Remote Panel is capable of recording, storing, and displaying an entire Attenuator Audit: Initial and final Zero, and 15 Attenuator values (5 runs of 3 attenuator values). Contact Teledyne Monitor Labs Tech Support at (800) 846-6062 for Technote #0049.opc. -
Page 95: Off-Stack Calibration
Small changes (± 10%) in the flange to flange calibration distance discovered by the user may be compensated for by performing a new clear path zero calibration. The Teledyne Monitor Labs factory should approve changes beyond the + 10% limit. This will insure that the appropriate optical elements are installed &... -
Page 96: Generating An Optical Clear Path Opacity Signal
Teledyne Monitor Labs in the Site Specification Data Sheets of this manual. If test stands are not available, a table whose length is greater than the “flange to flange”... -
Page 97: Actual Clear Path Conditions
SECTION 9.0, OFF-STACK CALIBRATION Figure 9-1 Tabletop Calibration 9.2.2 Actual Clear Path Conditions This is done by performing the across stack calibration while the stack or duct is not in operation. This type of calibration does not suffer from potential distance measurement errors;... - Page 98 ® LIGHTHAWK 560ES OPACITY/DUST MONITOR You will notice that the eyepiece contains a cross hair and a series of concentric circles. Alignment is achieved by loosening one nut and tightening the opposing nut, pivoting the optical head around so that the cross hairs are centered on the bright green image of the Retroreflector and the eyepiece circles are concentric with the image.
-
Page 99: Retroreflector Assembly
SECTION 9.0, OFF-STACK CALIBRATION 9.3.2 Retroreflector Assembly Retroreflector Assembly alignment is achieved by use of the Integral Retro Alignment Site. The Retro Alignment Site provides a visual indication during alignment. The alignment sight protrudes from the rear of the Retro Cap and has a frosted glass screen. The frosted glass screen has a circular target etched into it and a portion of the beam from the Optical Head is projected onto the target. -
Page 100: Cleaning The Optical Surfaces
The external optical windows and surfaces should be cleaned using a clean soft lint free cloth (Kimwipe or equivalent) and quality commercial glass cleaning solution. Both are available from Teledyne Monitor Labs. An ammonia based window cleaner may be used so long as it does not contain any anti-fog additive. -
Page 101: Optical Head Zero And One Hundred Percent Opacity
SECTION 9.0, OFF-STACK CALIBRATION 9.4.2.2 Cal Mechanism Sections While the Optical Head hinged section is open, the simulated zero and upscale windows of the Calibration Assembly may be cleaned. The Cal Mechanism Arm Assembly can be removed by loosening the gear clamp and pulling it off the shaft. - Page 102 ® LIGHTHAWK 560ES OPACITY/DUST MONITOR 2. While depressing the “DISP” key, increment either the “↑” or “↓” key until a 2 appears in the next green display character. n E E d The word nEEd will appear in the 4 digit red display. 3.
-
Page 103: Setting The Signal Gain
LED current is between 30.0 and 35.0 mA. 5. If the required Reference Gain is greater than 125, this may be an indication of potential LED problems. Contact Teledyne Monitor Labs Tech Support at (800) 846-6062 before proceeding. -
Page 104: Final Calibration Set Function Routines
® LIGHTHAWK 560ES OPACITY/DUST MONITOR 0 0 2 5 4. Manipulate the keypad to display the Signal Voltage at location S0. The Signal Voltage must be between 6.0 and 7.0 VDC. NOTE: If the voltage is not between 6.0 and 7.0 VDC, the Signal Gain will need adjustment. - Page 105 SECTION 9.0, OFF-STACK CALIBRATION • Set Out of Service Marker to 1.000 • Read raw CAL ZERO value (adjust as necessary) • Set Out of Service Marker back to 0.000 • Perform CAL ZERO SET • Adjust Upscale Calibration Iris as necessary Begin Procedure 1.
- Page 106 ® LIGHTHAWK 560ES OPACITY/DUST MONITOR 5. Change the Service Marker (location F6) to 1.000 for “Out of Service”. NOTE: When the “Out of Service” marker is on (1.000), the “Auto Zero Adjust” feature is disabled. 6. Open the Optical Head by releasing the latches on both sides and swinging out.
- Page 107 SECTION 9.0, OFF-STACK CALIBRATION Upscale Iris Setscrew Zero Iris Setscrew Zero Iris Adjustment Disc Upscale Iris Adjustment Disc Gear Clamp Figure 9-4 NOTE: The Instantaneous Opacity display may have as much as +0.5% variation over the period of a few seconds. Every attempt should be made to adjust the Iris carefully so that the normal variation is equally balanced around the 0% reading.
- Page 108 ® LIGHTHAWK 560ES OPACITY/DUST MONITOR Failure to obtain this specification will require the replacement of the Neutral Density window protecting the Zero Iris. Go to Section 9.8 for the Cal Mechanism Neutral Density Window Replacement procedure. NOTE: If the 1-Minute Opacity reading of the Calibration Zero value is NOT within the + 1 % opacity limit, return to step a) above and readjust the Calibration Zero Iris.
- Page 109 SECTION 9.0, OFF-STACK CALIBRATION ii) Manipulate the keypad to display the Instantaneous Opacity (location U0). NOTE: The Iris MUST be adjusted while observing the Instantaneous Opacity (location U0). iii) Slowly rotate the disc on the rear of the Cal Upscale Iris to achieve as near as possible to target value (location C1).
-
Page 110: Adjusting Calibration Kit
® LIGHTHAWK 560ES OPACITY/DUST MONITOR 9.6 ADJUSTING CALIBRATION KIT CAUTION: This adjustment must not be undertaken unless complete clear path recalibration is being performed. After all of the adjustments have been performed with the Retro Assembly, the Calibration Kit may be adjusted. 1. - Page 111 SECTION 9.0, OFF-STACK CALIBRATION 6. In order to provide a fine adjustment device, temporarily place the gear clamp (an integral part of the cover previously removed) over the smaller gear and tighten the clamp. This will allow the cover to be rotated in order to move the Iris in small increments for the final adjustment.
-
Page 112: Verify The Response Of The Optical Head
® LIGHTHAWK 560ES OPACITY/DUST MONITOR NOTE: Some small changes in the Iris position may occur when the clamp screw is tightened or when the gear clamp is removed. Be certain that the zero opacity reading is proper after the Iris position is locked and the cover has been reinstalled. - Page 113 SECTION 9.0, OFF-STACK CALIBRATION If the Iris opening is too small, the ND window must be replaced with one of a higher Optical Density value. If the Iris opening is too large, the ND window must be replaced with one of a lower optical density value. 1.
-
Page 114: Cal Kit Neutral Density Window Replacement
® LIGHTHAWK 560ES OPACITY/DUST MONITOR Upscale Rear Gasket Allen Head ND Window, coating Screws toward Rear Gasket Front Gasket Zero ND Cover Figure 9-7 9.9 CAL KIT NEUTRAL DENSITY WINDOW REPLACEMENT NOTE: This procedure should only be undertaken if the Cal Kit Iris opening diameter falls outside of the specifications listed in Section 9.6, Step 8. - Page 115 SECTION 9.0, OFF-STACK CALIBRATION 2. Remove the gear screw, collar and gear. See Figure 9-8. 3. Remove the 2 Allen head screws holding the ND Cover. See Figure 9-8. 4. Remove the ND cover, front gasket, ND window and rear gasket. See Figure 9-8.
-
Page 116: Off-Stack Calibration History
® LIGHTHAWK 560ES OPACITY/DUST MONITOR 9.10 OFF-STACK CALIBRATION HISTORY Use Table 9-1 below to record the adjustments made during the Off-Stack Calibration. Date Flange to Flange Hinge to Hinge Reference Gain Signal Gain Zero Iris Diameter Zero ND Window Upscale Iris Diameter Upscale ND Window Upscale Target Value Cal Kit Iris Diameter... - Page 117 SECTION 9.0, OFF-STACK CALIBRATION (This page intentionally left blank.) ® SEC 9 LIGHTHAWK 560ES OFF-STACK CAL.DOC 9-23...
-
Page 118: Installation
Determination of the angle φ may be made by the following formula: φ = ARC SIN [{(D/2) - .5)} / (L+1”)] For a typical installation where Teledyne Monitor Labs recommends a 2” diameter tube 5.5" long, the maximum misalignment calculates to 4.41°. ®... - Page 119 ® LIGHTHAWK 560ES OPACITY/DUST MONITOR Example: φ = ARC SIN [{(2/2) - .5)} / (5.5+1”)] φ = ARC SIN .5/6.5 φ = 4.41° For a mounting to be 2 feet or 24" long, the maximum angle would fall to 1.15°. To avoid very small misalignment angles the mounting tube diameter should be increased when long mounting tube lengths (L) are required.
-
Page 120: Distance Determination
SECTION 10.0, INSTALLATION Teledyne Monitor Labs has a mounting plate alignment scope, which may be used to aid the user in determining the optical centerline between the two opposing ports. CAUTION: The pipes must not be rigidly connected to the inner and outer shell stacks since they may move differently. -
Page 121: Power Requirements
Failure to provide purge air to the system components could result in damage to the system that will not be covered under the Teledyne Monitor Labs warranty. Power to the Purge System should be provided via a circuit that is always activated so long as the stack is in operation. -
Page 122: Enhanced Remote Display Assembly
SECTION 10.0, INSTALLATION Optical alignment of the system is accomplished as described in Section 7.0 of this manual. Evaluation of the monitor output and calibration is covered in Section 8.0 of this manual. 10.8 ENHANCED REMOTE DISPLAY ASSEMBLY The Enhanced Remote Display Assembly may be 19" (483mm) rack mounted, panel mounted, or located inside an enclosure. - Page 123 ® LIGHTHAWK 560ES OPACITY/DUST MONITOR (This page intentionally left blank.) ® 10-6 SEC 10 LIGHTHAWK 560ES INSTALL.DOC...
-
Page 124: Troubleshooting
560ES has been logged out of service. Check the value of F6. For normal operation F6 must be set to 0. XX1X ADC Fault: Beyond the scope of this manual. Call Teledyne Monitor Labs Tech Support at (800) 846-6062. XX2X Reference Fault: Check the Reference voltage value at location S1. -
Page 125: Extended Status Code U4
X4XX Not Used 1XXX Not Used 2XXX Not Used 4XXX Not Used 11.3 ASSISTANCE If you are unable to determine the problem, call Teledyne Monitor Labs Tech Support at (800) 846-6062. An experienced factory trained technician will handle your call. ® 11-2 SEC 11 LIGHTHAWK 560ES TROUBLESHOOTING.DOC... -
Page 126: Site Specification Data Sheets
APPENDIX A SITE SPECIFICATION DATA SHEETS... - Page 127 (This page intentionally left blank.)
- Page 128 APPENDIX A, SITE SPECIFICATION DATA SHEETS SITE SPECIFICATION DATA TML LIGHTHAWK ® 560ES OPACITY MONITORING SYSTEM COMPANY: TML SHOP ORDER NO: CAL DATE: UNIT SERIAL #: CAL. TECHNICIAN: I. OPTICAL HEAD FEET Hinge to Hinge FLANGE TO FLANGE CALIBRATION DISTANCE: FEET meters MONITOR PATH LENGTH:...
- Page 129 ® LIGHTHAWK 560ES COMPLIANCE OPACITY MONITOR C. AUTO CAL CYCLE CYCLE FREQUENCY CAL TIME HOUR 76 / C(4) CAL TIME MIN. MIN. 77 / C(5) CAL INTERVAL HOUR 78 / C(6) CYCLE DURATIONS UPSCALE 79 / C(8) ZERO 80 / C(7) PLCF 81 / C(9) DUST COMP.
- Page 130 APPENDIX A, SITE SPECIFICATION DATA SHEETS V. ENHANCED REMOTE PANEL E. R. P. PROVIDED: A. MULTI I/O PROVIDED: B. ANALOG OUTPUT CHANNEL SELECTIONS CHANNEL 1 DEFINITION WITH / W.O. CAL ZERO VALUE FULL SCALE CHANNEL 2 DEFINITION WITH / W.O. CAL ZERO VALUE FULL SCALE CHANNEL 3...
- Page 131 ® LIGHTHAWK 560ES COMPLIANCE OPACITY MONITOR (This page intentionally left blank.) ® APP A LIGHTHAWK 560ES SITE SPEC DATA.DOC...
-
Page 132: Maintenance Check Sheets
APPENDIX B MAINTENANCE CHECK SHEETS... - Page 133 (This page intentionally left blank.)
- Page 134 APPENDIX B, MAINTENANCE CHECK SHEETS Rev. 1/26/15 PAGE 1 OF 3 TELEDYNE MONITOR LABS ® ON-STACK CALIBRATION CHECKLIST for LightHawk 560ES OPACITY SYSTEM PLANT NAME LOCATION SERVICE PERSON SERIAL # DATE TIME A. REASON FOR CALIBRATION QUARTERLY EMERGENCY INSTALL OTHER...
- Page 135 ® LIGHTHAWK 560ES OPACITY/DUST MONITOR PAGE 2 OF 3 F. CHECK THE PERMANENT DATA RECORD FOR THE LAST CAL RESULTS ZERO CAL = % OPACITY DUST COMP= % OPACITY UPSCALE CAL = % OPACITY P. L. C. F. = G. ANALOG OUTPUTS ENHANCED REMOTE DISPLAY CHECKED WITH MULTIMETER OUTPUT DEVICE (DAS)
-
Page 136: Lighthawk
APPENDIX B, MAINTENANCE CHECK SHEETS PAGE 3 OF 3 D. CLEAN: RETRO EXIT WINDOW CAL MECH CAL KIT E. INSTALL CAL KIT FIXTURE F. PERFORM BACKGROUND SET G. PERFORM NORMAL SET H. PERFORM ZERO SET I. CHECK CAL ZERO VALUE U4 Extended Status Code J. - Page 137 ® LIGHTHAWK 560ES OPACITY/DUST MONITOR (This page intentionally left blank.) ® APP B LIGHTHAWK 560ES MAINT CHK SHTS.DOC...
- Page 138 APPENDIX C SPARE PARTS...
- Page 139 (This page intentionally left blank.)
- Page 140 APPENDIX C, RECOMMENDED SPARE PARTS RECOMMENDED SPARE PARTS ® Recommended spare parts for the LightHawk 560ES are organized into four categories. User can stock the appropriate parts for their level of maintenance. The four lists do not overlap. For the highest level of maintenance the first three lists should be stocked. The “Recalibration” list is for reference only in the event that major path length or optical changes are necessary.
- Page 141 The following table represents a selection of parts and supplies that may be required during start up and normal operation. This is the least comprehensive list. These parts will support only a minimal maintenance level. ® TELEDYNE MONITOR LABS (TML) LIGHTHAWK 560ES “START UP/OPERATIONAL” RECOMMENDED SPARE PARTS Stocking...
- Page 142 APPENDIX C, RECOMMENDED SPARE PARTS “Normal Wear and Maintenance” Spare Parts These are parts that may be used as a result of normal wear over time. ® TELEDYNE MONITOR LABS (TML) LIGHTHAWK 560ES "MAINTENANCE" RECOMMENDED SPARE PARTS Stocking Stocking Stocking...
- Page 143 The following is a list of spares that the user may wish to keep on hand in order to minimize system downtime in the event of an unforeseen failure such as power surges, lightning strikes, etc. ® TELEDYNE MONITOR LABS (TML) LIGHTHAWK 560ES "EMERGENCY/QUICK RESPONSE" RECOMMENDED SPARE PARTS Stocking...
- Page 144 The following is a list of neutral density windows used in the Calibration Mechanism and Calibration Kit. These windows only need changed if directed by the Off-Stack Calibration procedure outlined in Section 8.0 of this manual. ® TELEDYNE MONITOR LABS (TML) LIGHTHAWK 560ES “RECALIBRATION” PART NOS. Stocking...
- Page 145 ® LIGHTHAWK 560ES COMPLIANCE OPACITY MONITOR (This page intentionally left blank.) ® APP C LIGHTHAWK 560ES SPARE PARTS.DOC...
- Page 146 APPENDIX D DRAWINGS...
- Page 147 (This page intentionally left blank.)
- Page 172 APPENDIX E ENHANCED SERIAL PORT COMMUNICATION PROTOCOL...
- Page 173 (This page intentionally left blank.)
- Page 174 APPENDIX E, ENHANCED SERIAL PORT COMMUNICATION PROTOCOL ENHANCED SERIAL PORT COMMUNICATION PROTOCOL This enhanced serial port protocol is only available with Enhanced Remote Panel 332 version 1.13 or later. A short description of the original communication is described in the Enhanced Remote Display section of the manual.
- Page 175 The “variable number” is the same number designation used to number the variables in the original protocol. A list of the variable numbers can be obtained from the Enhanced Remote Panel by using the original 255? command. An example is included later in this appendix. ® APP E LIGHTHAWK 560ES SERIAL PORT PROTOCOL.DOC...
- Page 176 APPENDIX E, ENHANCED SERIAL PORT COMMUNICATION PROTOCOL INITIATION AND CONTROL OF CALIBRATIONS AND MODES OF OPERATION The system calibration may be initiated and controlled from the serial port. The command string is as follows: 998, "command", 998, "command" <CR><LF> The value for "command" is chosen from the following list of commands. Command Number Action resulting from specified Command Number NORMAL...
- Page 177 Proper usage is: 997?<cr> This variable is used to request a calibration mode for the Optical Head from the serial port. Proper usage is as follows: 998,"DESIRED MODE",998,"DESIRED MODE"<cr> This variable is not used ® APP E LIGHTHAWK 560ES SERIAL PORT PROTOCOL.DOC...
- Page 178 APPENDIX E, ENHANCED SERIAL PORT COMMUNICATION PROTOCOL BROADCAST MODE A screen on the Enhanced Remote Panel can be used to output data on a periodic basis. This allows a technician to log data without the need to request each data point independently. This serial transmission is only available on the RS-232 port and will only be in the matched-pair protocol.
- Page 179 Note that RS-422 communication is also at 9600 baud and it requires using 2 stop bits. ENHANCED REMOTE MOTHERBOARD JUMPERS for Serial Communication Jumper Options RS-232 RS-422 RS-485 UART UART UART UART UART UART UART UART UART UART UART ® APP E LIGHTHAWK 560ES SERIAL PORT PROTOCOL.DOC...
- Page 180 APPENDIX E, ENHANCED SERIAL PORT COMMUNICATION PROTOCOL VARIABLE LIST The following is a list of variables available from the Enhanced Remote Panel RS232 serial port. TML reserves the right to modify this list at any time. It is best to request a list from the Enhanced Remote Panel with 255? command.
- Page 181 70 Dig Out 3:ZERO ON AO 71 Dig Out 4:INST OPAC LEVEL1 72 Dig Out 5:AVG OPAC LEVEL1 73 Dig Out 6:PURGE FAILURE 74 Dig Out 7:DATA VALID 75 Dig Out 8:FAULT ® APP E LIGHTHAWK 560ES SERIAL PORT PROTOCOL.DOC...
- Page 182 APPENDIX E, ENHANCED SERIAL PORT COMMUNICATION PROTOCOL Calibration Configuration data: 76 Cal Time Hour: 0 77 Cal Time Min:0 78 Cal Interval Hour: 0 79 Upscale Secs:90 80 Zero Secs:90 81 Plcf Secs:90 82 Dust Secs:90 Particulate Mass correlation curve data: 83 MassLoad_X1:0.0000 84 MassLoad_Y1:0 85 MassLoad_X2:1.0000...
- Page 183 143 Mid TargetValue:0.00 144 High TargetValue:0.00 145 Low ArithMean:0.000 146 Mid ArithMean:0.000 147 High ArithMean:0.000 148 Low ConCoeff:0.000 149 Mid ConCoeff:0.000 150 High ConCoeff:0.000 151 Low CalError:0.00 152 Mid CalError:0.00 153 High CalError:0.00 ® E-10 APP E LIGHTHAWK 560ES SERIAL PORT PROTOCOL.DOC...
Need help?
Do you have a question about the LightHawk 560ES and is the answer not in the manual?
Questions and answers