Advertisement
Quick Links
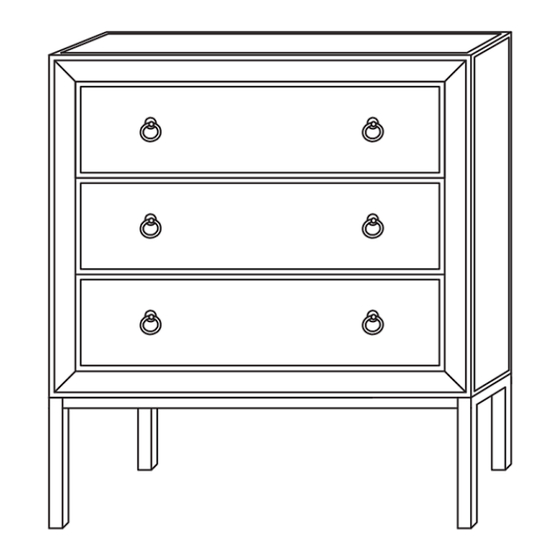
Product Name:
SKU #:
Thank you for purchasing this LuxenHöme product. This product has been manufactured with the highest
standards of safety and quality.
PLEASE READ ALL INSTRUCTIONS CAREFULLY BEFORE ASSEMBLY.
Unpack all parts from the packaging inside the carton to ensure there are no missing or damaged parts.
Place all wooden furniture parts on a clean, flat, soft surface to prevent scratches. Refer to the steps
provided below for assembly.
Do not attempt to assemble or use the product if any parts are missing or damaged.
CARTON CONTENTS:
Hardware:
A*8
Parts:
①X1
Tools required for assembly: Screwdriver (if using power tools, use with care)
Modern Gray 31.5" Wide 3-Drawer Bachelor Chest
WHIF1890
B*6
Please save this manual for future reference.
C*6
②X2
1 of 3
Instruction Manual
D*8
E*1
③*2
Advertisement

Related Manuals for LuxenHome WHIF1890


Summary of Contents for LuxenHome WHIF1890
- Page 1 Please save this manual for future reference. Product Name: Modern Gray 31.5" Wide 3-Drawer Bachelor Chest SKU #: WHIF1890 Thank you for purchasing this LuxenHöme product. This product has been manufactured with the highest standards of safety and quality. PLEASE READ ALL INSTRUCTIONS CAREFULLY BEFORE ASSEMBLY.
- Page 2 Product Name: Modern Gray 31.5" Wide 3-Drawer Bachelor Chest SKU #: WHIF1890 Assembly: Step 1 – Insert the metal legs ② into rails ③ as shown below. Step 2 – Secure the legs from the assembled leg frame in Step 1 by using screws A, washer D and screwdriver E to secure the frame as shown below.
- Page 3 Modern Gray 31.5" Wide 3-Drawer Bachelor Chest SKU #: WHIF1890 Step 3 – With 2 people, carefully place the chest body upside down on a clean and soft surface to prevent scratching the top. Secure the frame from the assembled leg frame in Step 2 by using screws B, washer C, and screwdriver E to the chest ①, as shown below.
Need help?
Do you have a question about the WHIF1890 and is the answer not in the manual?
Questions and answers