
Related Manuals for Optimum THERMOCOOK PRO M 3.0X


Summary of Contents for Optimum THERMOCOOK PRO M 3.0X
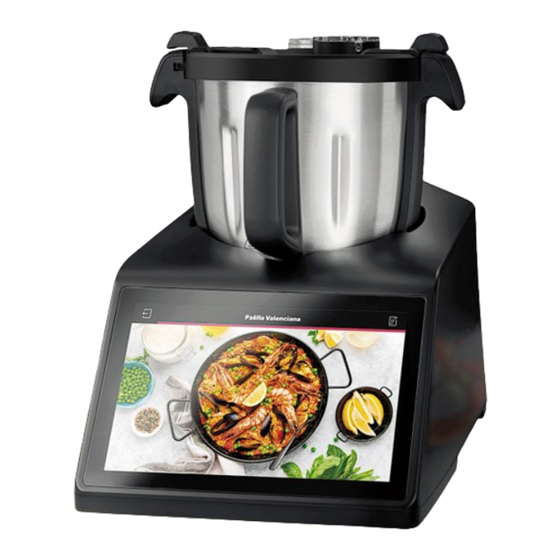
- Page 1 THERMOCOOK PRO M 3.0X e Must-Have All-In-One Kitchen Appliance Professional ermo Cooker USER MANUAL...
-
Page 2: Table Of Contents
WELCOME TO YOUR NEW KITCHEN ASSISTANT! SAFETY FIRST GETTING TO KNOW YOUR THERMOCOOK PRO M 3.0X - PARTS GETTING TO KNOW YOUR THERMOCOOK PRO M 3.0X - DIGITAL DISPLAY / CONTROL PANEL GETTING TO KNOW YOUR THERMOCOOK PRO M 3.0X - USER ACCOUNT... -
Page 3: Welcome To Your New Kitchen Assistant
Congratulations on the purchase of your professional all-in-one kitchen appliance, the Optimum Thermocook Pro M 3.0X. From the first time you use your Optimum Thermocook, it will become your secret ally in the kitchen, helping you to cook like a five-star chef. -
Page 4: Safety First
Optimum Thermocook clearly understands how to operate it safely to avoid potential hazards. 4. Your Optimum Thermocook is not a toy. Do not allow children to use it; and keep it and the cord that comes with it out of their reach. - Page 5 23. When the steamer is operating, the handles are the only safe place to touch it. Touching it anywhere else may result in injury. 24. After using your Optimum Thermocook, please keep it and any of its parts that are still hot well out of children’s reach.
- Page 6 Before plugging in, ensure that your electricity supply matches the specifications indicated on the underside of your appliance. WARNING: THIS APPLIANCE MUST BE EARTHED. IMPORTANT: FAILURE TO FOLLOW THESE SAFETY INSTRUCTIONS AND WARNINGS COULD RESULT IN SERIOUS INJURY. ADDITIONALLY, MISUSING YOUR OPTIMUM THERMOCOOK PRO M 3.0X MAY DAMAGE IT AND VOID YOUR WARRANTY.
-
Page 7: Getting To Know Your Thermocook Pro M 3.0X Parts
GETTING TO KNOW YOUR THERMOCOOK PRO M 3.0X PARTS This section introduces you to the key components of your new Optimum ThermoCook Pro M 3.0X. PART NAMES: Large steamer basket Food processor lid Lid cap Bowl sealing ring Bowl lid... -
Page 8: Getting To Know Your Thermocook Pro M 3.0X - Digital Display
GETTING TO KNOW YOUR THERMOCOOK PRO M 3.0X DIGITAL DISPLAY / CONTROL PANEL Home Screen - Menu Automatic Recipes Automatic Programs Manual Cooking Automatic Automatic Download New Recipes Recipes Programs Manual Download Cooking New Recipes Automatic Recipes Interface Recipes Classification... - Page 9 GETTING TO KNOW YOUR THERMOCOOK PRO M 3.0 DIGITAL DISPLAY / CONTROL PANEL Manual Cooking Interface Weight Turbo Button Temperature Setting Start Button Reset To Default Setting Steering Setting Time Setting Reverse Speed Setting Clockwise Automatic Programs Interface...
- Page 10 GETTING TO KNOW YOUR THERMOCOOK PRO M 3.0X DIGITAL DISPLAY / CONTROL PANEL Setup / Settings Settings Software Updating Android System Updating Recipes Updating...
-
Page 11: Getting To Know Your Thermocook Pro M 3.0X User Account
GETTING TO KNOW YOUR THERMOCOOK PRO M 3.0X USER ACCOUNT User Registration & Log In Join us today and enjoy the ultimate cooking experiences with recipes, updates and more! User Registration... - Page 12 GETTING TO KNOW YOUR THERMOCOOK PRO M 3.0X USER ACCOUNT User Log In Reset Password...
-
Page 13: Operating Instructions
OPERATING INSTRUCTIONS Place the motor base on a flat, sturdy surface. Ensure the surface is clean and dry. Place the bowl onto the motor base, ensuring the handle is pointing to the front. Press down firmly to lock the bowl into place. Ensure the blade assembly base is correctly inserted and securely locked to the bowl with the blade assembly nut. - Page 14 OPERATING INSTRUCTIONS Temperature, time, speed and direction icons Press the temperature, time, speed and highlight in red can be adjusted by turning the direction icons to adjust settings. To quickly dial until you reach your setting. To clear set exact times, press on the minute or current settings, press STOP and then press second time icons.
- Page 15 OPERATING INSTRUCTIONS Accessories that can be put in the dishwasher include the cooking lid, food processor attachment, large steamer basket, small steaming basket, stirring paddle attachment, butterfly whisk, spatula Whip the Thermocook base and measuring cup. with a soft damp cloth. NOTE: To remove the small steaming basket safely, follow these steps: •...
-
Page 16: Control Panel Overview
CONTROL PANEL OVERVIEW Icon Function description Back Button: Press this icon at any time to return to the previous menu. Set time display Working time display: 0-90 minutes for manual mode. Up to 8 hours in slow cooking programs. Press TIME to select. Press your finger on the numbers to set value. - Page 17 CONTROL PANEL OVERVIEW Icon Function description Adjust temperature by sliding the disk with your finger. Use the “+” and “-“ buttons to adjust the temperature. The actual temperature in the bowl will be displayed after starting. Set speed display Clockwise speed ranges between 0-12. Reverse speed ranges between 0-3.
- Page 18 CONTROL PANEL OVERVIEW Icon Function description Tare to reset scales 5.21 Boil Water Function Temperature: 100°C Speed: 1 (forward range 0-1 or reverse range 0-1) Ends function after reaching the preset water temperature. Chop Function Temperature: 0°C Time: 10 seconds (range 0-4 minutes) Speed: 6 (forward range 1-12) Slow Cook Function Temperature: 90°C (range 37°C-95°C)
- Page 19 CONTROL PANEL OVERVIEW Icon Function description Turbo Function Press and hold for 3 seconds for blades to spin at high speed. Release button to stop blades spinning. Press this icon at any time to return the home screen. Settings button Settings Press to change Thermocook settings.
- Page 20 CONTROL PANEL OVERVIEW Icon Function description There are the following functions: Recipes comments, Share recipes, delete recipes 8.51 Recipe comments 8.52 Share recipe 8.53 Delete recipe Favourite recipe 8.10 Unsave recipe 8.11 Hide recipe rating, preparation time, di culty level 8.12 Display recipe rating, preparation time, di culty level 8.13...
-
Page 21: Processing Guide / Suggested Usage Of Attachments
PROCESSING GUIDE / SUGGESTED USAGE OF ATTACHMENTS Maximum cooking Temperature Part / Attachment Function Speed Time ingredients ˚C in one batch Whip 2 - 4 2 - 4 minutes egg white egg white Butterfly whisk 3 - 5 Whip cream 200ml minutes 1 - 90... -
Page 22: Cleaning And Maintenance
CLEANING AND MAINTENANCE Before cleaning the appliance, switch o the Thermocook and remove the power cord plug from the power point. Wipe the Thermocook base with a soft damp cloth. Only use a soft dry cloth to clean the power cord. Remove the lid and any attachments including the blade assembly. -
Page 23: Troubleshooting
TROUBLESHOOTING Problem Potential cause Solution Machine not properly Check that the machine is plugged into the plugged into the wall and the power point is on. power source. If the machine is plugged in and the power Cannot be point is on, switch it o . powered on The temperature of the Wait for 1 hour, then restart the appliance. -
Page 24: Product Specifications
PRODUCT SPECIFICATIONS Product: Optimum Thermocook Pro M 3.0X Model: TCPROM3.0X Voltage: 220-240V Frequency: 50/60Hz Rated Power (Motor): 1400W Rated Power (Heater): 1000W Dimension: 43 x 28,5 x 37,2cm (with the stainless steel bowl) Product weight (net): 9,7kg At the end of its service life, this product may not be disposed of in the normal household waste, but rather must be disposed of at a collection point for recycling electrical and electronic devices. -
Page 25: Warranty Terms & Conditions
Optimum® (“we”) warrants this appliance to be free from defects in materials and workmanship. As long as you use it according to this instruction book, Optimum® warrants that it will perform satisfactorily in household use for a period of 1 year. -
Page 26: Contact Us
CONTACT US Please contact the distributor located in the Country where you made your original purchase for all Support, Servicing and Warranty. Your distributor is: Call to speak to one of our friendly Customer Service Representatives during business hours. Australia 1300 309 900 New Zealand 0800 741 369 United Kingdom 0800 0789 055 United States 187 766 11851... - Page 27 ThermoCook Pro M 3.0X V2...
Need help?
Do you have a question about the THERMOCOOK PRO M 3.0X and is the answer not in the manual?
Questions and answers