Onkyo A-9070 Instruction Manual
Instruction manual
Hide thumbs
Also See for A-9070:
- Specifications (2 pages) ,
- Specifications (2 pages) ,
- Service manual (81 pages)
Table of Contents
Advertisement
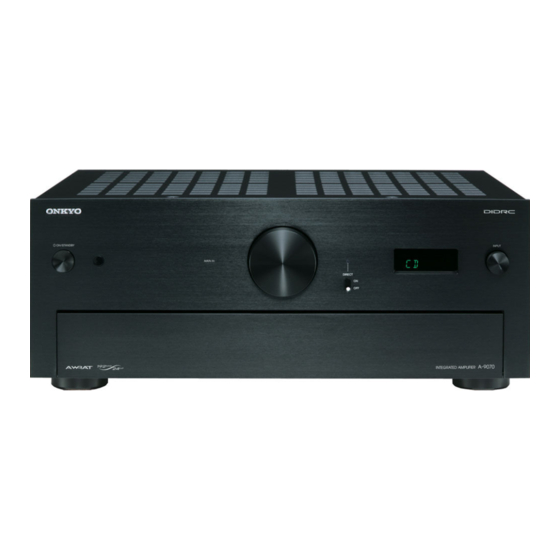
Integrated Amplifier
A-9070
Instruction Manual
Thank you for purchasing an Onkyo Integrated
Amplifier. Please read this manual thoroughly before
making connections and plugging in the unit.
Following the instructions in this manual will enable
you to obtain optimum performance and listening
enjoyment from your new Integrated Amplifier.
Please retain this manual for future reference.
Contents
Introduction ...................................2
Connections.................................13
Turning On & Basic Operations ......26
Advanced Operations .................35
Others...........................................41
E
n
Advertisement
Table of Contents

Related Manuals for Onkyo A-9070


Summary of Contents for Onkyo A-9070
-
Page 1: Integrated Amplifier
Thank you for purchasing an Onkyo Integrated Amplifier. Please read this manual thoroughly before making connections and plugging in the unit. Following the instructions in this manual will enable you to obtain optimum performance and listening enjoyment from your new Integrated Amplifier. -
Page 2: Introduction
Leave 30 cm (12") of free space at the top and sides damaged in any way, such as power-supply cord or and 10 cm (4") at the rear. The rear edge of the shelf or plug is damaged, liquid has been spilled or objects board above the apparatus shall be set 10 cm (4") -
Page 3: Precautions
This is normal. the permission of the copyright holder. • If you do not use this unit for a long time, it may not 2. AC Fuse—The AC fuse inside the unit is not user- work properly the next time you turn it on, so be serviceable. -
Page 4: Supplied Accessories
Batteries (R03)....... . (2) The wire which is coloured brown must be connected to the terminal which is marked with the letter L or coloured red. -
Page 5: Features
• 3 Digital Inputs (2 Coaxial and 1 Optical) • Gold-Plated, Machined Solid Brass RCA Inputs • Gold-plated, Color-coded, Transparent Speaker Posts • Display Dimmer (Normal/Dim) This function only applies to the following sampling rates: 32 kHz, 44.1 kHz, 48 kHz. Other rates are not supported. -
Page 6: Table Of Contents
Connecting a Cassette Tape Deck .......21 Connecting a Recording Component......22 Using the Integrated Amplifier as a Preamplifier...23 Separating the Pre-amp and Main Amp Units ....24 Using the Integrated Amplifier as a Power Amplifier..25 Turning On & Basic Operations Basic Operations ............26 Turning On/Off the Integrated Amplifier ......26... -
Page 7: Before Using The Integrated Amplifier
Keep this in mind when installing. • If another remote controller of the same type is used in the same room, or the integrated amplifier is installed close to equipment that uses infrared rays, the remote controller may not work reliably. -
Page 8: Installing The Integrated Amplifier
Approx. 4 in. (10 cm) Install the integrated amplifier on a sturdy rack or shelf. Position it so that its weight is evenly dispersed on its four legs. Do not install the integrated amplifier in a place with vibration or an unstable location. -
Page 9: Getting To Know The Integrated Amplifier
26) h INPUT selector page 28) (➔ (➔ Sets the integrated amplifier to On or Standby. Selects the input sources in sequence. It is also used to select settings. b Remote control sensor (➔ page 7) i Front flap Receives control signals from the remote controller. - Page 10 BALANCE L/R buttons (➔ page 27) (➔ page 29) Selects Speakers A, Speakers B, or both. The A and B Adjusts the balance of left and right channels. LEDs show which speaker set is selected. n SETUP button page 35) (➔...
-
Page 11: Rear Panel
AC INLET e SPEAKERS B terminals Connects the supplied power cord. The other end of Connect Speakers B. the power cord should be connected to a suitable wall f PHONO (MM/MC) L/R jacks outlet. Connect a turntable with analog audio output. -
Page 12: Remote Controller
Onkyo CD Player (e.g. C-7070), Onkyo Dock, or Onkyo Network Tuner (e.g. T-4070). Note • Make sure the remote controller is pointed at the CD player when using it. • With some components, the remote controller may not work, or only partially. -
Page 13: Connections
■ Banana Plugs (North American models) • If you are using banana plugs, tighten the speaker terminal before inserting the banana plug. • Do not insert the speaker code directly into the center hole of the speaker terminal. - Page 14 Note • Make sure that the wires do not touch metal parts on the back panel or elsewhere. • Y plugs cannot be connected. • Two sets of speakers (Speakers A and Speakers B) can be connected to the integrated amplifier. You can select which speakers to output audio to when listening to music.
- Page 15 Important: • Bi-wiring can be used only with speakers that support bi-wiring. Refer to your speaker manual. • When making the bi-wiring connections, be sure to remove the jumper bars that link the speakers’ tweeter (high) and woofer (low) terminals.
-
Page 16: Cable And Jacks
CD Player, Network Tuner, or RI Dock to the integrated amplifier with an u cable. Note • Push plugs in all the way to make good connections (loose connections can cause noise or Right! malfunctions). • To prevent interference, keep audio cables away from power cords and speaker cables. -
Page 17: Connecting A Cd Player
This is an example of connection using the CD Player C-7070. Analog Connection Integrated Amplifier A-9070 CD Player C-7070 • Connect the CD Player to either of the following jacks: LINE IN 1/2/3. Digital Connection (Coaxial or Optical) Integrated Amplifier A-9070 Connect either of them. -
Page 18: Connecting An Onkyo Dock
• Use only an Onkyo Dock with digital connections. pages 20, 35). • To use the (Remote Interactive) connection, you need to change the names of inputs (➔ • Connect the Onkyo Dock to either of the following jacks: COAXIAL 1/2, OPTICAL. -
Page 19: Connecting A Tuner
• Connect your tuner to either of the following jacks: LINE IN 1/2/3. Digital Connection (Coaxial or Optical) Integrated Amplifier A-9070 Connect either of them. Network Tuner T-4070 • Connect the Network Tuner to either of the following jacks: COAXIAL 1/2, OPTICAL. -
Page 20: Connecting Onkyo U Components
Onkyo CD Player, Network Tuner or RI Dock. RI Dock DOCK • If two u jacks are present, you can use either one indifferently as they work the same way. Make sure that each Onkyo CD Player, Network •... -
Page 21: Connecting A Turntable
• If your turntable has a built-in phono preamp, you can connect the turntable to other analog inputs such as LINE IN 1. • If your turntable has a ground wire, connect it to the GND screw. With some turntables, connecting the ground wire may produce an audible hum. -
Page 22: Connecting A Recording Component
• Unless you have the full consent of the copyright holder, copyright laws prohibit using your recordings for anything other than personal enjoyment! • Do not change the integrated amplifier’s input while recording. Doing so will cause the audio from the selected component to be recorded. -
Page 23: Using The Integrated Amplifier As A Preamplifier
Using the Integrated Amplifier as a Preamplifier The integrated amplifier can be used as a preamplifier (Pre mode). This mode keeps the heat down, as opposed to when the integrated amplifier is used as a pre-main amplifier. This is an example of connection using the power amplifier M-5000R. -
Page 24: Separating The Pre-Amp And Main Amp Units
Note • Depending on the sound processor used, noise may be produced upon switching the integrated amplifier on and off. In this case, turn on each device in the following sequence: sound processor, integrated amplifier. Turn off each device in the following sequence:... -
Page 25: Using The Integrated Amplifier As A Power Amplifier
• Always turn the integrated amplifier off before connecting the MAIN IN jacks. • Before setting the integrated amplifier to Main mode, make sure that no component such as a CD player is connected to the MAIN IN jacks, as a direct connection may cause a massive blast sound and damage the integrated amplifier or your speakers. -
Page 26: Turning On & Basic Operations
(➔ page 38). the speakers or headphones become active. • After a certain time of warming up, the internal temperature of the integrated amplifier stabilizes, and the sound is softened. • The integrated amplifier remembers the state when power was... -
Page 27: Selecting Speakers A And Speakers B
• When “ROUTE” is set to “PRE”, this setting is disabled (➔ page 39). • When this setting is set to A + B, the impedance of speakers is restricted. For further details, see “Connecting Your Speakers” (➔ page 13). -
Page 28: Selecting The Input Source
You can adjust the brightness of the integrated amplifier’s information display. The information display goes off and the DIRECT LED lights. • To turn the information display on while the Direct function is DIMMER enabled, press DIMMER on the remote controller. -
Page 29: Adjusting The Bass, Treble And Balance
You can adjust the bass and treble levels from -6 The adjustment is automatically confirmed. to +6. • By default, bass and treble are set to 0, and balance is set to the center position (no visible bars). Note • The integrated amplifier will end the adjustment if there is no operation for 5 seconds. -
Page 30: Changing The Display Information
Changing the Display Information Note • Input fs (sampling rate) is displayed only when a digital input You can display information such as the current input or (COAX1, COAX2, OPT) is selected. the value of settings. • Depending on the source, the value on the information display may differ from the actual sampling rate’s. -
Page 31: Muting The Sound
• If MUTING is pressed while a setting is being performed, the setup will be terminated. • If there’s a volume difference between your speakers and your • Even if the power cord is unplugged, the muting function will be page 37). headphones, you can adjust the offset level (➔... -
Page 32: Controlling Other Onkyo Components
CD player’s remote control sensor. 3 button Note Pauses playback. REPEAT button • With some components, the remote controller may not work, or only partially. Cycles through the repeat back modes. 7 button Selects the beginning of the current song. Pressing this button twice selects the previous song. -
Page 33: Controlling The Onkyo Dock
Starts or pauses playback. DIMMER 6 button Selects the next song. • If you use your iPod with any other accessories, iPod playback detection may not work. • Use the integrated amplifier’s volume control to adjust the playback volume. • While your iPod is inserted in an Onkyo Dock, its volume control has no effect. -
Page 34: Controlling The Onkyo Network Tuner
Sets an Onkyo Network Tuner to Standby. Connect an Onkyo Network Tuner to the integrated DIMMER button amplifier and enjoy its music. You can use the integrated Adjusts the display brightness. amplifier’s remote controller to control the Network !/"/#/$ and ENTER buttons Tuner, but the functionality will depend on your Network Select and adjust settings. -
Page 35: Advanced Operations
Press !/" repeatedly to select “NAME”. Note • If you assign a name that is already used on another input, the name of that other input will be restored to its default. • When the “PHONO” input is selected, “NAME” setting is not available. -
Page 36: Skipping Unused Inputs
Operating on the integrated amplifier Skipping Unused Inputs INPUT selector SETUP You can hide the display of those inputs that are not used, so that they are skipped when selecting an input. Change any input from the following: L1(LINE1), L2(LINE2), L3(LINE3), CX1(COAX1), CX2(COAX2), OPT, PNO(PHONO) ■... -
Page 37: Setting The Headphone Level
The current level is displayed. • The default level is 0. Note • The integrated amplifier will end the setup if there is no operation for 8 seconds. Press #/$ repeatedly to adjust the offset level. You can adjust the offset level from -12 dB to +12 dB in 1 dB steps. -
Page 38: Setting The Auto Standby Function
Setting the Auto Standby Function INPUT selector SETUP When the Auto Standby (ASb) function is activated, the integrated amplifier will automatically enter Standby mode if there is no operation for 30 minutes with no audio signal input. ■ Operating with the remote controller !/"/#/$... -
Page 39: Setting The Route
Note PRE: With this setting, you can use the integrated • In “PRE” mode, SPEAKERS can’t be used. • In “SPLIT” mode, you need to use PRE OUT and MAIN IN. amplifier as a preamplifier (➔ page 23). • In “MAIN” mode, only SPEAKERS and SETUP can be used. -
Page 40: Restoring The Default Settings
The current setting flashes on the information display. If “RST-NO” is selected, the setup returns to “RESET”. Note • The integrated amplifier will end the setup if there is no operation for 8 seconds. Press #/$ to switch between “RST-NO” and “RST-YES”. -
Page 41: Others
Audio performance integrated amplifier enters Standby mode. Remove the source of the problem and turn the integrated amplifier • Audio performance will be at its best about 10 to 30 back on. minutes after the integrated amplifier has been turned on and had time to warm up. - Page 42 A popping noise is produced when the power is set to on or off. • Turn each of the components’ power on or off in the following order. When turning the power on: 1.
-
Page 43: Specifications
LINE 1, LINE 2, LINE 3, PHONO (European) (MM/MC), MAIN IN 2 ch × 75 W at 8 ohms, 20 Hz - 20 kHz, 0.05 %, 2 ch driven (IEC) ■ 2 ch × 140 W at 4 ohms, 20 Hz - 20 kHz, Audio Outputs 0.05 %, 2 ch driven (IEC) - Page 44 The Coach House 81A High Street, Marlow, Buckinghamshire, SL7 1AB, UK Tel: +44-(0)1628-473-350 Fax: +44-(0)1628-401-700 Unit 1033, 10/F, Star House, No 3, Salisbury Road, Tsim Sha Tsui Kowloon, Hong Kong. Tel: 852-2429-3118 Fax: 852-2428-9039 http://www.ch.onkyo.com/ 1301, 555 Tower, No.555 West NanJin Road, Jin an, Shanghai,...
Need help?
Do you have a question about the A-9070 and is the answer not in the manual?
Questions and answers