Table of Contents
Advertisement
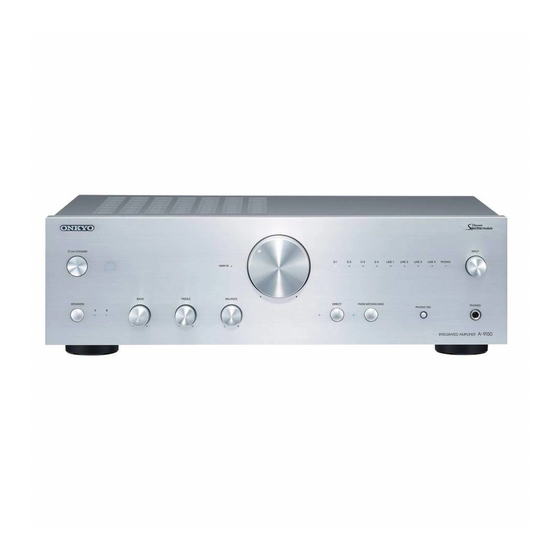
INTEGRATED AMPLIFIER
A-9150
Instruction Manual
Thank you for purchasing an Onkyo Integrated
Amplifier. Please read this manual thoroughly before
making connections and plugging in the unit.
Following the instructions in this manual will enable
you to obtain optimum performance and listening
enjoyment from your new Integrated Amplifier.
Please retain this manual for future reference.
Contents
Introduction ...................................2
Connections.................................12
Turning On & Basic Operations....... 21
Advanced Operations .................25
Others...........................................28
E
n
Advertisement
Table of Contents

Related Manuals for Onkyo A-9150


Summary of Contents for Onkyo A-9150
- Page 1 Turning On & Basic Operations..21 Instruction Manual Advanced Operations ....25 Others...........28 Thank you for purchasing an Onkyo Integrated Amplifier. Please read this manual thoroughly before making connections and plugging in the unit. Following the instructions in this manual will enable you to obtain optimum performance and listening enjoyment from your new Integrated Amplifier.
-
Page 2: Introduction
Introduction WARNING: WARNING AVIS RISK OF ELECTRIC SHOCK RISQUE DE CHOC ELECTRIQUE TO REDUCE THE RISK OF FIRE OR ELECTRIC DO NOT OPEN NE PAS OUVRIR SHOCK, DO NOT EXPOSE THIS APPARATUS TO The lightning flash with arrowhead symbol, within an RAIN OR MOISTURE. -
Page 3: Precautions
CAN ICES-3 B/NMB-3 B. wet or damp. If water or any other liquid gets inside Sur les modèles dont la fiche est polarisée: this unit, have it checked by your Onkyo dealer. ATTENTION: POUR ÉVITER LES CHOCS 8. Handling Notes ÉLECTRIQUES, INTRODUIRE LA LAME LA PLUS... -
Page 4: Supplied Accessories
Specifications and operations are the – Safety same regardless of color. – Limits and methods of measurement of radio disturbance characteristics – Limits for harmonic current emissions – Limitation of voltage changes, voltage fluctuations and flicker – RoHS Directive, 2011/65/EU WEEE http://www.onkyo.com/manual/weee/weee.pdf... -
Page 5: Features
Features • Three-stage Inverted Darlington Circuitry • Digital input capable of handling 192 kHz sampling rate (2 COAXIAL/2 Optical) • 384 kHz/32 bit D/A converter from Asahi Kasei • Phase Matching Bass Technology • 1.6 mm Full Flat Chassis • 60 W/ch (4 ohms, from 20 Hz - 20 kHz, 0.08 % THD, 2ch Driven) •... -
Page 6: Table Of Contents
Using Headphones ............24 Advanced Operations Custom Setup ..............25 Setting the Auto Standby Function .......25 Setting the speaker impedance ........25 Connecting with Onkyo RI Components .......26 Changing the input setting from a turntable to MC ..27 Others Troubleshooting .............28 Specifications ..............30... -
Page 7: Before Using The Integrated Amplifier
Before Using the Integrated Amplifier Installing the Batteries Using the Remote Controller To use the remote controller, point it at the integrated To open the battery compartment, press the small amplifier’s remote control sensor, as shown below. hollow and slide the cover. Remote control sensor Integrated amplifier Insert the two supplied batteries (R03/AAA) in... -
Page 8: Getting To Know The Integrated Amplifier
Getting to Know the Integrated Amplifier Front Panel For detailed information, see the pages in parentheses. 1 ÍON/STANDBY button ( : TREBLE –/+ controller ( page 21 page 24 Sets the integrated amplifier to On or Standby. -
Page 9: Rear Panel
9 LINE IN 1/2/3/4 L/R jacks REMOTE CONTROL jack Connect playback devices with analog audio output. Connect Onkyo components such as Network Audio Player, Onkyo Docks, CD Players, or Tuner with : LINE OUT L/R jacks (Remote Interactive) jacks. Connect components such as analog line-level sources. -
Page 10: Remote Controller
devices, so connect the cable to the device you have selected to be linked. • Refer to the manuals supplied with your Onkyo CD Players, Tuner, Network Audio Player or Docks. Controlling the Onkyo CD player ∫... - Page 11 Connecting Terminal LINE1/D1 LINE2/D2 LINE3/D3 Component NETWORK Button on CD Player TUNER DOCK AUDIO PLAYER Remote Controller Í Í Í Í DIMMER DIMMER DIMMER DIMMER (Tuning Up/Down) (Preset Up/Down) ENTER ENTER ENTER ENTER ENTER Í CD Í Display the current Display the current Display the current DISPLAY...
-
Page 12: Connections
Connections Connections The power cord must be connected only after all other cable connections are completed. Connecting Your Speakers Right Left Speakers A Integrated Amplifier Speakers B Right Left 1/2" to 5/8" (12 to 15 mm) Screw-type speaker terminals ∫ Strip 1/2"... - Page 13 Bi-wiring Connection Note • Make sure that the wires do not touch metal parts on the back Bi-wiring provides improved bass and treble performance. panel or elsewhere. Using terminals of both SPEAKERS A and • Y plugs cannot be connected. SPEAKERS B, it separates high frequency from low •...
-
Page 14: Cable And Jacks
The integrated amplifier provides 75-ohm impedance matching. White Analog audio (RCA) Analog audio connections (RCA) carry analog audio. To use (Remote Interactive), you need to connect your Onkyo CD Player, Tuner, Network Audio Player, or Dock to the integrated amplifier with an cable. -
Page 15: Analog Connection
Connect the coaxial digital cable to the COAXIAL connect the CD player to the LINE IN 1 jack. D1 jack. • Refer to “Connecting with Onkyo RI Components” ) to use the RI dock function. page 26 • The CD player can be connected to the COAXIAL D1 or D2 jack or the OPTICAL D3 or D4 jack. -
Page 16: Connecting A Tuner
However, when using the interlock function, be sure to connect the Tuner to the LINE IN 2 jack. • Refer to “Connecting with Onkyo RI Components” ) to use the RI dock function. page 26 • The Tuner can be connected to the COAXIAL D1 or D2 jack or the OPTICAL D3 or D4 jack. -
Page 17: Connecting A Network Audio Player And An Ri Dock
Dock Connect the audio pin cable to the LINE IN 3 jack. OPTICAL • An Onkyo Dock can be connected to the LINE IN 1/2/3/4 jack. Network Audio Player, Digital Media However, when using the interlock function, be sure to... -
Page 18: Connecting A Turntable
Connecting a Turntable • Connect your cassette tape deck to either of the following jacks: This unit is compatible with turntables using either MM LINE IN 1/2/3/4. cartridges or MC cartridges. You will need to switch the input setting to match the type of cartridge you are using. Connecting a Recording Component Refer to “Changing the input setting from a turntable to MC”... -
Page 19: Using The Integrated Amplifier As A Preamplifier
The integrated amplifier can be used as a power amplifier. mode). This is an example of connection using the power This is an example of connection using the Onkyo pre- amplifier. amplifier (sold separately). Only the MAIN IN jacks and SPEAKERS jacks are used. -
Page 20: Connecting The Power Cord
Connecting the Power Cord Integrated Amplifier Supplied power cord To an AC wall outlet (Plug type varies from country to country.) AC INLET Connect all of your speakers and components. Connect the supplied power cord to the integrated amplifier’s AC INLET. Plug the power cord into an AC wall outlet. -
Page 21: Turning On & Basic Operations
Turning On & Basic Operations Basic Operations Turning On/Off the Integrated Amplifier ÍON/STANDBY button Turning On the Integrated Amplifier Turning Off the Integrated Amplifier Operating with the remote controller Operating with the remote controller ∫ ∫ Press Í. Press Í. The SPEAKERS (A/B) and Input source LEDs blink, The integrated amplifier enters Standby mode and the then light up after a short time. -
Page 22: Selecting Speakers A And Speakers B
Selecting Speakers A and Speakers B Adjusting the Volume You can select to output sound from Speakers A, The default level is 0. Speakers B, or both A + B (Default value is "Speaker A"). Operating with the remote controller ∫... -
Page 23: Selecting The Input Source
Selecting the Input Source Using the Direct Function You can switch inputs to select the desired source By bypassing the tone control circuit, the Direct function component. Choose an input from the following: uses the shortest path for enhanced sound quality (Default value is "On"). -
Page 24: Adjusting The Bass, Treble And Balance
• When the DIRECT function ( ) is on, turn the page 23 Muting the Sound function off to use the PHASE MATCHING BASS effect. You can temporarily mute the output of the integrated amplifier. Adjusting the Bass, Treble and Balance You can adjust the bass, treble and left/right output balance respectively (Default value is "Center"). -
Page 25: Advanced Operations
Advanced Operations Custom Setup Setting the speaker impedance Setting the Auto Standby Function When the Auto Standby (ASb) function is activated, the You can set the impedance of the speakers that you connect to the unit (Default value is "8 Ω"). integrated amplifier will automatically enter Standby mode if there is no operation for 20 minutes with no audio signal input (Default value: "Off"... -
Page 26: Connecting With Onkyo Ri Components
(*). "D1"). When connected to the LINE 1 jack, After connecting the unit and the Onkyo component with make it so only the "LINE 1" LED is flashing. a digital cable or RCA cable (... -
Page 27: Changing The Input Setting From A Turntable To Mc
Remote Control ∫ You can use the integrated amplifier’s remote controller to control your other -capable Onkyo Components, pointing the remote controller at the integrated amplifier’s remote control sensor instead of the component. To operate the CD player, point the remote controller at the CD player. -
Page 28: Others
• Make sure the integrated amplifier’s volume control is not Further product operating procedures and FAQs set to minimum ( page 22 (frequently asked questions) are available from the Onkyo • Make sure the correct input source is selected web site. page 23 •... -
Page 29: Onkyo Dock
There’s no sound. The remote controller doesn’t work properly. • Make sure that the Onkyo Dock is connected to the integrated amplifier properly. • Make sure the batteries have been installed with the correct • Make sure that no video content is being played. -
Page 30: Specifications
Specifications Rated Output Power (North American) (FTC) With 8 ohm loads, both channels driven, from 20 - 20,000 Hz; rated 30 watts per channel minimum RMS power, with no more than 0.08% total harmonic distortion from 250 milliwatts to rated output. (FTC) With 4 ohm loads, both channels driven, from 20 - 20,000 Hz;... - Page 31 MEMO...
- Page 32 2-3-12, Яэсу, Чуо-ку, г. Токио, 104-0028, ЯПОНИЯ The above-mentioned information is subject to change without prior notice. Visit the Onkyo web site for the latest update. (C) Copyright 2017 Onkyo & Pioneer Corporation Japan. All rights reserved. F1705-1 Printed in Malaysia / Imprimé en Malaisie...
Need help?
Do you have a question about the A-9150 and is the answer not in the manual?
Questions and answers