
Related Manuals for CyberPower BPS240V7ART3U


Summary of Contents for CyberPower BPS240V7ART3U
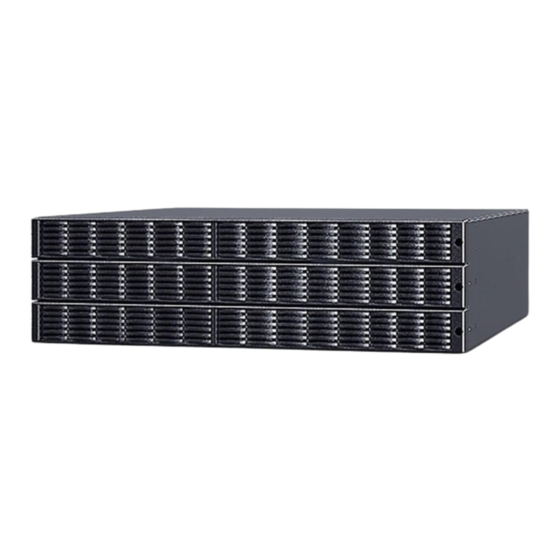
- Page 1 INSTALLATION AND OPERATION MANUAL BPS240V7ART3U BPS240V9ART3U BPS192V7ART3U BPS192V9ART3U K01-C000817-00...
-
Page 2: Table Of Contents
TABLE OF CONTENTS SAFETY INSTRUCTIONS ...................1 Product Safety................................1 INTRODUCTION ....................2 UPS Extended Battery Modules .........................2 Unpacking Procedures ............................2 What’s In The Box ..............................3 EXTENDED BATTERY MODULE INSTALLATION .........4 Battery Module ................................. 4 Connection With UPS ............................4 Extended Battery Modules Configuration ......................5 HARDWARE INSTALLATION ................ -
Page 3: Safety Instructions
SAFETY INSTRUCTIONS SAVE THESE INSTRUCTIONS Please read this manual and follow the instructions for installation and operation. PRODUCT SAFETY CAUTION A battery can present a risk of electric shock and high short circuit current. The following precaution should be observed when working on batteries: •... -
Page 4: Introduction
INTRODUCTION UPS EXTENDED BATTERY MODULES Extended Battery Modules (EBMs) from CyberPower (BPS240V7ART3U, BPS240V9ART3U, BPS192V7ART3U, BPS192V9ART3U) increase battery runtimes during power outages. Each rack/tower convertible EBM uses 3U of rack space, depending upon the model, and can be installed in a tower form factor to match the UPS installation. The DC plug-and-play power connectors allow to daisy- chain additional EBMs to a UPS system. -
Page 5: Whats In The Box
INTRODUCTION WHATS IN THE BOX CONTENT Rackmount Left Rail Rackmount Right Rail Rackmount Ears User’s Manual Phone Cable Flat Head Screws: M4X8L Pan Head Screws: M5X12L Plastic Washers Screw hole dust covers Truss Head Screws: M3X6L... -
Page 6: Extended Battery Module Installation
EXTENDED BATTERY MODULE INSTALLATION BATTERY MODULE BATTERY OUTPUT BATTERY INPUT BATT DET. DC BREAKER Front Panel Rear Panel CONNECTION WITH UPS 1. UPS with one Extended Battery Module (EBM) Step 1: Turn off the DC breaker on the EBM. Step 2: Loosen the two screws to remove the battery cable retention bracket of the UPS. Use the output cable of the EBM to connect the EBM to the UPS. -
Page 7: Extended Battery Modules Configuration
EXTENDED BATTERY MODULE INSTALLATION 2. UPS with multiple Extended Battery Modules (EBMs) *with OLS6/10KERT4U *with OLS6/10KERT5U EXTENDED BATTERY MODULES CONFIGURATION Extended Battery Modules can be configured by the user to display correct estimated battery runtimes. CONFIGURATION ITEM AVAILABLE SETTING DEFAULT SEETING C25 - EBM Number Autodetect, 0-10 pack(s) Autodetect... -
Page 8: Hardware Installation
RISK OF FALLING EQUIPMENT Caution - Important Instructions: Must always be followed. CyberPower Extended Battery Module (EBM) can be installed in a rackmount or vertical/tower orientation. This versatility is especially important to growing organizations with changing needs that value having the option to position an EBM on the floor or in a rackmount system. - Page 9 Step 4: Pull Out the Battery Packs Pull the battery packs out slowly on to a flat and stable surface. Set them aside for reinstalling after that the EBM is rack mounted. *battery packs of BPS240V7ART3U/BPS240V9ART3U *battery packs of BPS192V7ART3U/ BPS192V9ART3U...
- Page 10 HARDWARE INSTALLATION Step 5: Rackmount Ears Installation Attach two rackmount ears to the EBM using eight M4X8 flat head screws. Step 6: Rackmount Rail Installation The mounting depth of the included rackmount rails can adjust from 20.5 in to 36 in (52 cm to 91.5 cm).
- Page 11 HARDWARE INSTALLATION Step 7: Place and Secure the EBM on the Rails Place the EBM on a flat stable surface with the front of the unit facing toward you. Secure the EBM to your rack with four M5X12L screws at the front of the rack. (square holes 2 and 5 as shown).
-
Page 12: Vertical/Tower Installation
Stand the EBM on its side and attach the tower stands (rackmount ears) using four M4X8L screws onto the bottom of the it. Step 2: Attach the Dust Covers Insert the dust covers into the open screw holes on the top and side cover. *battery packs of *battery packs of BPS240V7ART3U/ BPS240V9ART3U BPS192V7ART3U/ BPS192V9ART3U... -
Page 13: Maintenance
Please dispose and/or recycle your UPS and batteries in accordance with local regulations. BATTERY REPLACEMENT For battery procurement, go to www.CyberPower.com, or contact your local dealer. When the Replace Battery the LCD displays Service Battery, use PowerPanel Business Agent software or log on to the RMCARD to perform a runtime calibration to verify battery capacity... - Page 14 Step 4: Pull Out the Battery Packs Pull the battery packs out slowly onto a flat and stable surface. Set them aside for reinstalling after that the EBM is rack-mounted. *battery packs of BPS240V7ART3U/ BPS240V9ART3U *battery packs of BPS192V7ART3U/ BPS192V9ART3U...
- Page 15 Please make sure the connection is properly seated. Step 5-3 : Connect the battery connectors and secure them to the battery compartment. Step 5-4 : Re-install the front panels and tighten them with screws. *battery packs of *battery packs of BPS240V7ART3U/ BPS240V9ART3U BPS192V7ART3U/ BPS192V9ART3U...
-
Page 16: Technical Specifications
TECHNICAL SPECIFICATIONS Models BPS240V7ART3U BPS240V9ART3U BPS192V7ART3U BPS192V9ART3U CONFIGURATION DC Output 240 Vdc 192 Vdc Voltage PHYSICAL Dimensions (mm) W x H x D = 433 x 127.8 x 660 Net Weight (kgs) BATTERY Specifications 12V x 20 pcs 12V x 16 pcs... - Page 17 11F., No.26, Jinzhuang Rd., Neihu Dist., Taipei City 114, Taiwan Copyright © 2023 Cyber Power Systems, Inc. All rights reserved. CyberPower and the CyberPower logo are trademarks of Cyber Power Systems, Inc., and/ or affiliates, which are registered in many countries and regions.
Need help?
Do you have a question about the BPS240V7ART3U and is the answer not in the manual?
Questions and answers