
Related Manuals for holzkraft HBS AS Series


Summary of Contents for holzkraft HBS AS Series
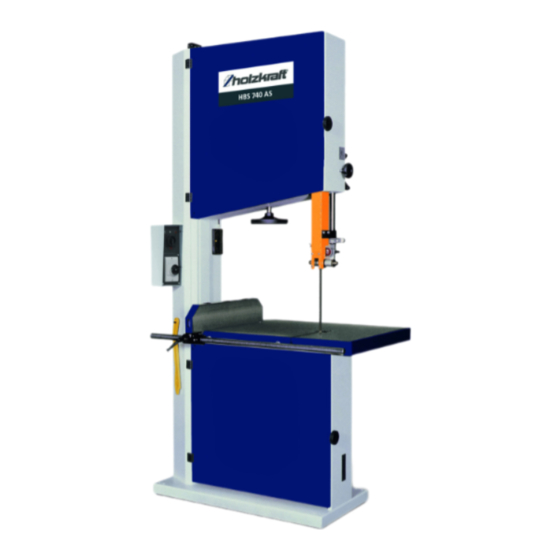
- Page 1 Instruction Manual Wood Band HBS 540 AS HBS 640 AS HBS 740 AS HBS 840 AS HBS 940 AS HBS 740 AS...
-
Page 2: Table Of Contents
5 Transportation, packing, storage ......11 Fax: 0049 (0) 951 96555 - 55 5.1 Transport ............11 5.2 Packaging ............12 E-Mail: info@holzkraft.de 5.3 Storage ............. 12 Internet: www.holzkraft.de 6 Assembly and installation ........12 6.1 Lifting ..............12 6.2 External dimensions - installation ..... 12 6.3 Mounting the work surface and adjusting the inclination..13... -
Page 3: Introduction
All data in these operating instructions has been com- You have made a good choice by purchasing the band piled on the basis of the state-of-the-art, valid standards saw from HOLZKRAFT. and guidelines as well as our many years of expertise and experience. -
Page 4: Responsibility Of The Operator
Safety Operator's duties CAUTION! If the wood band saw is used for commercial purposes, This combination of symbol and signal word indica- the operator of the wood band saw is subject to the legal tes a potentially hazardous situation which, if not stipulations in terms of occupational safety. -
Page 5: Personnel Requirements
Safety 2.3 Personnel requirements 2.4 Personal protective equipment Personal protective equipment is intended to protect the Qualifications health and safety of persons at work. Staff must wear the personal protective equipment indicated in individual The different tasks described in these operating instruc- sections of these operating instructions when carrying tions require different levels of skills in terms of the quali- out the different tasks on the machine. -
Page 6: Safety Regulations In General
Safety 2.5 Safety regulations in general 2.6 Safety instructions for transport NOTE! DANGER! The regulations valid in the country of use must be Before transportation, it is necessary to carefully read observed in each case (as amended). all the information about the weight and the possibi- lity of lifting the products. -
Page 7: Safety Instructions For Correct Use Of The Machine
Safety DANGER! WARNING! - The machine must be connected to a powerful suc- It is forbidden to start the machine if not all the machine parts are mounted or if they do not work tion system before start-up. 35 m/s must be guaran- properly. -
Page 8: Safety Instructions For Operating Personnel
Safety 2.9 Safety instructions for operating personnel - When working with the machine, never bring your hands close to rotating parts! - Do not remove the sharp-edged chips by hand; use NOTE! hand broom or chip hook! - Use the protective devices and befes. Do not wear Before starting, using, servicing or otherwise interve- any hanging objects, especially around wrists and ning on the machine, the instructions for use and... -
Page 9: Safety Markings On The Band Saw
Intended use 2.10 Safety markings on the band saw - Machining of oversized or undersized workpieces so that safe working can no longer be guaranteed. The following safety markings are attached to the band - Modifications to the machine or the use of modified saw (Fig. -
Page 10: Technical Data
Technical Data Technical Data Modell HBS 740 AS HBS 840 AS Ø 1 Suction socket 120 mm 140 mm Model HBS 540 AS HBS 640 AS Ø 2 Suction socket 120 mm 140 mm Work table dimen- 520 x 720 x 600 x 885 x V-belt 3V 475... -
Page 11: Noise Level
Transportation, packing, storage 4.2 Noise level WARNING! Since there is a correlation between intensity of loudness Severe or fatal injuries may occur if parts of the and duration of exposure, it is not possible to precisely machine tumble or fall down from the forklift truck, define the need for further precautions and even less pallet truck or from the transport vehicle. -
Page 12: Packaging
Assembly and installation 5.2 Packaging All of the wood band saw's packaging materials and packing aids are suitable for recycling and must always be disposed of using material-based recycling systems. Packaging materials made of cardboard must be shred- ded and disposed of as part of waste paper recycling. Fig. -
Page 13: Mounting The Work Surface And Adjusting The Inclination
Assembly and installation DANGER! The stud bolts, see Figure 6, is the only connecting component between the worktop and the frame of the machine. If it is necessary to adjust the right angle of the working plate to the saw blade, proceed as follows: After instal- ling the saw blade, see "Installing the saw blade chapter, an angle gauge must be placed on the worktop and the inclination must be adjusted with the screws (Figure 7) -
Page 14: Install Saw Band
Electrical connection Electrical connection 6.5 Install saw band To install the saw band, release the brake of the motor, 7.1 Machines with electromechanical brake which prevents the manual rotation of the flywheels. When the machine is switched off, in order to release the To connect the machine to the mains, see the figure 10. -
Page 15: Operation Of The Wood Band Saw
Operation of the Wood Band Saw Operation of the Wood Band Saw - Check the correct direction of rotation of the tools by starting the motor (teeth engaging the working surface). - If the direction of rotation is incorrect, the internal connections of the motor must be changed by spe- DANGER! cialized personnel. - Page 16 Operation of the Wood Band Saw guard can be lowered, see Figure 13, A ("Rip fence in Before the saw can be switched on, check that the upper normal position") and B ("Rip fence in position for small and lower flaps are properly closed, see Figure 16. Like- and low workpieces").
- Page 17 Operation of the Wood Band Saw Manual start-up "star-delta start-up" for bandsaws The band saw is ready for cutting. with larger motors (4-10 hp) (Figure 17 B). Step 9: To stop the machine, turn the selector switch C Step 1: Turn the main switch located on the back of the back to position 0 (turn the selector switch back 2 machine clockwise to supply power to the steps).
- Page 18 Operation of the Wood Band Saw The following figure shows designs that can be made Fig A with the saw, for example. A Power supply control lamp (main switch) B Brake control lamp (ON = brake released) C Brake selector switch D Machine start selector switch Fig B A Power supply control lamp (main switch)
-
Page 19: Setting And Maintenance
Setting and maintenance For the mold work, do not perform a particularly tight ra- dius of curvature compared to the width of the saw blade. DANGER! - When the machine is switched on, it must never be left unattended. - After finishing work, the machine must be dis- connected from the power supply by pressing the Fig. -
Page 20: Adjustment Of The Upper Flywheel
Setting and maintenance The blade in contact with the buffer (Figure 21 f) is cle- 9.4 Brake adjustment aned and lubricated. To ensure that the buffer is always lubricated, the tank 9.4.1 Electromechanical brake must be filled (Figure 21 g); at the beginning/end of the work, open/close the tap (21 h). - Page 21 Setting and maintenance Step 3: Insert the spring into the hole of the brake coil Step 6: Prepare the fixing screw (Fig. 28). Make sure that (Fig. 25). the nut is on the edge of the screw. Fig. 28: Prepare fixing screw Fig.
-
Page 22: Area Approach
Setting and maintenance Test mode: 9.5 Area approach - Switch to manual operation to test the brake. - Check whether the fan wheel rotates freely. - Start the machine and perform the braking process. Make sure that the fan wheel stop time is less than 10 seconds. -
Page 23: Buffer Flap
Setting and maintenance Fig. 36: Flap If the spring is worn out, the buffer must be replaced im- mediately before the machine is used any further. Fig. 34: Adjust belt 9.8 Safety locking of the flaps To replace the belts, lower the tension as described, re- move screw B (Figure 34), loosen screws A (Figure 35), Check the proper operation of the safety interlock mi- pull the flywheel and shaft off the bracket. -
Page 24: Care, Maintenance And Repair
Care, maintenance and repair 10 Care, maintenance and repair 10.2 Care after work The Wood Band Saw must always be kept in a clean Danger! condition. Danger to life through electric shock! There is a danger to life when in contact with live Wear protective gloves! components. -
Page 25: Maintenace
Disposal, recycling of old equipment 10.4 Maintenace Pos. What Control When Executor Note Check safety With the machine swit- Beim erneuten Every Operator of device ched on, open the main Schließen darf month the machine switch and close it sich die Maschine again. -
Page 26: Disposal Via Municipal Collection Points
Spare parts 11.4 Disposal via municipal collection 12.1 Ordering spare parts points The spare parts can be obtained from the authorised de- Disposal of used electrical and electronic equipment aler. (Applicable in the countries of the European Union and other European countries with a separate collection sys- Specify the following key data when making inquiries or tem for these appliances) ordering spare parts:... -
Page 27: Spare Parts Drawings
Spare parts 12.2 Spare parts drawings The following drawings should help to identify necessary spare parts in case of service. To order, send a copy of the parts drawing with the marked components to your authorized dealer. Spare parts drawing 1 Adjustment system Justier-System Belt protection system... - Page 28 Spare parts Spare parts drawings 2 and 3A Spare parts drawing 2: 200. Belt tensioning system 203. Parallel stop system Spare parts drawing 3 A HBS 540/940 Fig. 39: Spare parts drawings 2 and 3 A HBS AS-Series | Version 2.14...
- Page 29 Spare parts Spare parts drawing 3 B Antrieb Fig. 40: Spare parts drawing 3 B Spare parts drawing 4 Fig. 41: Spare parts drawing 4 HBS AS-Series | Version 2.14...
- Page 30 Spare parts Spare parts drawing 5 Fig. 42: Spare parts drawing 5 HBS AS-Series | Version 2.14...
- Page 31 Spare parts Spare parts drawing 6 Fig. 43: Spare parts drawing 6 HBS AS-Series | Version 2.14...
- Page 32 Spare parts Spare parts drawing 7 A. Lubrication system for belt tensioning system B. Electropneumatic lubrication system (optional) C. Lubricant Tank D. Nozzles Fig. 44: Spare parts drawing 7 HBS AS-Series | Version 2.14...
-
Page 33: Electrical Circuit Diagrams
Electrical circuit diagrams 13 Electrical circuit diagrams Electrical circuit diagram 1 - HBS 540 AS and HBS 640 AS Fig. 45: Electrical wiring diagram 1 HBS 540 AS and HBS 640 AS HBS AS-Series | Version 2.14... - Page 34 Electrical circuit diagrams Electrical wiring diagram 1 - HBS 740 AS, HBS 840 AS and HBS 940 AS Fig. 46: Electrical wiring diagram 1 HBS 740 AS, HBS 840 AS and HBS 940 AS HBS AS-Series | Version 2.14...
-
Page 35: Ec-Declaration Of Conformity
According to machinery directive 2006/42/EC Annex II 1.A Stürmer Maschinen GmbH Manufacturer/carrier: Dr.-Robert-Pfleger-Str. 26 D-96103 Hallstadt hereby declares that the following product ® Product group: Holzkraft Holzbearbeitungsmaschinen Type of machine: Wood Band Saw Designation of the machine *: Item number: HBS 540 AS 5152154...
Need help?
Do you have a question about the HBS AS Series and is the answer not in the manual?
Questions and answers