Table of Contents
Advertisement
Quick Links
Advertisement
Table of Contents

Related Manuals for JUNO JBD167D2


Summary of Contents for JUNO JBD167D2
- Page 1 User Manual Steam oven JBD167D2...
-
Page 2: Table Of Contents
VISIT OUR WEBSITE TO: Get usage advice, brochures, trouble shooter, service and repair information: www.juno.de/support CONTENTS 1. SAFETY INFORMATION...................2 2. SAFETY INSTRUCTIONS.................4 3. PRODUCT DESCRIPTION................7 4. CONTROL PANEL.................... 7 5. BEFORE FIRST USE..................9 6. DAILY USE...................... 10 7. CLOCK FUNCTIONS..................12 8. - Page 3 be kept away from the appliance unless continuously supervised. Children should be supervised to ensure that they do not • play with the appliance. Keep all packaging away from children and dispose of it • appropriately. WARNING: The appliance and its accessible parts become •...
-
Page 4: Safety Instructions
Always use oven gloves to remove or insert accessories or • ovenware. Use only the food sensor (core temperature sensor) • recommended for this appliance. To remove the shelf supports first pull the front of the shelf • support and then the rear end away from the side walls. Install the shelf supports in the opposite sequence. - Page 5 2.2 Electrical connection • Do not change the specification of this appliance. • Make sure that the ventilation openings WARNING! are not blocked. Risk of fire and electric shock. • Do not let the appliance stay unattended during operation. • All electrical connections should be made •...
- Page 6 2.6 Internal lighting behind a closed furniture panel and cause subsequent damage to the appliance, the housing unit or the floor. Do not close the WARNING! furniture panel until the appliance has Risk of electric shock. cooled down completely after use. •...
-
Page 7: Product Description
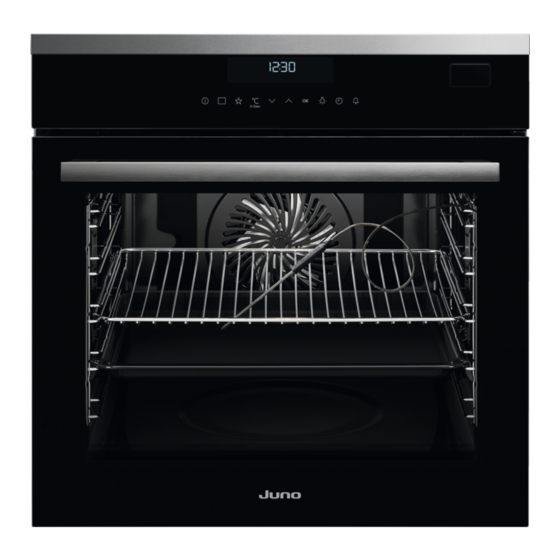
3. PRODUCT DESCRIPTION 3.1 General overview Control panel Electronic programmer Water drawer Socket for the food sensor Heating element Lamp Descaling pipe outlet Shelf support, removable Shelf positions 3.2 Accessories • Grill- / Roasting pan To bake and roast or as pan to collect fat. •... - Page 8 Use the sensor fields to operate the appliance. Sensor Function Description Field Display Shows the current settings of the appliance. ON / OFF To turn the appliance on and off. Options To set a heating function or an automatic programme. My Favourite Pro‐...
-
Page 9: Before First Use
Temperature An automatic programme with a weight input operates. The current temperature is indicated. Temperature A clock function operates. You can change the temperature. Core temperature sensor The core temperature sensor is in the 4.3 Heat up indicator core temperature sensor socket. Light If you turn on the heating function, appears. -
Page 10: Daily Use
Water hardness Test paper Calcium de‐ Calcium de‐ Water clas‐ posit posit (mg/l) sification Level (dH) (mmol/l) 0 - 7 0 - 1.3 0 - 50 soft 8 - 14 1.4 - 2.5 51 - 100 moderately hard 15 - 21 2.6 - 3.8 101 - 150 hard... - Page 11 The oven door should be closed during cooking so that the function is not interrupted Oven func‐ Application and the oven operates with the highest tion energy efficiency possible. Use this function to prepare When you use this function the lamp bread and bread rolls with automatically turns off after 30 sec.
-
Page 12: Clock Functions
in the settings menu, the signal sounds if the 4. Turn on the oven. Fast Heat Up is not available for the set 5. Set a steam heating function and the function. Refer to "Additional functions" temperature. chapter, Using the settings menu. 6. - Page 13 7. Press a sensor field to stop the signal. 8. Turn off the oven. To turn on the appliance with necessa‐ ry settings with only one press of the 7.4 How to set: End Time Set + sensor field any time later. 1.
-
Page 14: Automatic Programmes
7.6 How to set: Set + Go 3. Press to set the Minute Minder You can use the Set + Go function only when to confirm. the Duration is set. 4. Press or the Minute Minder starts 1. Set a heating function and temperature. automatically after 5 seconds. - Page 15 4. Touch or the settings save Programme automatically after five seconds. The appliance activates. LEMON SPONGE CAKE 5. You can change the default weight value CHEESE CAKE with . Touch CANNELLONI 6. When the set time ends, an acoustic signal sounds for two minutes. CONVENIENCE CAKE flashes.
-
Page 16: Using The Accessories
9. USING THE ACCESSORIES WARNING! CAUTION! Refer to Safety chapters. Only use the core temperature sensor supplied or the correct replacement parts. 9.1 Inserting accessories A small indentation at the top increases The core temperature sensor must safety. The indentations are also anti-tip stay in the meat and in the socket during devices. -
Page 17: Additional Functions
When the meat is at the set core You can set the core temperature temperature, an acoustic signal sounds for two minutes and the value of the core only when flashes. If is in the display but does not flash before you temperature and flash. - Page 18 The signal sounds. Description Value to The display shows SAFE. To turn off the Child Lock function repeat step Restore settings YES / NO 10.3 Using the Function Lock It is not possible to deactivate the tone of the ON / OFF sensor field.
-
Page 19: Hints And Tips
10.7 Cooling fan brightness mode for the next 10 seconds. When the appliance operates, the cooling fan – if the appliance is deactivated and you turns on automatically to keep the surfaces of set the Minute Minder. When the the appliance cool. If you turn off the Minute Minder function ends, the appliance, the cooling fan can continue to display goes back to the night... - Page 20 Cannelloni 180 - 200 70 - 85 Bread pudding 190 - 200 55 - 70 Rice pudding 170 - 190 45 - 60 Apple cake, made of sponge cake mixture 160 - 170 70 - 80 (round cake tin) White bread 190 - 200 55 - 70 11.4 Information for test institutes...
-
Page 21: Care And Cleaning
True Fan Baking tray 25 - 35 2 and 4 Small cakes, 20 per tray Cooking True Fan Fatless sponge cake 45 - 55 2 and 4 Wire shelf Cooking True Fan Apple pie 55 - 65 2 and 4 Wire shelf Cooking Preheat the empty appliance. - Page 22 • Do not clean the non-stick accessories 2. Remove all accessories and removable using abrasive cleaner or sharp-edged shelf supports. objects. 3. Turn on the appliance. 4. Place the deep pan on the first shelf 12.2 Removing the shelf supports position.
- Page 23 steam generator and on the food quality. To 2. Remove all accessories and removable prevent this, clean the steam generation shelf supports. circuit from residual stone. 3. Turn on the appliance. 4. Place the deep pan on the first shelf 1.
-
Page 24: Troubleshooting
9. Clean the glass panel with water and soap. Dry the glass panel carefully. Do not clean the glass panels in the dishwasher. After cleaning, do the above steps in the opposite sequence. Install the smaller panel first, then the larger and the door. Make sure that the glass panels are inserted in the correct position otherwise the surface 45°... - Page 25 13.1 What to do if... Problem Possible cause Remedy You cannot activate or operate The oven is not connected to an Check if the oven is correctly the oven. electrical supply or it is connected connected to the electrical supply incorrectly.
- Page 26 Problem Possible cause Remedy The descaling procedure is inter‐ There was a power cut. Repeat the procedure. rupted before it finishes. The descaling procedure is inter‐ The function was stopped by the Repeat the procedure. rupted before it finishes. user. There is no water inside the You did not fill the water drawer Check if the a descaling agent /...
-
Page 27: Energy Efficiency
14. ENERGY EFFICIENCY 14.1 Product Information Sheet and Product Information according to EU Energy Labelling and Ecodesign Regulations Supplier's name Juno Model identification JBD167D2 944182419 Energy Efficiency Index 81.0 Energy efficiency class Energy consumption with a standard load, conventional mode 1.09 kWh/cycle Energy consumption with a standard load, fan-forced mode 0.68 kWh/cycle... -
Page 28: Environmental Concerns
Cooking with fan warm. The residual heat indicator or temperature appears on the display. When possible, use the cooking functions with fan to save energy. Cooking with the lamp off Residual heat Turn off the lamp during cooking. Turn it on only when you need it. - Page 32 867353479-D-142024...
Need help?
Do you have a question about the JBD167D2 and is the answer not in the manual?
Questions and answers