Advertisement
Available languages
Available languages
INSTALLATION MANUAL
230CIK Clean Installation Kit
CSA approved for use with Valor P2 200 Models only
DANGER
!
A barrier designed to reduce the risk of burns from the hot
viewing glass is provided with this appliance and must be
installed for the protection of children and other at-risk
individuals.
26-1/2" [674 mm]
21-1/8" [537 mm]
outer frame
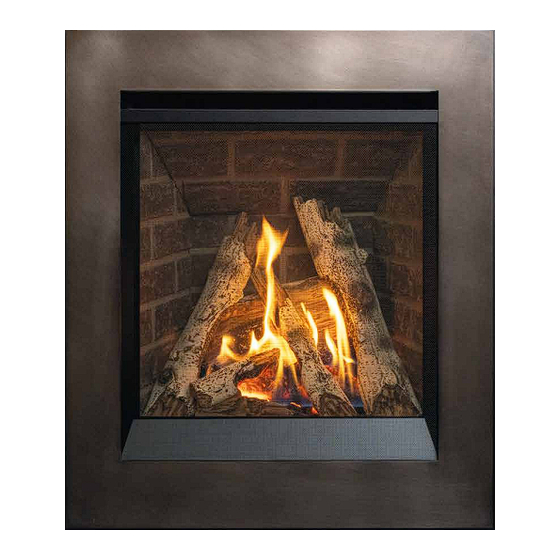
The 230 Clean Installation Kit installs at the time of
framing the appliance. Wall fi nishes are then applied
over top of fl anges and butted up to 230's frame.
This kit is not intended to and cannot be installed
with a P2 trim or any other trim.
See appliance installation manual for more
information about finishing around this kit.
4009490-01
© Copyright Miles Industries Ltd., 2024
P2 Series
HOT GLASS WILL
CAUSE BURNS.
DO NOT TOUCH GLASS
UNTIL COOLED.
NEVER ALLOW CHILDREN
TO TOUCH GLASS.
1-9/16"
[39 mm]
1-5/8"
[41 mm]
1-1/8"
[29 mm]
Upper panel
Convection baffle
Left hand
panel
Left hand
door
Removable
panel
Overview
I N ST A LL E R
L e a v e t h i s m a n u a l
w i t h t h e a p p l i a n c e .
C O N S U M E R
Retain this manual
for future reference.
Note: This kit must be installed
by a qualifi ed installer, service
agency or gas supplier at the time
of the heater installation. These
instructions are to be used in
conjunction with the fi replace
main installation instructions.
P2 200
Right hand door
Barrier screen
Right hand
panel
Lower panel
1
Advertisement
Table of Contents

Related Manuals for Valor P2 230CIK


Summary of Contents for Valor P2 230CIK
- Page 1 INSTALLATION MANUAL P2 Series 230CIK Clean Installation Kit CSA approved for use with Valor P2 200 Models only DANGER I N ST A LL E R L e a v e t h i s m a n u a l w i t h t h e a p p l i a n c e .
- Page 2 WARNING Raised, non-combustibe hearths, although safe, can get quite hot and may present a burn hazard to children and other at-risk individuals. Right side view of appliance - bottom appliance base level allowed to maximum 1-1/2” [39 mm] thickness Removable panel including 1/2”...
- Page 3 Installation of 230CIK Clean Installation Kit Installation at time of framing The side brackets provided loose with the appliance are 1. Install the lower panel securing it to the studs inside not needed with this kit. the bottom of the appliance with 3 nuts provided. Hearth considerations You need to know whether there will be a hearth or not in front of the appliance and some rules must be...
- Page 4 3. Insert appliance into framing and center it laterally. 5. Install the top panel butting it to the top surface of Secure bottom panel to studs with 2 wood screws the convection baffl e; secure to the studs with 4 (not supplied).Install the side panels on the appli- wood screws (not provided) (2/side).
-
Page 5: Finishing Installation
7. Secure the side panels to the studs using 8 wood 2. Identify left hand side door from right using the screws (not supplied) (4/side). image below. Left Right Left Right Side doors - front view Side doors - rear view 3. -
Page 6: Repair Parts List
Because our policy is one of constant development and improvement, details may vary slightly from those given in this publication. Designed & Manufactured by / for Miles Industries Ltd. 190 – 2255 Dollarton Highway, North Vancouver, B.C., CANADA V7H 3B1 Tel. 604-984-3496 Fax 604-984-0246 www.valorfi replaces.com... -
Page 7: Directives D'installation
DIRECTIVES D'INSTALLATION Série P2 Encadrement 230CIK Certifi é par la CSA pour usage avec les foyers Valor P2 200 seulement DANGER INSTALLATEUR : Laissez cette notice avec l’appareil. CONSOMMATEUR : Conservez cette notice pour VITRE CHAUDE - RISQUE consultation ultérieure. - Page 8 AVERTISSEMENT Les dalles incombustibles, même si elles sont sécuritaires, peuvent devenir très chaudes et peuvent causer des brûlures aux enfants et personnes à risques. Finis incombustible AU-DESSUS Côté droit de l'appareil - bas du niveau de la base de l’appareil épaisseur maixmale de 1-1/2”...
- Page 9 Installation au moment de l'encastrement Installation avec l'Encadrement 230CIK Les supports des côtés fournis avec l'appareil ne sont 1. Installez le panneau du bas et fi xez-le aux 3 chevilles pas nécessaires pour installer le 230CIK. Recyclez-les. au bas de l’appareil avec trois écrous fournis. Dalle ou plancher protecteur Vous devez savoir à...
- Page 10 3. Insérez l’appareil dans la charpente et centrez-le 5. Installez le panneau du haut l’aboutant à la surface latéralement. Fixez le panneau du bas aux poteaux du défl ecteur de convection et fi xez-le aux poteaux avec 2 vis à bois (non fournies). avec 4 vis à...
- Page 11 7. Fixez les montants des côtés aux poteaux avec 8 vis 2. Identifi ez les portes latérales gauche et droite à à bois (non fournies) (4/côté). l'aide de l'image ci-dessous. Gauche Droite Gauche Droite Portes latérales - avant Portes latérales - arrière 8.
-
Page 12: Liste De Pièces
Liste de pièces 4. Installez le pare-étincelles, les onglets en bas et les aimants vers l'intérieur. Description de pièce a. Posez les onglets du bas sur le panneau Panneau du haut 4009231 amovible. Défl ecteur de convection 4009232 b. Poussez le pare-étincelles contre le cadre. Montant gauche 4009233 c.
Need help?
Do you have a question about the P2 230CIK and is the answer not in the manual?
Questions and answers