
Subscribe to Our Youtube Channel
Related Manuals for Uniden BW4501 Series


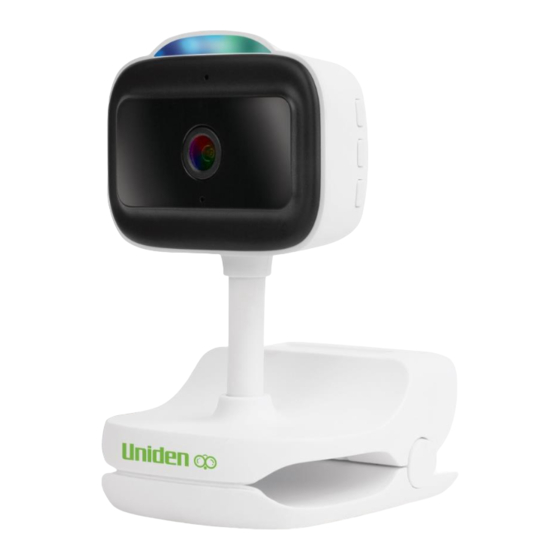
Summary of Contents for Uniden BW4501 Series
- Page 1 BW4501 Series 4.3” LCD Portable Wireless Baby Monitoring System For more exciting new products please visit our website: Australia: www.uniden.com.au...
- Page 2 IMPORTANT SAFETY INSTRUCTIONS This manual contains important information about this product’s operation. If you are installing this product for others, you must leave this manual or a copy with the end user. When using your equipment, always follow basic safety precautions to reduce the risk of fire, electric shock and injury to persons, including the following: •...
- Page 3 • Clean only with a dry cloth. Failure to follow the instructions in this operating manual will void the warranty. Uniden assumes no liability for damages to property or injury to persons caused by improper handling or failure to comply with these safety...
-
Page 4: Table Of Contents
CONTENTS WHAT’S IN THE BOX? ..................5 GETTING STARTED .....................6 INSTALLATION ....................10 MONITOR INSTALLATION ........................10 CAMERA INSTALLATION ...........................10 PAIRING ......................12 PAIRING TWO CAMERAS.................13 USING THE BABY MONITOR ................14 VOLUME ..............................14 MONITOR BRIGHTNESS ......................... 14 PHOTO ................................. 14 VIDEO ................................14 GALLERY .............................. -
Page 5: What's In The Box
* Additional 1 Camera BW450 can be added to BW4501. • If any item is missing or damaged, contact your place of purchase immediately. Never use damaged products! • Need help? Get answers at our website: www.uniden.com.au for Australian model All trademarks are registered trademarks of their respective owners. -
Page 6: Getting Started
GETTING STARTED Camera... - Page 7 Item What it does LED night light bars. Status Light: Solid Red: Camera is malfunction. Slow Blinking Red: Waiting for the connection with the pairing monitor. Refer to Item 10. Fast Blinking Red: Pairing with the monitor/ Fail to connect to the monitor. Solid Blue: Camera connected to the monitor.
- Page 8 Monitor...
- Page 9 Item What it does 4.3 inch LCD screen. Microphone: Capture sounds and transmits it to the camera. Status Light: Orange: Charging, Working and Sleep. Black: Power off. If the monitor unplugged from the power, this LED turns off. POWER: Press and hold 5 seconds to turns the monitor on and off. Switch cameras when dual screen.
-
Page 10: Installation
INSTALLATION MONITOR INSTALLATION Place the monitor in a location with clear reception from your camera(s). If you are using the monitor as a stand-alone unit, flip out the stand on the back of the monitor and extend the antenna. 1. Insert one end of the USB-C cable to the USB-C port on the side of the monitor. 2. - Page 11 Wall Mount The camera mounting clip has two slots that fit over screws to mount the unit on the wall. 1. Install the screws to the wall according to the position of the drill template. Do not tighten the screws to the end, as you need to leave a gap for hanging the camera.
-
Page 12: Pairing
PAIRING Viewing the Camera on Monitor After the camera and the monitor are powered on, the camera will connect to the monitor automatically. The camera(s) and the monitor are already paired from the factory. The viewing range is limited to no more than 200m in line of sight. Other factors such as house walls, layout and electronic devices will affect the transmission range. -
Page 13: Pairing Two Cameras
PAIRING TWO CAMERAS The BW4501 baby monitor supports up to two camera connections and able to display two camera feeds at the same time. To set parameters or enable functions of one of the cameras, you will need to select the camera first. -
Page 14: Using The Baby Monitor
USING THE BABY MONITOR Volume This option allows you to adjust the volume level for the monitor. Press +/- button on top right of the monitor to adjust. Monitor Brightness This option allows you to adjust the brightness level for the monitor. 1. -
Page 15: Gallery
Gallery Access recorded video and photo in the micro SD Card. 1. Press Menu button on the monitor, select and press OK enter the interface. 2. Select the camera and date, select the photo or video you want to view,and press OK to view photo or playback video. -
Page 16: Status Light/Night Light
Status Light / Night light This option allows you to switch On/Off the LED indicator and the camera night light and brightness level for the monitor. 1. Status light: Press Menu button on the monitor and select > 2. Night light: Press Menu button on the monitor and select >... -
Page 17: Temperature And Humidity Detection
Temperature and Humidity Detection The baby monitor is able to provide ambient room temperature and humidity level around the camera as a reference only. If the temperature or humidity falls outside of a preset range, the system alerts you. Temperature and humidity alert range lets you set that range. -
Page 18: Smart Care
Smart Care Motion Detection detects any movement within camera view; Noise Detection identifies the volume of the baby’s sound or crying. When any of the detection is above the set threshold, the monitor screen will lit up when it is in sleep mode or the screen is in standby mode. -
Page 19: Sleep Mode
Sleep Mode S et the monitor to automatically enter sleep mode according to the length of time. Please make sure to adjust the Smart Care settings (page18) according to your needs. If motion detection or noise detection is on Low/Medium/High, any alert triggered will turn the monitor LCD back on with Reminder Method you selected (Icon, Voice). -
Page 20: Date And Time
Date and Time S et the monitor to automatically enter sleep mode according to the length of time set to increase the monitor standby time. Any of the detection triggered will turn the LCD back on. If none of the detection is active, press the power button on the monitor to turn the LCD back on. -
Page 21: Sd Card
SD Card View the total capacity and the free space left in the micro SD Card if it is inserted to the monitor. The monitor only supports up to 128GB micro SD Card and only recognise fat32 type micro SD Card. You may format the SD Card as required and be sure to backup important files before formatting the micro SD Card. -
Page 22: Device Information
Device Information 1. View the monitor and camera firmware version. 2. Press the MENU button on the monitor, and select > Device Information. 3. Press LEFT and RIGHT direction buttons to toggle between the monitor and camera firmware information and whether there is an upgrade. Battery Information Status (Monitor + Camera) Time... -
Page 23: Troubleshooting
TROUBLESHOOTING If you have problems with the system, there is often a quick and simple solution. Please try the following: There is no picture on • checking all connections to the camera. Make sure the monitor from the the adaptor is plugged in. camera •... -
Page 24: Specification
SPECIFICATION CAMERA Image Sensor 1/2.9” 2Megapixel Colour CMOS Video Resolution 1920 x 1080p Viewing Angle 100° Two-way Audio Night Vision Up to 10m Temperature Sensor Humidity Sensor Battery 3350mAh Power Input DC 5V/1A Operating Temperature Range 0°C ~ 40°C Operating Humidity Range Within 90% Relative Humidity MONITOR Display... -
Page 26: Two-Year Limited Warranty
(C) Improperly installed contrary to instructions contained in the relevant Owner’s Manual (D) Repaired by someone other than an authorized Uniden Repair Agent in relation to a defect or malfunction covered by this warranty; or (E) Used in conjunction with any equipment, parts or a system not manufactured by Uniden. - Page 27 (such as a legible copy of the sales docket) to Uniden. Please refer to the Uniden website for address details. You should contact Uniden regarding any compensation that may be payable for your expenses incurred in making a warranty claim.
- Page 28 © 2024 Uniden Australia Pty Limited. V1.3...
Need help?
Do you have a question about the BW4501 Series and is the answer not in the manual?
Questions and answers