
Related Manuals for Uniden BW615PTR


Summary of Contents for Uniden BW615PTR
- Page 1 BW615PTR Additional/Standalone Camera Baby Monitoring System For more exciting new products please visit our website: Australia: www.uniden.com.au...
- Page 2 IMPORTANT SAFETY INSTRUCTIONS This manual contains important information about this product’s operation. If you are installing this product for others, you must leave this manual or a copy with the end user. When using your equipment, always follow basic safety precautions to reduce the risk of fire, electric shock and injury to persons, including the following: •...
- Page 3 • Clean only with a dry cloth. Failure to follow the instructions in this operating manual will void the warranty. Uniden assumes no liability for damages to property or injury to persons caused by improper handling or failure to comply with these safety...
-
Page 4: Table Of Contents
CONTENTS WHAT’S IN THE BOX? ..................5 GETTING STARTED .....................6 INSTALLATION ....................8 CAMERA INSTALLATION ...........................8 PAIRING TO THE MONITOR ................10 USING THE BABY MONITOR ................11 CAMERA SELECTION..........................11 BABY WATCH PLUS APP................... 12 REMOTE VIEWING VIA APP ......................... 12 LIVE VIEW..............................17 HISTORY .............................. -
Page 5: What's In The Box
• If any item is missing or damaged, contact your place of purchase immediately. Never use damaged products! • Need help? Get answers at our website: www.uniden.com.au for Australian model All trademarks are registered trademarks of their respective owners. -
Page 6: Getting Started
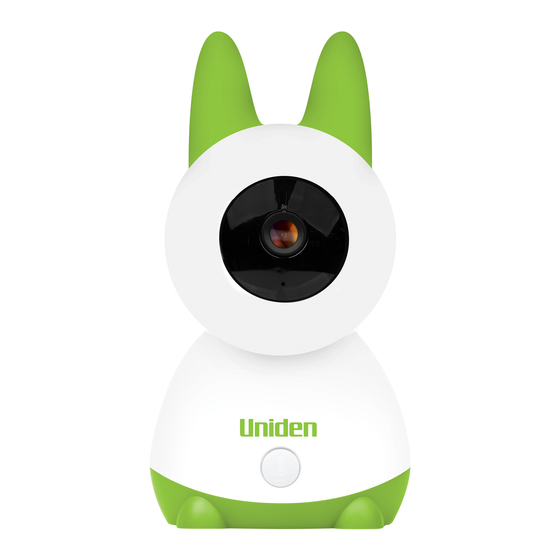
GETTING STARTED Camera... - Page 7 Item What it does Silicone Sleeve Status Light: Solid Red: Camera is malfunction. Slow Blinking Red: Waiting for network configuration. Fast Blinking Red: Fail to connect to the network/waiting for network connection. Solid Blue: Camera connected to the network. Lens: Camera lens. Microphone: Captures sounds for the area near the camera.
-
Page 8: Installation
INSTALLATION CAMERA INSTALLATION Placement Considerations The camera can be placed on a shelf with the bracket fixed or on the wall with the bracket anchored to the wall. Align the base of the camera Rotate the camera clockwise to slip into the bracket and secure the camera in position. - Page 9 Powering the Camera Insert one end of the micro USB cable to the micro USB port on the cam- era (at the back of the camera). Connect the other end of the USB cable into the USB power adaptor. Connect the USB power adaptor into a 240 volt AC (standard indoor) power outlet.
-
Page 10: Pairing To The Monitor
PAIRING TO THE MONITOR Pairing the camera to the monitor: 1. Press the Menu button on the monitor, and select > Camera Management > Camera icon that is greyed out . 2. Press and hold the pairing button on the camera until you hear the prompt tone. 3. -
Page 11: Using The Baby Monitor
USING THE BABY MONITOR The BW61xxR series monitor supports up to two camera connections and able to display two camera feeds at the same time. To set parameters or enable functions of one of the cameras, you will need to select the camera first. -
Page 12: Baby Watch Plus App
• You must have an available Wi-Fi-enabled Smartphone (Android or iOS smartphone). • The BW615PTR camera and your smartphone must be within the same Wi-Fi network range for initial setup (ideally within 3m from the router). • Wi-Fi router connection is 2.4GHz and password if any. - Page 13 2. When launch the Baby Watch app for the first time, you will see the login page. Tap the “Sign Up” button to create a new Baby Watch Plus account. 3. Enter your email address you wish to register with and check the user agreement privacy policies.
- Page 14 4. Name your account and enter your password. Tap Done button and you’ll be all set. Your Baby Watch App account has now been created. 2021-05 5. On the devices tab, to add a device, tap the “+” button on the middle of the screen or on the top right-hand side of the screen if you already have shared access or a paired device.
- Page 15 6. Please ensure the camera is powered on and is within the range of the router. Tap “Next” to continue. If the indicator light on the camera is not flashing slowly, press and hold the reset button with the reset pin for 5 seconds to reset the camera and set it up within 2 minutes.
- Page 16 8. Please make sure that you’ve ripped the protection film off the camera’s lens. Tap “Next” and a QR code will be generated on the screen. Please place the QR code on screen towards the camera lens at a distance of about 15~20cm to let the camera scan the QR code.
-
Page 17: Live View
LIVE VIEW Back Device Settings Date & Time 2021-05-01 15:00:00 2021-05-01 15:00:00 Tap to switch streaming resolution Full Screen Mode Streaming rate & Wi-Fi Strength Two-way talk Take Snapshot Local Recording Motion Alert View and set the temperature and Pan and Tilt humidity alerts. -
Page 18: History
HISTORY 2021-05-01 15:00:00 View playback file timeline View alert event history Choose the date to Take a snapshot while search for videos. playback recorded video Record playback video Access local gallery to local gallery # Please note that a SD Card is needed and inserted to the camera for the lullabies to download and playback. -
Page 19: Troubleshooting
TROUBLESHOOTING If you have problems with the system, there is often a quick and simple solution. Please try the following: There is no picture on • checking all connections to the camera. Make sure the monitor from the the adaptor is plugged in. camera •... -
Page 20: Specification
SPECIFICATION CAMERA Image Sensor 1/2.8” Colour CMOS Video Resolution 2304 x 1296 Rotation Angle Pan:0~355° Tilt: 0~60° Viewing Angle 105° Two-way Audio Night Vision Up to 10m Temperature Sensor Humidity Sensor Wi-Fi 2.4G WIFI (IEEE802.11b/g/n) Transmission Range Wi-Fi: up to 50m line of sight Monitor: up to 150m Line of sight Smart Home Google Assistant / Alexa... -
Page 22: Two-Year Limited Warranty
(“Uniden Aust”) . Terms of Warranty Uniden Aust warrants to the original retail purchaser only that the BW615PTR Series (“the Product”), will be free from defects in materials and craftsmanship for the duration of the warranty period, subject to the limitations and exclusions set out below. - Page 23 (such as a legible copy of the sales docket) to Uniden. Please refer to the Uniden website for address details. You should contact Uniden regarding any compensation that may be payable for your expenses incurred in making a warranty claim.
- Page 24 ©2022 Uniden Australia Pty Ltd Printed in PRC v1.0...
Need help?
Do you have a question about the BW615PTR and is the answer not in the manual?
Questions and answers