Table of Contents
Advertisement
Quick Links
manufactured by
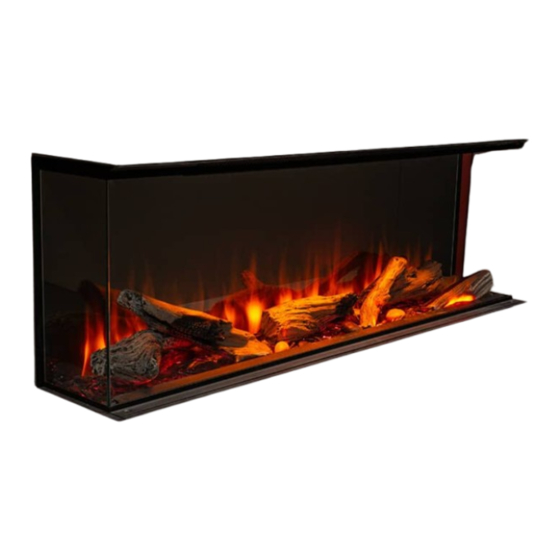
Electric Fireplace Insert
INSTRUCTION MANUAL
MODELS: LEX2-S/LEX3-S/LEX4-S
WARNING
CAUTION
LEX-S_03
Read and understand this entire owner's
manual, including all safety information,
before plugging in or using this product.
Failure to do so could result in fire, electric
shock, or serious personal injury.
Keep this owner's manual for future
reference. If you sell or give this product
away, make sure this manual accompanies
this product.
Advertisement
Table of Contents

Subscribe to Our Youtube Channel
Related Manuals for Valor LEX2-S


Summary of Contents for Valor LEX2-S
- Page 1 Electric Fireplace Insert INSTRUCTION MANUAL MODELS: LEX2-S/LEX3-S/LEX4-S WARNING Read and understand this entire owner’s manual, including all safety information, before plugging in or using this product. Failure to do so could result in fire, electric shock, or serious personal injury.
-
Page 2: Table Of Contents
CONTENT IMPORTANT SAFETY INFORMATION ..........3 TECHNICAL SPECIFICATIONS ............7 PARTS AND HARDWARE ..............8 APPLIANCE DIMENSIONS ............10 ACCESSORIES .................11 LOG SETS .....................11 MOOD LIGHTING ................12 INSTALLATION INSTRUCTIONS ...........13 PREPARATION BEFORE INSTALLATION ..........13 Connect the Mood Lighting Cable ............14 Connect the Power Supply ..............14 Hard Wiring ....................15 Preparing The Casing ................16 INSTALLATION ...................18... -
Page 3: Important Safety Information
IMPORTANT SAFETY INFORMATION • Read all instructions before using this heater! • This heater is hot when in use. To avoid burns, DO NOT let bare skin touch hot surfaces. If provided, use handles when moving this heater. Keep combustible materials, such as furniture, pillows, bedding, papers, clothes, and curtains at least 1 meter (39 inches) from the front of the heater and keep them away from the sides and rear. - Page 4 • Use this heater only as described in this manual. Any other use not recommended by the manufacturer may cause fire, electric shock, or injury to persons. • This appliance MUST be grounded. • ALWAYS plug heaters directly into a wall outlet/receptacle. NEVER use with an extension cord or relocatable power tap (outlet/power strip).
- Page 5 • ALWAYS disconnect this unit from the power supply before performing any assembly or cleaning, or before relocating the electric fireplace. • NEVER leave this heater unattended. ALWAYS unplug this heater when not in use. • ALWAYS store this heater in a dry location. NEVER use the fireplace if it has become wet.
- Page 6 APPLIANCE CERTIFICATIONS This device has been tested in accordance with the CSA Standards for fixed and location-dedicated electric room heaters in the United States and Canada. The appliance must be electrically wired and grounded in accordance with local codes or, in the absence of local codes, with the latest edition of the National Electrical Code ANSI/ NFPA/ 70 in the United States or the Canadian Electrical Code CSA C22.1 in Canada.
-
Page 7: Technical Specifications
TECHNICAL SPECIFICATIONS Models No.: LEX2-S / LEX3-S / LEX4-S Supply Voltage: AC 120V 60Hz / AC 240V 60Hz Maximum power consumption: 1400 W / 2800 W Power for flame and fuel bed effect: Model LEX2-S LEX3-S LEX4-S Power 40.1W 48.1W 50.1W... -
Page 8: Parts And Hardware
PARTS AND HARDWARE 1. Unpack the fireplace carefully and make sure that the appliance is intact with no signs of damage caused by transport and no part has been exposed to water. If in doubt, do not use the appliance and contact your retailer. - Page 9 Sucker LEX2-S (1 pc) LEX3-S/LEX4-S (2 pcs) Black Ember Glass (1 set) Vermiculate (1 set) Remote Control (1 pc) AAA (R03) Battery (2 pcs) Simplified Instruction (1 pc) Instruction (1 pc)
-
Page 10: Appliance Dimensions
APPLIANCE DIMENSIONS Model Units 1250 1280 LEX2-S 49-1/4 50-3/8 15-7/8 22-1/16 8-7/16 11-13/16 9/16 3-1/8 1500 1530 LEX3-S 59-1/16 60-1/4 15-7/8 22-1/16 8-7/16 11-13/16 9/16 3-1/8 1800 1830 LEX4-S 70-7/8 72-1/16 15-7/8 22-1/16 8-7/16 11-13/16 9/16 3-1/8 Clearances from combustibles... -
Page 11: Accessories
ACCESSORIES LOG SETS This appliance is supplied with black glass embers and vermiculite. In addition, three optional log sets are offered to complement the embers/vermiculite: • LEXDWK—Driftwood Log Kit • LEXSWK—Splitwood Log Kit • LEXBLK—Birch Log Kit For optimum log placement follow the instructions supplied with each set. -
Page 12: Mood Lighting
MOOD LIGHTING The LEX2-S can be installed with optional LED strip lighting, up to 9 W. The LEX3-S and LEX4-S can be installed with optional LED strip lighting, up to 18 W. • MLLED9W—9 W, 3 meter LED strip • MLEC—1 meter extension cable with 1 meter connection cable •... -
Page 13: Installation Instructions
INSTALLATION INSTRUCTIONS PREPARATION BEFORE INSTALLATION Tools A screwdriver, a spirit level and drill will be needed. Appliance Location Your new electric fireplace may be installed virtually anywhere in your home. However, when choosing a location, ensure that the general instructions are followed: •... -
Page 14: Connect The Mood Lighting Cable
Connect the Mood Lighting Cable The Mood Lighting is optional and sold separately. Use only the Valor brand. Other brands may not be suitable and can void the warranty—see Accessories on page 12 in this manual for available kits. The connector for the mood lighting cable is on the top rear corner of the appliance, near the power cord outlet. -
Page 15: Hard Wiring
The power connection can be made with the 6 feet Mains Cable provided or alternatively it can be hard wired by unscrewing and removing the Access Plate, the Mains Cable and retention grommet. The access plate can be repositioned so that the 22mm hole sits over the cutout in back of appliance. The 22mm hole can be used for hard wiring access with a strain relief clamp. -
Page 16: Preparing The Casing
Preparing The Casing The appliance can be installed in 3 different arrangements: Front view (only the front window is visible) When you unpack the appliance, you will notice that the side panels have been secured to the appliance, which makes the appliance visible only on the front side. - Page 17 2. Use the suction cup(s) provided to support the middle of the glass panel and lock them as indicated below. Suction cups LEX2-S = 1 LEX3-S / LEX4-S = 2 3. Lift the panel upward and pull it forward at its lower...
-
Page 18: Installation
NOTE: Ensure a firm flat positioning of the appliance and secure fixing to avoid vibration and movement of the appliance after applying wall finish. Units = mm [inches] Overall Overall Model Width Height 1260 LEX2-S [49-5/8] [22-11/16] 1510 LEX3-S [59-1/2] [22-11/16] [71-5/16] LEX4-S... -
Page 19: Wall Finish
2. Place the bracket horizontally against the wall where you plan to install the appliance. 3. Using the wall as a template, mark the hole position as shown in the figure below. Units = mm [inches] Model LEX2-S [25-1/2] 1000 LEX3-S [39-3/8] 1200... - Page 20 5. Drill holes and use the wall plugs supplied to prepare for the lower bracket installation. 6. Carefully mount the appliance on the hooks of the wall bracket and secure it with the screws provided (1 at each end). 7. Use four screws to secure the bottom brackets to the corresponding holes on the underside of the appliance, adjusting the brackets position to ensure the appliance is plumb with the wall.
-
Page 21: Fuel Bed
Fuel Bed Once the appliance is in final place, install the fuel bed. It helps to turn the fireplace’s lights on when placing the logs to highlight their details. See the appliance’s control panel—page 23—or use the remote control—page Log Sets See Accessories section on page 11 of this manual for optional log sets. -
Page 22: Operating Instructions
OPERATING INSTRUCTIONS BEFORE OPERATION: WARNING! Do not operate the appliance if it is damaged or malfunctions. If you suspect the appliance is damaged or malfunctions, call a qualified service engineer to inspect the appliance, and replace any part of the electrical system if necessary before reusing. -
Page 23: Manual Control
MANUAL CONTROL MANUAL SWITCH Press “I” to turn on the appliance; press “O” to turn it off. STAND-BY Press to turn on the appliance with the last used settings without any heat. Places the appliance into standby mode with all features turned off. FLAME Press repeatedly to cycle through 6 fire preset modes and 3 user defined presets if programmed. -
Page 24: Remote Control
REMOTE CONTROL Timer 0.5h Battery Power ROOM Actual Room T emperature Heating Period T emperature Set NOTE: The remote control handset must be left in the same room as the appliance because it houses the thermostat that regulates heat output. Also, when using the APP, the remote must also be in the same room and have batteries fitted and working to ensure accurate temperature control. - Page 25 MY Flame Press to enter My Flame adjustment screen. Press to select 6 My Flame modes (+3 user defined presets if programmed). There are 3 preset slots allocated for the user to save personalised settings. Simply choose the flame color and brightness level, the fuel color and brightness level.
- Page 26 Heater Mode Press to cycle through the heat output options: ON-OFF-AUTO. To switch between ºC/ºF, press and hold button for 3 seconds. Press and buttons to adjust the temperature you want the room to reach, from 5 to 40 ºC (41 to 104 ºF). NOTE: It is normal for the fan heater to stop running for periods of time.
- Page 27 Important Safety Information for Remote Control • To remove the batteries, open the back cover of the remote control heandset and replace with new ones. Pay attention to the positive and negative poles. • Two AAA alkaline batteries are required for the remote control. •...
-
Page 28: App Control
APP CONTROL Visit your APP store for iOS or Android to download the C&JsmartFIRE APP. Or use the QR code on this page. Follow your devices onscreen instructions to create an account. Once installed, follow the procedure below to pair the device with your appliance. -
Page 29: Maintenance
MAINTENANCE WARNING: Before any maintenance or cleaning of the exterior of the fireplace, the unit should be disconnected from the power supply AND cooled off. ALWAYS turn the heater OFF and unplug the power cord from the outlet before cleaning, performing maintenance, or moving this fireplace. -
Page 30: Service Parts List & Wiring Diagram
SERVICE PARTS LIST & WIRING DIAGRAM... - Page 32 SIREN...
-
Page 33: Warranty
WARRANTY TWO YEAR LIMITED WARRANTY Products to which this limited warranty applies This limited warranty applies to your newly purchased Valor Electric product. This limited warranty applies to the original purchaser of the product only and is not transferable. Terms & Conditions Products covered by this limited warranty have been tested and inspected prior to shipment. - Page 34 maintenance, use or inability to use the product, even if the Company or its Directors, Officers, or Agents have been advised of the possibility of such losses, cost or damages, or if such losses, costs, or damages are foreseeable. Some juridisdictions do not allow the exclusion or limitation of incidental or consequential damages, so the above limitation or exclusion may not apply to the purchaser.
- Page 35 NOTES...
- Page 36 Distributed in Canada and USA exclusively by Valor Fireplaces — Head Office #190, 2255 Dollarton Hwy, North Vancouver, BC V7H 3B1 Phone: 604.984.3496 Email: info@valorfireplaces.com Manufactured by Charlton & Jenrick Ltd Unit D, Stafford Park 2, Telford, Shropshire, TF3 3AR, UK.
Need help?
Do you have a question about the LEX2-S and is the answer not in the manual?
Questions and answers