Makita UH020G Instruction Manual
Cordless hedge trimmer
Hide thumbs
Also See for UH020G:
- Instruction manual (105 pages) ,
- Instruction manual (116 pages) ,
- Instruction manual (93 pages)
Table of Contents
Advertisement
Quick Links
Advertisement
Table of Contents

Related Manuals for Makita UH020G


Summary of Contents for Makita UH020G
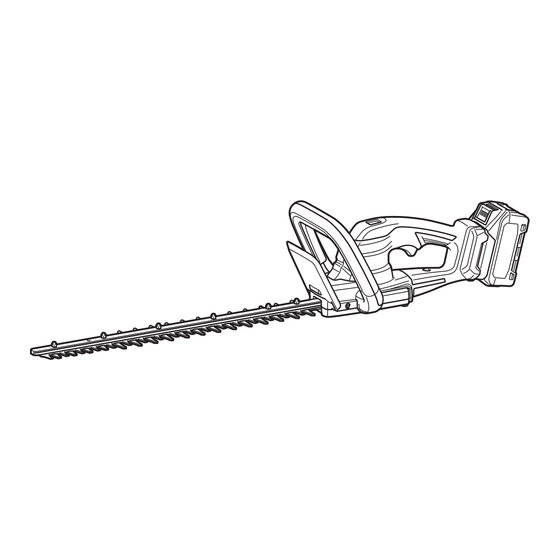
- Page 1 INSTRUCTION MANUAL Cordless Hedge Trimmer UH020G UH021G Read before use.
-
Page 2: Specifications
SPECIFICATIONS Model: UH020G UH021G Blade length 500 mm 600 mm Strokes per minute 4200 min Overall length 866 mm 985 mm (Without battery) Rated voltage D.C. 36 V - 40 V max Net weight 1.6 kg 3.0 - 4.2 kg 3.1 - 4.3 kg... -
Page 3: Intended Use
Personal safety Intended use Stay alert, watch what you are doing and use common sense when operating a power tool. The tool is intended for trimming hedges. Do not use a power tool while you are tired or under the influence of drugs, alcohol or med- ication. - Page 4 Power tool use and care Do not use a battery pack or tool that is dam- aged or modified. Damaged or modified batteries Do not force the power tool. Use the correct may exhibit unpredictable behaviour resulting in power tool for your application. The correct fire, explosion or risk of injury.
-
Page 5: Additional Safety Warnings
Additional safety warnings 10. If the blades stop moving due to the stuck of foreign objects between the blades during Preparation operation, switch off the tool and remove the battery cartridge, and then remove the foreign Check the hedges and bushes for foreign objects using tools such as pliers. -
Page 6: Functional Description
Makita warranty for the Makita tool and charger. Do not expose battery cartridge to water or rain. - Page 7 To remove the battery cartridge, slide it from the tool Indicator lamps Remaining while sliding the button on the front of the cartridge. capacity Lighted Blinking 75% to 100% 50% to 75% 25% to 50% 0% to 25% Charge the battery.
-
Page 8: Overload Protection
If no improvement can be found by restoring the protec- WARNING: If the entangled branches or tion system, contact your local Makita Service Center. debris cannot be removed by the reverse func- NOTICE: If the tool stops due to a cause... -
Page 9: Electronic Function
This tool is equipped with an electric brake. If the tool consistently fails to quickly stop the shear blades after releasing the switch trigger, have the tool serviced at Makita Authorized Service Center. • Accidental re-start preventive function Even if you install the battery cartridge while pressing the switch lever and pulling the switch trigger, the tool does not start. - Page 10 Turn the crank with the slotted screwdriver so that Remove the blade cover, and then attach it to the 2 holes are perpendicular to the shear blades. new shear blades. ig.6 Fig.10 ► 1 . Blade cover Align the rear edges of the shear blades as shown in the figure.
- Page 11 Slide the shear blades slightly as shown in the When attaching the shear blades to the tool, align the figure, and then attach the sleeves to the shear blades. guide bar with the opposite side of the rear edge so that the guide bar does not hit the ribs. Fig.12 ► 1 .
- Page 12 Slide the guide bar to the gear side and align the 10. Slide the shear blades and sleeves so that the holes on the guide bar with the holes on the tool. holes on the sleeves are aligned with the holes on the tool.
- Page 13 Install the shear blades again. NOTICE: If the parts other than the shear Fig.23 blades such as the crank is worn out, ask Makita ► 1 . Claw 2. Groove Authorized Service Centers for parts replacement or repairs.
-
Page 14: Operation
Press the levers on the chip receiver, and then OPERATION hook the claws on the other side to the groove on the shear blades. WARNING: Keep hands away from shear blades. CAUTION: Avoid operating the tool in very hot weather as much as possible. When operating the tool, be careful of your physical condition. -
Page 15: Maintenance
Always be sure that the tool is switched off and the battery cartridge is removed before attempting to perform inspection or maintenance. To maintain product SAFETY and RELIABILITY, repairs, any other maintenance or adjustment should be performed by Makita Authorized or Factory Service Centers, always using Makita replacement parts. 15 ENGLISH... -
Page 16: Cleaning The Tool
Cleaning the tool Storage Clean the tool by wiping off dust with a dry cloth or one The hook hole in the tool bottom is convenient for hang- dipped in soapy water and wrung out. ing the tool from a nail or screw on the wall. Attach the blade cover to the shear blades so that the NOTICE: Never use gasoline, benzine, thinner, shear blades are not exposed. -
Page 17: Grease Lubrication
Set the angle of a file to 35°, and grind the upper Grease lubrication blade from 3 directions with the file. Interval of lubrication: Every 25 operating hours Remove the bolt from the hole for lubrication. Fig.37 ► ( 1) File (2) 35° Fig.39 CAUTION: Before grinding the shear blades, ► 1 . Bolt make sure that the tool is switched off and the battery cartridge is removed from the tool. -
Page 18: Troubleshooting
TROUBLESHOOTING Before asking for repairs, conduct your own inspection first. If you find a problem that is not explained in the manual, do not attempt to dismantle the tool. Instead, ask Makita Authorized Service Centers, always using Makita replace- ment parts for repairs. State of abnormality Probable cause (malfunction) Remedy Motor does not run. Battery cartridge is not installed. Install the battery cartridge. - Page 20 Makita Corporation 3-11-8, Sumiyoshi-cho, Anjo, Aichi 446-8502 Japan 885A77-923 www.makita.com 20240322...
Need help?
Do you have a question about the UH020G and is the answer not in the manual?
Questions and answers