Table of Contents
Advertisement
Quick Links
Advertisement
Table of Contents

Subscribe to Our Youtube Channel
Related Manuals for AERMEC HMG


Summary of Contents for AERMEC HMG
- Page 1 2 3 . 0 1 – 5 3 8 9 9 8 1 _ 0 4 T r a n s l a t i o n f r o m o r i g i n a l H M G I n s t a l l a t i o n m a n u a l 50Hz REVERSIBLE AIR/WATER HEAT PUMP...
- Page 3 Illegal dumping of the product by the user entails the application of administrative sanctions provided by law. All specifications are subject to change without prior notice. Although every effort has been made to ensure accuracy, Aermec shall not be held...
- Page 4 50Hz Frequenza 50 Hz Gas refrigerante R32 Raffreddamento e riscaldamento Frequency 50 Hz R32 refrigerant Cooling and heating Fréquence 50 Hz Réfrigérant R32 Refroidissement et chauffage Frequenz 50 Hz R32-Kältemittel Kühlung und Heizung Frecuencia 50 Hz Refrigerante R32 Frío y calor Unità...
-
Page 5: Table Of Contents
SYSTEM CLEANING ..............................................33 CLEANING THE FINNED PACK EXCHANGER ....................................33 PRESSURE DROPS ..............................................34 EXAMPLES OF POSSIBLE PLANT SOLUTIONS ....................................36 HMG - SINGLE UNIT ..............................................36 HMG - HOMOGENEOUS MODULARITY ......................................37 HMG - SEQUENTIAL MODULARITY ........................................38 EMPTYING THE SYSTEM ............................................40 ANTIFREEZE PROTECTION IN WINTER ......................................40 ELECTRICAL CONNECTIONS ..........................................40... - Page 6 ELECTRICAL DATA ..............................................46 WIRING ...................................................47 POWER CABLE AND GROUNDING ........................................47 SERIAL CONNECTION BETWEEN WIRED CONTROL PANEL AND MODULAR UNITS .......................49 ADDRESSING OF MODULAR UNITS IN HOMOGENEOUS MODULARITY - DIP SWITCHES ...................50 ADDRESSING OF MODULAR UNITS IN SEQUENTIAL MODULARITY - DIP SWITCHES ....................51 PROCEDURE FOR REFRIGERANT CHARGING ....................................52 COMPRESSOR REPLACEMENT OR REMOVAL ....................................52 EXECUTION OF THE VACUUM ..........................................53...
-
Page 7: Certifications
CERTIFICATIONS COMPANY CERTIFICATIONS PRESTATIONAL CERTIFICATIONS Aermec participates in the EUROVENT program: LCP The products involved can be found on the website www.eurovent-certification.com SAFETY CERTIFICATIONS... -
Page 8: Safety Standards - R32 Gas
• Personnel approaching the unit must be competent in the use of this refrigerant and comply with current regulations. Evaluate procedures prescribed by Aermec and fire regulations to avoid inconsistencies between our prescriptions and the regulations in force. - Page 9 FILLING R32 REFRIGERANT GAS SAFETY RULES FOR THE TRANSPORT AND STORAGE OF R32 These procedures can only be performed by specialized technicians or qualified personnel. • Using a special gas detector, check that there are no gas leaks ATTENTION: in the environment before opening the unit packaging. In case of unit without refrigerant charge or with interrupted •...
- Page 10 SAFETY RULES FOR VACUUM PERFORMANCE ON UNITS that can ascertain their use. The pipe must be connected with a CONTAINING R32 GAS removable connection joint with zero leakage rate and be kept in good condition. Before using the equipment, check that it is These procedures can only be performed by specialized in good condition and that it is perfectly maintained.
-
Page 11: General Warnings
GENERAL WARNINGS • Do not install the machine near strong magnetic fields, in highly basic or acidic environments or where the power supply voltage is unstable. WARNING: Strictly observe the warnings below. Failure to ob- • Before installing the unit, check that the power adopted com- serve them, could result in injuries to people or damages to prop- plies with that indicated on the packaging label on the unit. - Page 12 • Check the correct grounding of the unit before starting. ing them, always wait for them to stop and take appropriate • The external paneling of the unit must be connected to the precautions to prevent them from being activated. ground line.
- Page 13 DISCLAIMER OF LIABILITY AERMEC DOES NOT ASSUME ANY RESPONSIBILITY FOR DAMAGES TO THE UNIT OR WARRANTY LOSS IN CASE: 1. The unit is used improperly. 2. Attempts to modify, alter or repair the unit were made without following the previously mentioned instructions.
-
Page 14: Receiving The Product
RECEIVING THE PRODUCT CHECKS UPON RECEIPT Product identification Aermec products are identifiable by the packaging label which shows the identification data of the product, and by the To avoid damage during transport, the units are completely technical plate which shows the technical performance and wrapped in packaging and protected by plastic elements. -
Page 15: Transport And Handling
TRANSPORT AND HANDLING The handling of the unit must be carried out by qualified per- sonnel. Strictly follow the lifting instructions indicated with the labels placed on the unit. Each unit has undergone a series of stringent factory inspections and tests to ensure expected performance and quality. However, special care should be taken during handling and ship- ping to prevent the units from being damaged. -
Page 16: Lift
LIFT STORAGE Units are delivered on a pallet; for lifting use suitable belts and It may happen that, after receipt, the units do not need to be to ensure that the structure is not damaged, place protections installed immediately and are therefore stored in the warehouse. between the belts (or ropes, chains) and the carpentry. -
Page 17: Unit Type
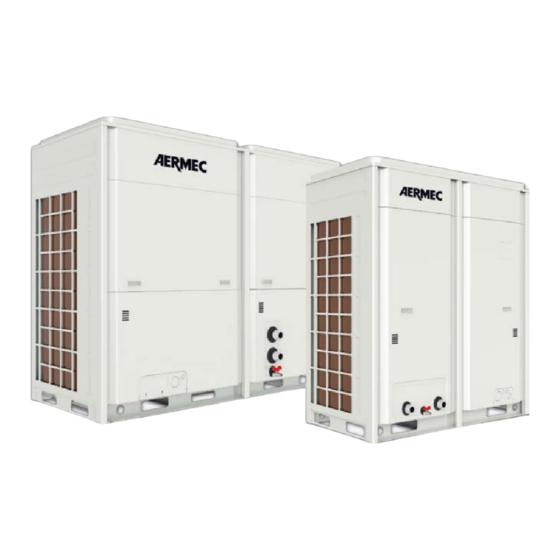
• special battery with golden fin coating, • high efficiency shell and tube system side heat exchanger for The HMG unit is able to cool at any time during the year while high reliability and durability over time, maintaining high energy efficiency. -
Page 18: Main Features Of The Unit
Thanks to the careful design, the excellent materials used for consisting of 1 master + maximum 5 slaves ), heat pumps (up to the construction, the HMG units guarantee excellent operating 4), MZC accessories (up to 5), radiant panel management (using reliability. -
Page 19: Modularity
MODULARITY HMG is a modular system of outdoor inverter reversible heat pumps for the production of hot and chilled water, with combinable basic modules specially designed to minimize the overall dimensions. It is also possible to connect units of different powers. -
Page 20: Sequential Modularity
For more information on the VMF system, refer to the dedicated documentation. In this mode of use it is possible to connect up to 4 HMG modules together. The management is optimized for systems in which each unit controls its own pump. -
Page 21: Parts Of The Unit
PARTS OF THE UNIT HMG0350 Description Frontal panel Water drain tap Water inlet Water outlet Fans Side panel HMG0600 Description Frontal panel Water drain tap Water inlet Water outlet Fans Side panel... -
Page 22: Operating Limits
OPERATING LIMITS Water side Air side Differenza di temperatura Temperatura b.s. Water temperature ingresso - uscita (°C) aria esterna (°C) Cooling 5~20 2,5~6 -15~52 Heating 35~50 2,5~6 -20~40 Pressioni d'ingresso dell'acqua massime e minime: Pressione minima dell'acqua in ingresso Pressione massima dell'acqua in ingresso Cooling 0.06 MPa 1.6 MPa... -
Page 23: Technical Dimensions
TECHNICAL DIMENSIONS HMG0350 (mm) 1200 Description Unit fixing holes or holes for anti- vibration positionin Water inlet B C D Water drain tap Water outlet 126 121 1340 HMG0600 (mm) 2060 Description Unit fixing holes or holes for anti- vibration positioning Water drain tap Water inlet Water oulet... -
Page 24: Weight Distribution
WEIGHT DISTRIBUTION WEIGHT CENTRE OF GRAVITY HMG0350 EMPTY 362,5 HMG0600 EMPTY 1090 HMG0350 DURING OPERATION 445 600 355 27 25 25 23 HMG0600 DURING OPERATION 755 1090 421 26 27 25 22 HMG0350 Top view 1340 lato attacchi idraulici e scatola elettrica 1200 HMG0600 Top view... -
Page 25: Minimum Technical Spaces For Single Unit
MINIMUM TECHNICAL SPACES FOR SINGLE UNIT (mm) (mm) Air outlet > 1000 > 1000 Electric box Water inlet / outlet connections MINIMUM TECHNICAL CLEARANCES FOR MODULAR UNITS (mm) > 1000 > 1000 > 500 > 500 (mm) > 1000 > 500 >... -
Page 26: Requirements For Placement And Installation
ATTENTION installation phase. AERMEC cannot be held responsible for Correct installation of the unit must provide for compli- any damage due to the failure or incomplete application... -
Page 27: Installation
• The units have been designed for outdoor installation. Consult Aermec before carrying out any other type of installation. • The ground under the unit must be flat, uniform and with sufficient strength to withstand the weight of the unit with the full refrigerant charge, in addition to the occasional presence of normal maintenance equipment. -
Page 28: Reduction Of Vibrations
REDUCTION OF VIBRATIONS The unit must be fixed to the anti-vibration mounts and the 3. Remove the screws that secure the anti-vibration mounts. latter firmly fixed to the concrete base by following the steps 4. Place the unit on the stands and align the bolt holes in the below: stands with the mounting holes in the base of the unit. -
Page 29: Refrigerant Circuit
REFRIGERANT CIRCUIT HMG0350 Description Description Shell and tube exchanger Finned pack exchanger Flow switch External air temperature probe Leaving water temperature probe 4-way valve Antifreeze / overtemperature alarm probe High pressure switch Inlet water temperature probe High pressure transducer Shell and tube exchanger inlet temperature probe Compressor discharge temperature probe Capillary tube Compressor... - Page 30 HMG0600 Description Description Shell and tube exchanger Compressor discharge temperature probe Flow switch High pressure transducer Leaving water temperature probe High pressure switch Antifreeze / overtemperature alarm probe 4-way valve Inlet water temperature probe External air temperature probe Shut-off valve Scambiatore di calore a batteria alettata Shell and tube exchanger inlet temperature probe Compressor suction temperature probe...
-
Page 31: Hydraulic Connections
EN vents inside the Aermec unit are not to be considered as a 378-1 as an indirect ventilated system (ref EN 378-1; 2016, par. -
Page 32: Characteristics Of Water
Aermec declines all responsibility for any damage deriving from the use of "heavy" water that is not treated or improperly treated. By way of non-exhaustive indication, we report the table of the... -
Page 33: System Cleaning
SYSTEM CLEANING The whole system needs to be cleaned periodically. • once the entire hydraulic circuit is clean, charge it completely and let it run for about 1-2 hours. Despite the use of treated water, it is possible that particles of 5. -
Page 34: Pressure Drops
PRESSURE DROPS 0350 0600 2000 3000 4000 5000 6000 7000 8000 9000 10000 11000 12000 13000 14000 A Pressure drops (kPa) B Water flow rate (l/h) Inlet water temperature 12 °C Outlet water temperature 7 °C Outside air temperature 35 °C Average temperature of the water 10 °C 0350 0600... - Page 35 0350 0600 2000 3000 4000 5000 6000 7000 8000 9000 10000 11000 12000 13000 14000 A Pressure drops (kPa) B Water flow rate (l/h) Inlet water temperature 23 °C Outlet water temperature 18 °C Outside air temperature 35 °C Average temperature of the water 21 °C 0350 0600 2000 3000 4000 5000 6000 7000 8000 9000 10000 11000 12000 13000 14000...
-
Page 36: Examples Of Possible Plant Solutions
EXAMPLES OF POSSIBLE PLANT SOLUTIONS HMG - SINGLE UNIT ATTENZIONE WARNING Tutte le unità di questa serie sono All the units in this series progettate per essere installate are designed to be installed outdoors only. esclusivamente all'esterno. fancoil COMPONENTS SUPPLIED AS STANDARD... -
Page 37: Hmg - Homogeneous Modularity
HMG - HOMOGENEOUS MODULARITY HMG module no. 1 HMG module no. 2 WARNING All the units in this series are designed to be installed outdoors only. fancoil COMPONENTS SUPPLIED AS STANDARD CHARACTERISTICS OF WATER Shell and tube exchanger SYSTEM: HEAT PUMP WITH TUBE BUNDLE EXCHANGER... -
Page 38: Hmg - Sequential Modularity
HMG - SEQUENTIAL MODULARITY HMG module no. 1 HMG module no. 2 WARNING All the units in this series are designed to be installed outdoors only. fancoil COMPONENTS SUPPLIED AS STANDARD Shell and tube exchanger Water temperature probe Drain tap... - Page 39 CHARACTERISTICS OF WATER SYSTEM: HEAT PUMP WITH TUBE BUNDLE EXCHANGER Elements Loading water Make-up water pH (25 °C) 6,8 ~ 8,0 6,8 ~ 8,0 Electrical conductivity (25 °C) < 400 μS/cm < 300 μS/cm Chlorine ions (Cl-) < 50 mg/L <...
-
Page 40: Emptying The System
EMPTYING THE SYSTEM ELECTRICAL CONNECTIONS • Loosen the screws that secure the front panel. ATTENTION • Remove the panel. For installation requirements, refer to the wiring diagram • Turn the tap located in the lower part of the unit anticlockwise supplied with the appliance. - Page 41 • Install a leakage protection device inside the unit which must WARNINGS comply with electrical engineering norms and standards. Incorrect uninstallation or installation would lead to electric • Before working on the electrical circuit, make sure that the shock. Perform an electrical leakage test after completing the power supply to the unit has been disconnected.
-
Page 42: Electric Board On Board The Unit
ELECTRIC BOARD ON BOARD THE UNIT HMG0350 Description Operating status output (230V) Operating status output (neutral) Alarm output (230V) Alarm output (neutral) Pump 1 contactor output (230V) Pump 1 contactor output (neutral) Pump 2 contactor output (230V) Pump 2 contactor output (neutral) ON / OFF clean contact input Auxiliary electric heater 1 contactor output (230V) Auxiliary electric heater 1 contactor output (neutral) -
Page 43: Electrical Connections
ELECTRICAL CONNECTIONS WATER PUMP Unit The unit can manage up to two water pumps. Connect the pump contactor KM1 and KM2 to the respective terminals 5 and 6 (for KM1) and to terminals 7 and 8 (for KM2). AUXILIARY ELECTRIC RESISTANCE Unit The unit can manage up to two auxiliary electric heaters. - Page 44 Unit 1 Unit 2 Unit 3 Unit 16 When it is necessary to display the errors of several modular units, terminals 3 and 4 of each module must be connected in parallel to the outputs A and B of the alarm lamp installed (HL2). Unit 1 Unit 2 Unit 3...
-
Page 45: Electrical Connections Of The Water Pump And Integrative Electrical Resistance
ELECTRICAL CONNECTIONS OF THE WATER PUMP AND INTEGRATIVE ELECTRICAL RESISTANCE HMG0350 HMG0600... -
Page 46: Electrical Data
ELECTRICAL DATA The cable sections shown in the table are recommended for a maximum length of 50 m. For longer lengths or different types of cable laying, it will be the designer's responsibility to appropriately size the line switch, the power supply line and the earth protection connection, and the connection cables in operation: •... -
Page 47: Wiring
WIRING POWER CABLE AND GROUNDING ATTENTION • The power cable supplied at the installation site of the unit • Make sure the power supply has been cut off before must be at least 1 mm2. proceeding with electrical connections and wiring. •... - Page 48 HMG0350 Description Secure the cable with a clamp or cable tie Secure the cable with a clamp or cable tie Secure the cable on both sides of the vertical column with clamps or cable ties The pre-cut hole, after all wiring and electrical connection work on the unit have been carried out, must be sealed to prevent the entry of foreign covers that could damage the cables and components.
-
Page 49: Serial Connection Between Wired Control Panel And Modular Units
XT1. • The units may be integrated in BMS system by using the ModBus protocol. (To view the list of variables refer to the specific documentation found on our website www.aermec. com) * NOTE... -
Page 50: Addressing Of Modular Units In Homogeneous Modularity - Dip Switches
ADDRESSING OF MODULAR UNITS IN HOMOGENEOUS MODULARITY - DIP SWITCHES The 5-pin DIP switches are used for addressing modular units (1 ~ 16). Each address must be unique and will be shown on the wired panel display (module 1, module 2, ... module 16). 5-pin DIP switches are binary codes where 1 indicates the lowest bit and 5 the highest bit. -
Page 51: Addressing Of Modular Units In Sequential Modularity - Dip Switches
ADDRESSING OF MODULAR UNITS IN SEQUENTIAL MODULARITY - DIP SWITCHES The 5-pin DIP switches are used for addressing the modular units (1 ~ 4). In the case of sequential modularity, the address of all the units must be the same. All bits of the 5-pin DIP switch must be set to ON as shown in the figure below. -
Page 52: Procedure For Refrigerant Charging
PROCEDURE FOR REFRIGERANT CHARGING COMPRESSOR REPLACEMENT OR REMOVAL The R32 refrigerant gas filling inside the circuit must be carried Should it be necessary to remove or replace the compressor, it is out according to the system discharge and suction pressure. mandatory to follow the instructions below: Before carrying out any charging operation, perform a tightness test of the refrigerant pipes;... -
Page 53: Execution Of The Vacuum
Evaluate procedures prescribed by Aermec and fire regulations promptly removed from the site and that all isolation valves to avoid inconsistencies between our prescriptions and the are closed. -
Page 54: Antifreeze Protection
ANTIFREEZE PROTECTION The addition of glycol is the only effective method of protection against freezing, the glycol / water solution must be sufficiently concentrated to ensure adequate protection and prevent the for- mation of ice at the minimum temperature expected for a given installation. -
Page 55: Wiring Diagrams
WIRING DIAGRAMS HMG0350... - Page 56 NAME DESCRIPTION NAME DESCRIPTION Power Power Phase monitor Ground line Temp sensor outgoing water Main board Temp sensor antifreeze Wave filter board Temp sensor defrost Control board of the inverter Temp sensor I unload compressor Temp sensor inlet water Motor control board 1 Temp sensor tube bundle Motor control board 2 refrigerant inlet...
- Page 57 HMG0600...
- Page 58 NAME DESCRIPTION NAME DESCRIPTION Power Power Fan motor 1 Ground line Fan motor 2 Main board Phase monitor Wave filter board 1 Temp sensor outgoing water Wave filter board 2 Temp sensor antifreeze COMP1 control board Temp sensor system defrost 1 COMP2 control board Temp sensor system drain 1 Control board of M1...
-
Page 59: First Start-Up And Maintenance
FIRST START-UP AND MAINTENANCE STARTING AND SHUTTING DOWN THE UNIT CHECKS BEFORE STARTING • It is recommended to start the unit via the control panel mak- ing sure to start the water pump first and then the unit and stop the system by reversing this sequence. ATTENTION •... - Page 60 Starting up the unit after a long period of inactivity Before turning on a unit that has not worked for a long period of time it is necessary to: • Check that each component of the unit is in excellent condition and carry out cleaning operations as indicated in this manual.
-
Page 61: Troubleshooting
TROUBLESHOOTING MALFUNCTION CAUSE OF THE PROBLEM SOLUTION OF THE PROBLEM 1. Incomplete aspiration. 1. Aspirate the system again and recharge the 2. Ambient temperature too high. refrigerant. 3. The condenser fins are dirty and there are 2. Improve ventilation. Blockage caused by the obstructions. - Page 62 MALFUNCTION CAUSE OF THE PROBLEM SOLUTION OF THE PROBLEM 1. Decrease the load to improve the water Defective discharge 1. Water temperature too low. temperature. temperature sensor 2. The exhaust temperature sensor has dropped. 2. Check that the exhaust temperature sensor is installed correctly.
- Page 64 TÉLÉCHARGER LA DERNIÈRE VERSION: TÉLÉCHARGER LA DERNIÈRE VERSION: http://www.aermec.com/qrcode.asp?q=16426 http://www.aermec.com/qrcode.asp?q=16427 http://www.aermec.com/qrcode.asp?q=16428 A E R M E C S . p . A . V i a R o m a , 9 9 6 - 3 7 0 4 0 B e v i l a c q u a ( V R ) - I t a l y T e l .
Need help?
Do you have a question about the HMG and is the answer not in the manual?
Questions and answers