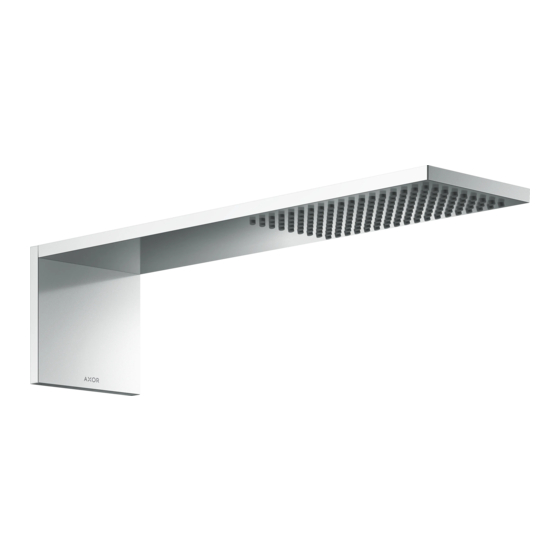
Summary of Contents for Axor Starck 12592 1 Series
- Page 1 EN Installation / User Instructions / Warranty AXOR Starck 12592XX1 FR Instructions de montage / Mode d'emploi / Garantie 12791XX1 ES Instrucciones de montaje / Manejo / Garantía I N S T A L L A T I O N...
-
Page 2: Données Techniques
E N G L I S H F R A N A I S T EC HN IC A L I N F ORMAT IO N D ONNÉ ES TEC H NIQ UE S Flow rate Capacité nominale 12592XX1 2.5 GPM (9.5 L/min) 12592XX1 2.5 GPM (9.5 L/min) -
Page 3: Datos Tecnicos
E S P A Ñ O L DATOS TEC N ICO S T O O L S R E Q U I R E D / O U T I L S R E Q U I S / H E R R A M I E N T A S Ú T I L E S Caudal máximo 12592XX1 2.5 GPM (9.5 L/min) - Page 4 AXOR Starck 12592XX1 12791XX1 16¾" (425 mm) 12¾" (324 mm) 6¾" (175 mm) ⅜" (10 mm) 4⅜" (110 mm)
- Page 5 I N S T A L L A T I O N / I N S T A L L A T I O N / I N S T A L A C I Ó N Make sure that the water is turned off at the main before beginning.
- Page 6 Turn on the water and flush the rough for at least 1 minute. Turn the water off. Ouvrez l’eau et rincez la pièce intérieure pendant au moins 1 minute. Fermez l’eau. > 1 min Abra el paso de agua y purgue la pieza interior durante 1 minuto como mínimo.
- Page 7 Use a 16 mm wrench to remove the right and left pipes from the rough. Leave the center pipe in place. Utilisez une clé de 16 mm pour retirer les tuyaux droit et SW 16 mm gauche de la pièce intérieure. Laissez le tube central en place.
- Page 8 If the outside surface of the finished wall is closest to the “min” marking of the plaster shield, select the four M6x60 counter- sunk screws and the four M5x75 cylinder-head screws. If the outside surface of the finished wall is closest to the “max” marking on the plaster shield, select the M6x80 countersunk screws and the four M5x90 cylinder-head screws.
- Page 9 They should be ⅜” (10 mm) behind the edge of the plaster shield. Elles doivent être à ⅜ po (10 mm) derrière le rebord du protecteur. Deben estar ⅜” (10 mm) detrás del borde del protector de yeso. Position the mounting plate assembly over the rough and against the wall.
- Page 10 Use a 4 mm Allen wrench to reposition the screws so that they are even with the rear of the mounting plate assembly. Utilisez une clé hexagonale de 4 mm pour repositionner les vis afin qu’elles soient au même niveau que l’arrière de (M6x60 = ^ min.) l’assemblage de la plaque de montage.
- Page 11 Remove the three set screws using a 2 mm Allen wrench. Retirez les trois vis de pression à l’aide d’une clé hexago- nale de 2 mm. SW 2 mm Retire los tres tornillos de fijación con una llave Allen de 2 mm.
- Page 12 Lightly lubricate the o-rings on the shower module Push the shower module into place. Lubrifiez légèrement les joints toriques du module de douche Poussez le module de douche pour le mettre en place. Lubrique ligeramente los retenes del módulo de ducha. Presione el módulo de ducha para colocarlo en su sitio.
- Page 13 R E P L A C E M E N T P A R T S / P I È C E S D É T A C H É E S / R E P U E S T O S AXOR Starck...
- Page 14 C L E A N I N G / N E T T O Y A G E / L I M P I E Z A JUST CLEAN: simply rub over the spray nozzles to remove QUICK lime scale. CLEAN LA PROPRETÉ...
- Page 15 C L E A N I N G R E C O M M E N D A T I O N F O R H A N S G R O H E P R O D U C T S Modern bathroom faucets, kitchen faucets and shower products are made from different materials to comply with the needs of the market with regard to design and functionality.
- Page 16 IMP ORTA NT ⁄ Les residus de produits pour le corps comme les savons liquides, shampooings, gels de douche, teintures pour cheveux, parfums, apres-rasage et vernis a ongles peuvent causer des deteriorations. Rincez le produit avec de l’eau propre après chaque utilisation.
- Page 17 Hansgrohe, Inc. company philosophy. We offer consumers a limited warranty on our hansgrohe and AXOR branded products. (ii) any hansgrohe or AXOR product sold for display purposes or (iii) ® ® hansgrohe or AXOR products purchased from unauthorized sellers.
- Page 18 PROD UC T IN STRUCTIO N S AN D Q UEST IO N S WHICH THE PRODUCT IS INSTALLED, ABUSE, NEGLECT OR IMPROPER OR INCORRECTLY PERFORMED INSTALLATION, MAINTENANCE OR REPAIR, INCLUDING THE USE OF Upon purchase or prior to installation, please carefully inspect your ABRASIVE OR CAUSTIC CLEANING AGENTS OR “NO-RINSE”...
- Page 20 AXOR ⁄ Hansgrohe, Inc. 1490 Bluegrass Lakes Parkway Alpharetta, GA 30004 Tel. 800-334-0455 Fax 770-889-1783 axor-design.com...


Need help?
Do you have a question about the Starck 12592 1 Series and is the answer not in the manual?
Questions and answers