YitaHome ZSWYHS-V1 Assembly Instructions Manual
Hide thumbs
Also See for ZSWYHS-V1:
- Assembly instructions manual (8 pages) ,
- Assembly instructions (5 pages) ,
- Assembly instructions manual (9 pages)
Table of Contents
Advertisement
Quick Links
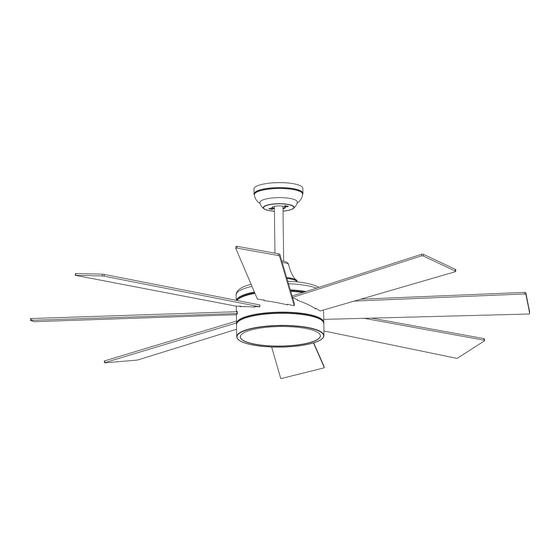
ASSEMBLY INSTRUCTIONS
ZSWYHS-V1
TLCFLS-0014
Pure & Easy
CONTACT US:
If you have any questions about the installation of YITAHOME® products, just contact us
at +1(888)-717-8084 from Mon-Fri 8:00 AM-16:30 PM PST / Saturday 8:00 AM-12:00 PMPST
or E-mail us at: after-sale.cs@hotmail.com
Alternative method to contact us(amazon.com orders only)
1.Log into your amazon account
2.Go to "Your Orders" and find the purchase
CEILING FAN
3.Click on "Contact Seller"
Advertisement
Table of Contents

Subscribe to Our Youtube Channel
Related Manuals for YitaHome ZSWYHS-V1


Summary of Contents for YitaHome ZSWYHS-V1
- Page 1 TLCFLS-0014 Pure & Easy CONTACT US: If you have any questions about the installation of YITAHOME® products, just contact us at +1(888)-717-8084 from Mon-Fri 8:00 AM-16:30 PM PST / Saturday 8:00 AM-12:00 PMPST or E-mail us at: after-sale.cs@hotmail.com Alternative method to contact us(amazon.com orders only) 1.Log into your amazon account...
-
Page 2: Safety Guidelines
ASSEMBLY INSTRUCTIONS ASSEMBLY INSTRUCTIONS PACKAGE INCLUDED Thank you for purchasing a YITAHOME product. To ensure correct function and safety, please read and follow all the instructions before using the product. SAFETY GUIDELINES Item Item Reference Image Qty. Reference Image Qty. -
Page 3: Installation Preparation
ASSEMBLY INSTRUCTIONS ASSEMBLY INSTRUCTIONS INSTALLATION PREPARATION INSTALLING THE FAN Carefully open the packaging. Remove motor housing and place on carpet or Styrofoam to avoid Tools Required: Phillips screwdriver, a pair of pliers, straight slot screwdriver, adjustable wrench, step ladder, and wire cutters. damage to the finish. -
Page 4: Assembling And Hanging The Fan
ASSEMBLY INSTRUCTIONS ASSEMBLY INSTRUCTIONS ASSEMBLING AND HANGING THE FAN REMOTE CONTROL CONNECTION WARNING: To avoid possible electrical shock, be sure the electricity is turned off in the main fuse box before wiring. Electrical 1. Connect the fan to the remote control. The fan’s 3P plug should insert into the the remote control’s 3P plug. 2. -
Page 5: Installing Light Kit
ASSEMBLY INSTRUCTIONS ASSEMBLY INSTRUCTIONS INSTALLING LIGHT KIT INSTALLING BLADES 1. Unscrew a set screw. Attach the LED pan up to the bottom of the fan by inserting the other two set *Time Saver: Washers for blade screws can be set on each blade screw before installing blades. screw heads into key hole slots, rotate it to place, then secure the previous set screw by aligning screw hole and the hole at the bottom of the fan, tighten the rest two set screw to secure LED pan. -
Page 6: Remote Control Setting And Operation
ASSEMBLY INSTRUCTIONS ASSEMBLY INSTRUCTIONS REMOTE CONTROL SETTING AND OPERATION IMPORTANT:PAIRING BETWEEN REMOTE AND RECEIVER 1. Restore electricity to the outlet box by turning the electricity on at the main Within the 30s after turning "ON" the power supply, press the “FAN ON/OFF" buttons of fuse box. -
Page 7: Troubleshooting
ASSEMBLY INSTRUCTIONS ASSEMBLY INSTRUCTIONS HOW TO USE BALANCING KITS TROUBLESHOOTING NOTE: CEILING FANS TEND TO MOVE DURING OPERATION DUE TO THE FACT THAT THEY ARE Your fan may occasionally jerk forward or backward upon starting up. MOUNTED ON A RUBBER CROMMET. IF THE FAN WAS MOUNTED RIGIDLY TO THE CEILING, IT This is normal and does not affect the fan operation.
Need help?
Do you have a question about the ZSWYHS-V1 and is the answer not in the manual?
Questions and answers