
Subscribe to Our Youtube Channel
Related Manuals for Otto Bock Genium X4 3B5-4-P


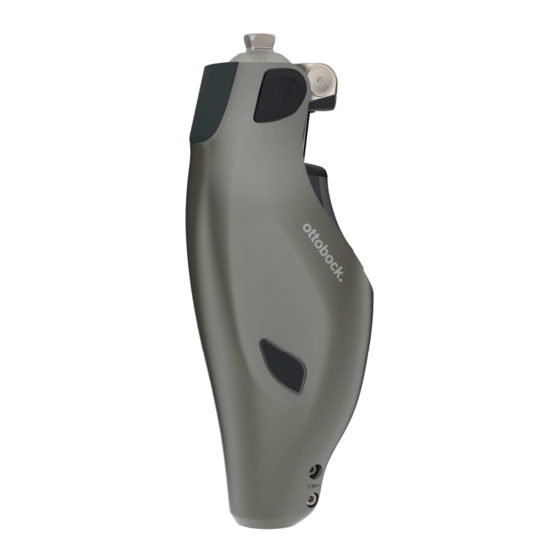
Summary of Contents for Otto Bock Genium X4 3B5-4-P
- Page 1 Genium X4 3B5-4=P, 3B5-4=ST Instructions for use (qualified personnel) ..............
- Page 2 Genium X4 3B5-4=P, 3B5-4=ST...
-
Page 3: Table Of Contents
Table of contents Table of contents Foreword ................................Product description ............................Design ..............................Function .............................. Combination possibilities ........................2.3.1 Limits for combination options with prosthetic feet ..................2.3.2 Combination with an osseointegrated implant system ................Intended use ................................ Indications for use .......................... - Page 4 Table of contents Bluetooth ................................10.1 Establishing the Bluetooth connection ....................MyModes ................................11.1 Running function as configured MyMode ....................11.2 Switching MyModes using motion patterns .................... 11.3 Switching from a MyMode back to basic mode ..................Additional operating states (modes) ......................
-
Page 5: Foreword
Only put the product into use in accordance with the information contained in the accompanying documents sup plied. According to the manufacturer (Otto Bock Healthcare Products GmbH), the patient is the operator of the product according to the IEC 60601-1:2005/A2:2020 standard. -
Page 6: Function
Product description Charging adapter 1. Cable for connecting to the charging receptacle of the prosthetic knee joint 2. LED bar to indicate the charge level while charging (see page 33) 3. Light sensor for adjusting the LED brightness to the ambient light 4. -
Page 7: Limits For Combination Options With Prosthetic Feet
Product description • 4R57=WR, 4R57=WR-ST Rotation adapter (water • 4R111 lamination anchor with pyramid receiver proof, corrosion-resistant) • 4R116 lamination anchor with pyramid adapter • 4R41 lamination anchor with pyramid receiver • 4R119 Lamination anchor with pyramid receiver and • 4R43 lamination anchor with threaded connector angled arm •... -
Page 8: Combination With An Osseointegrated Implant System
Intended use LP2-W2 Freestyle Swim Body weight Approved foot size [cm] Maximum stiffness Up to 100 kg (220 lbs) Up to 31 101 kg to 150 kg (222 lbs to 330 lbs) Not approved 2.3.2 Combination with an osseointegrated implant system This product can be connected to a socket or to an osseointegrated, percutaneous implant system. In case of connection to an implant system, verify that the manufacturer of the implant system and the manufactur... -
Page 9: Contraindications
Safety 3.4 Contraindications 3.4.1 Absolute Contraindications • Body weight over 150 kg 3.4.2 Relative Contraindications • Body weight less than 35 kg 3.5 Qualification The product may be fitted only by qualified personnel authorised by Ottobock after completing the corresponding training. If the product is to be connected to an osseointegrated implant system, the qualified personnel must also be autho rised for the connection to the osseointegrated implant system. -
Page 10: Scope Of Delivery And Accessories
Scope of Delivery and Accessories 5 Scope of Delivery and Accessories 5.1 Scope of delivery • 1 pc. 3B5-4 Genium X4 (with pyramid) or 1 pc. 3B5-4=ST Genium X4 (with threaded connector) • 1 pc. 2R68=280 Axon tube adapter (waterproof, corrosion-resistant) or 1 pc. 2R69=280 Axon tube adapter with torsion (weatherproof, not corrosion-resistant) •... -
Page 11: Connecting The Power Supply And Charging Adapter
Charging the battery 6.1 Connecting the power supply and charging adapter 1) Slide the country-specific plug adapter onto the power supply unit until it locks into place (see fig. 1). 2) Use the provided USB cable to connect the USB-A bushing on the power supply unit to the USB-C bushing on the charging adapter (see fig. 2). -
Page 12: Display Of Battery Charge Level Without Additional Devices
Preparing the product for use Charging time of the prosthesis battery Charge level after 4 hours charging time Fully charged INFORMATION Note charging progress ► When a rechargeable battery has been deeply discharged, charging times may become longer. For this reas on, check the charge level on the charging adapter display while charging. -
Page 13: Installing The Tube Adapter
Preparing the product for use 5) Determine the required length of the tube adapter based on the difference between the overall size and the knee pivot point to ground measurement. 6) Shorten the tube adapter by the determined value with the 719R5 tube cutter. 7) Store the tube adapter cable in the tube adapter. -
Page 14: Checking The Clearance Between The Prosthetic Socket And Knee Joint
Preparing the product for use INFORMATION Changed position of the pyramid/threaded connector (0°) If the fitting was modified from a previous knee joint generation such as the 3B1-2, 3B1-3, 3B5-2, 3B5-3; 3C98-*, 3C88-* to this knee joint (3B5-4=P/3B5-4=ST) without fabricating a new socket, the changed position of the pyr amid/threaded connector has to be taken into account since the pyramid/threaded connector is no longer angled (0°). -
Page 15: Flexion Stop
Preparing the product for use INFORMATION Padding material to check the distance Instead of using a measuring tool, a large piece of padding material (e.g. 617S3 Pedilin from Ottobock) with a thickness of 3 mm or 5 mm can be used as a distance gauge between the socket and knee joint during the test. Verification at maximum extension If the distance between the socket and prosthetic knee joint is not sufficient, the joint may be damaged. -
Page 16: Dynamic Alignment Optimisation
Consideration of the alignment recommendations for bench alignment of the prosthesis is a prerequisite. Minim ising the compensation via the residual limb and/or the contralateral side is the goal of optimal alignment. The patient’s required energy expenditure can be reduced by optimising the arrangement of the prosthetic compo nents. -
Page 17: Running Short Distances ("Walk-To-Run" Function)
"Start-to-walk" function With this function, the knee joint can be flexed more easily when starting to take a step without initiating a swing phase. This also makes walking in confined spaces easier since initial flexion is possible not only from the step position via stance release/swing phase initi ation but also from the standing position. -
Page 18: Sitting/Standing Up
8.5 Sitting/standing up If the patient is in a sitting position for more than two seconds, i.e. the thigh is close to hori zontal and there is no load on the leg, the knee joint switches the resistance to a minimum in the extension direction. -
Page 19: Walking Down A Ramp
Switching the product on/off 8.8 Walking down a ramp Under increased flexion resistance, permit controlled flexion of the knee joint which lowers the body’s centre of gravity. 8.9 Walking up a ramp Activating the “Optimised slope ascent” function makes it easier to walk up ramps. 8.10 Cycling When the "Intuitive cycling"... -
Page 20: Bluetooth
Bluetooth INFORMATION Actual deactivation only some time after playing the melody When there is a Bluetooth connection to a mobile device (LED on the back of the joint shows continuous blue light ), deactivation occurs only some time after the deactivation melody plays. Switching on 1) Connect the USB power source to the charging adapter. -
Page 21: Switching Mymodes Using Motion Patterns
MyModes 11.2 Switching MyModes using motion patterns Information on switching • Before the first step, always check whether the selected mode corresponds to the required motion type. Requirements for successful switching using motion patterns The following points must be observed to carry out switching successfully: •... -
Page 22: Additional Operating States (Modes)
Additional operating states (modes) ≥3x Basic mode ð ð ð ð ð þ 1) Position the prosthetic leg slightly to the rear (step position). 2) While maintaining constant contact with the floor, and with the leg extended, bounce on the forefoot three or more times. -
Page 23: Reaching The Critical Temperature Of The Hydraulics
Storage The following functions are deactivated in overheating mode: • Switching to a MyMode • Changes to the prosthesis setting 12.4.1 Reaching the critical temperature of the hydraulics If activity continues despite switching to overheating mode, safety mode is activated once the critical temperature of the hydraulics is reached and the knee joint is then turned off. -
Page 24: Cleaning The Charging Adapter
Maintenance 14.2 Cleaning the charging adapter 1) Clean the product with a damp cloth and mild soap (e.g. 453H10=1-N Ottobock Derma Clean) when needed. Make sure that no liquid penetrates into the product. 2) Dry the product with a lint-free cloth and allow it to air dry fully. 3) If necessary, disinfect the surface by wiping with a surface disinfectant (e.g. -
Page 25: Local Legal Information
Technical data Product Reference Specifications number Power supply unit 757L48=1 Directive 2014/35/EU, Directive 2014/30/EU, Directive 2011/65/EU, Directive 2009/125/EG, Regulation (EU) 2019/1782 USB charging adapter 757L47=1 Regulation (EU) 2017/745, Directive 2011/65/EU 16.4 Local Legal Information Legal information that applies exclusively to specific countries is written in the official language of the respective country of use in this chapter. - Page 26 Technical data Environmental conditions Time for cooling to the operating temperature after stor 30 minutes age between applications, from +60 °C/+140 °F at an ambient temperature of +20 °C/+68 °F Charging the battery +5 °C/+41 °F to +40 °C/+104 °F 15% to 90% relative humidity, non-condensing Air pressure: 70 kPa to 106 kPa (- 425 m to 3000 m without pressure equalisation) Prosthetic knee joint Reference number...
- Page 27 Technical data Axon tube adapter Water resistance Waterproof and corrosion-resistant Expected lifetime 6 years Approved set screws Length 16 mm Reference number 506G3=M8x16 ZN Maximum tightening torque 15 Nm Axon tube adapter with torsion Reference number 2R69=280 Weight 190 g–300 g Material Aluminium Max. body weight 125 kg Protection rating IP54...
- Page 28 Technical data Power supply unit Storage and transport with/without packaging -20 °C/-4 °F to +60 °C/+140 °F 5 % to 95 % relative humidity, non-condensing Operation 0 °C/+32 °F to +40 °C/+104 °F max. 90 % relative humidity Air pressure: 70 kPa to 106 kPa (-425 m to 3000 m without pressure equalisation) Input voltage 100 V~ to 240 V~ Mains frequency 50 Hz to 60 Hz...
-
Page 29: Appendices
Appendices 18 Appendices 18.1 Symbols Used In some jurisdictions it is not permissible to Declaration of conformity according to the dispose of these products with unsorted applicable European directives household waste. Disposal that is not in Serial number accordance with regulations in your country (21)YYYYWWNNNN can be harmful to health and the environment. -
Page 30: Signals For Operating States
Appendices Acoustic signals Text description Time of occurrence/meaning 4 high tones Maintenance is due soon, overheating of the knee joint (toot toot toot toot) Falling tone, followed by 2 short tones Display of the charge level <20 %, <15 %, <10 %, <5 %, <2 % during operation (wheeoo wop wop) Rising and held tone... -
Page 31: Warnings/Error Signals
Appendices Melody/s Vibration signal Event ound Maintenance date exceeded or unplanned main tenance due to mechanical or thermal overloading of the prosthetic knee joint (dee 4x, 4x repeated • Use the Cockpit app to check the next mainten ance date. doo day) •... -
Page 32: Status Signals
Appendices Melody/so Repeat Vibra Event/required action tion Indicates safety mode activation (see page 22) Attempt to reset this error by connecting/disconnecting the char ging adapter. If the error persists, use of the product is prohib (dee Continu ited. The product must be inspected by an authorised Ottobock day dee doo Service Center. -
Page 33: Led Symbols On The Charging Adapter
Appendices 18.2.4 LED symbols on the charging adapter Status LED and battery symbol Event Required action Charging adapter is not supplied Check whether the charging adapter is correctly connected to the with power! power supply unit or USB power source. Then check/complete the following items: •... -
Page 34: Directives And Manufacturer's Declaration
Appendices Maintenance LED Event Required action No maintenance required in the near The maintenance date can be seen using future. the adjustment app or Cockpit app. Maintenance is due within 4 weeks The maintenance date can be seen using the adjustment app or Cockpit app. maintenance date been... - Page 35 Appendices Phenomenon EMC basic standard or Interference immunity test level Test procedure Conducted interference IEC 61000-4-6 3 V induced by high-frequency 0.15 MHz to 80 MHz fields 6 V in ISM and amateur frequency bands between 0.15 MHz and 80 MHz 80% AM at 1 kHz Voltage drops IEC 61000-4-11 0% U ;...
- Page 36 Appendices Immunity to magnetic fields in close range Test frequency Modulation Interference immunity test level [A/m] 30 kHz 134.2 kHz Pulse modulation 2.1 kHz 13.56 MHz Pulse modulation 50 kHz Genium X4 3B5-4=P, 3B5-4=ST...
- Page 37 Genium X4 3B5-4=P, 3B5-4=ST...
- Page 38 Genium X4 3B5-4=P, 3B5-4=ST...
- Page 39 Genium X4 3B5-4=P, 3B5-4=ST...
- Page 40 Otto Bock Healthcare Products GmbH Brehmstraße 16 · 1110 Wien · Austria T +43-1 523 37 86 · F +43-1 523 22 64 info.austria@ottobock.com · www.ottobock.com...
Need help?
Do you have a question about the Genium X4 3B5-4-P and is the answer not in the manual?
Questions and answers
Why did my genius mix four lock up after swimming?
The Otto Bock Genium X4 3B5-4-P may have locked up after swimming due to mechanical or thermal overloading, which can trigger unplanned maintenance. If the maintenance date has been exceeded, the product must be inspected by an authorized Ottobock Service Center. Additionally, if water exposure affected components that are not waterproof or corrosion-resistant, it could cause issues. Use the Cockpit app to check the maintenance status and contact an authorized service center if necessary.
This answer is automatically generated