
Related Manuals for Otto Bock Genium X4 3B5-4-P


Summary of Contents for Otto Bock Genium X4 3B5-4-P
- Page 1 Genium X4 3B5-4=P, 3B5-4=ST Instructions for use (user) ....................
- Page 2 order-ifu@ottobock.com Documentu 647H1703 Versionu 12 SCAN ME httpsu//product-documents.ottobock.com/IFU/INT/3B5-4/647H1703/12/O/S/F DE | Lassen Sie sich durch das Fachpersonal in den sicheren Gebrauch des Produkts einweisen. Weitere Sprachen dieser Gebrauchsanweisung sind online verfügbar oder können kostenlos als gedrucktes Exemplar bestellt werden (siehe Seite 2). EN | Consult qualified personnel for instructions on how to use the product safely.
- Page 3 FI | Anna ammattihenkilöstön perehdyttää itsesi tuotteen turvalliseen käyttöön. Tämän käyttöohjeen muut kielet ovat saatavilla online tai niitä voi tilata maksutta painettuna versiona (katso sivu 2). PL | Personel fachowy powinien poinstruować użytkownika na temat bezpiecznego używania produktu. Niniejszą instrukcję używania w innych językach można przeczytać online lub zamówić bezpłatnie w wersji drukowanej (patrz strona 2).
-
Page 5: Table Of Contents
Table of contents Foreword ......................... Product description ....................... Design ........................ Function ......................Intended use ........................Indications for use ....................Conditions of use ....................Indications ......................Contraindications ....................3.4.1 Absolute Contraindications ..................3.4.2 Relative Contraindications ..................Qualification ......................Safety ..........................Meaning of warning levels ................... - Page 6 Bluetooth ........................Establishing the Bluetooth connection ..............MyModes ........................10.1 Running function as configured MyMode ............... 10.2 Switching MyModes using motion patterns ............10.3 Switching from a MyMode back to basic mode ............Additional operating states (modes) ................. 11.1 Empty battery mode ....................
-
Page 7: Foreword
1 Foreword INFORMATION Date of last update: 2024-03-07 Please read this document carefully before using the product and observe the safety ► notices. Consult the qualified personnel for instructions regarding the safe use of the product. ► Please contact the qualified personnel if you have questions about the product or in case of ►... -
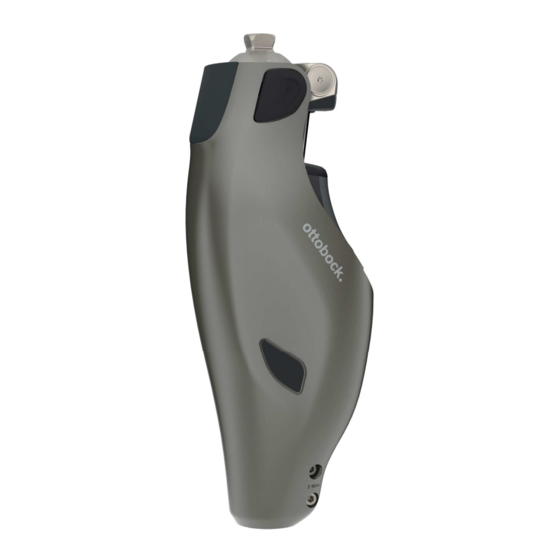
Page 8: Function
Charging adapter 1. Cable for connecting to the charging receptacle of the pros thetic knee joint 2. LED bar to indicate the charge level while charging (see page 35) 3. Light sensor for adjusting the LED brightness to the ambient light 4. -
Page 9: Conditions Of Use
3.2 Conditions of use The product was developed for everyday use and must not be used for unusual activities. These unusual activities include, for example, extreme sports (free climbing, parachuting, paragliding, etc.). Permissible ambient conditions are described in the technical data (see page 26). The product is intended exclusively for use on one user. -
Page 10: Safety
4 Safety Ottobock developed this product according to applicable standards and rules and tested it mul tiple times. In order for you to enjoy the product, we need your help. Only by complying with the following instructions can we guarantee safe operation. 4.1 Meaning of warning levels WARNING! Failure to follow the instructions can lead to serious accidents and injuries. -
Page 11: During Use
► Do not subject the product to mechanical vibrations or impacts. ► Check the product and its accessories for visible damage before each use. ► No solid particles or foreign objects are permitted to penetrate into the product. ► Do not use the product and the AXON tube adapter under extreme conditions such as jet ski ing or deep jumps into water (for the maximum duration and water depth, see the section “Technical data”... -
Page 12: Use In Special Situations
4.3.1 Use in special situations CAUTION! Possibility of falling ► When passing through theft prevention systems, body scanners or metal detectors, watch out for unexpected changes in the damping behaviour of the product. ► Maintaining a minimum distance of 30 cm from HF communication devices is recommended. ►... -
Page 13: Connecting The Power Supply And Charging Adapter
• Ensure that the USB power source meets the EMC requirements according to EN 55032/EN 55035 at a minimum. • Use the included charging adapter and included USB cable to charge the battery. • With average use, the capacity of the fully charged battery is sufficient for about 5 days. •... -
Page 14: Display Of The Current Charge Level During The Charging Process
LED flashes LED flashes slowly quickly 6.3.1 Display of the current charge level during the charging process During the charging process, the current charge level is indicated by the number of LEDs lit on the charging adapter. If the LEDs do not light up or light up in a different colour, this indicates an error. -
Page 15: Use
Melody/sound Repeat Charge level Operating time with new rechargeable battery at room temperature >80 % >4 days 60 % - 80 % >3 days 40 % - 60 % >2 days 20 % - 40 % One more day, if (booey) the query takes place in the morning – <20 %, Less than one day if the query takes place in the... -
Page 16: Walking
7.2 Walking Initial attempts at walking with the prosthesis always require the instruction of trained, qualified personnel. The hydraulics stabilise the knee joint in the stance phase and release the knee joint in the swing phase so that the prosthesis can swing forward freely. Switching to the swing phase requires a rollover to the front over the prosthes... -
Page 17: Sitting Down
7.4 Sitting down The resistance in the prosthetic knee joint while sitting down ensures the body is lowered evenly into the sitting position. 1) Place both feet side by side at the same level. 2) While sitting down, weight should be distributed evenly between both legs and the arm supports used if available. -
Page 18: Walking Down Stairs
3) The user should use their hand for support on the contralateral side. A flat wall is also suffi cient for this purpose. This lateral support is intended to prevent twisting of the residual limb in the prosthetic socket, which can cause unpleasant surface tension between the skin and socket. -
Page 19: Walking Backwards
In addition, the bicycle must have a freewheel function and it is not permissible to secure the shoes on the pedals (with clips, click mountings or the like). 7.11 Walking backwards It is possible to walk backwards safely and quickly without initiating a swing phase and without excessive flexion. -
Page 20: Mymodes
10 MyModes MyModes are intended for specific types of movement or posture (e.g. golf, basketball, …). The O&P professional can activate and configure these in addition to basic mode (mode 1) using an adjustment app. The MyModes can be switched using the Cockpit app or movement patterns. Switching by using movement patterns has to be activated in the adjustment software by the O&P professional. -
Page 21: Switching From A Mymode Back To Basic Mode
2x à MyMode 1 à MyMode 1 4x à MyMode 2 3x à MyMode 2 MyMode 1 ð ð ð ð þ ð MyMode 2 1) Position the prosthetic leg slightly to the rear (step position). 2) While maintaining constant contact with the floor, bounce on the forefoot with the leg exten ded according to the desired MyMode (MyMode 1 = three times, MyMode 2 = four times). -
Page 22: Additional Operating States (Modes)
→ A single vibration signal and acoustic signal will be emitted to confirm that the movement pattern has been recognised (see page 31). INFORMATION: If this vibration signal and acoustic signal are not emitted, the requirements were not met while bouncing the forefoot. 4) After the vibration signal and acoustic signal are emitted, keep the prosthetic leg extended with no load. -
Page 23: Reaching The Critical Temperature Of The Hydraulics
In the MyModes, the overheating mode signal is generated but there is no increase in the flexion resistance. Overheating mode is indicated by 4 high sounds (deen deen deen deen) that are repeated every 5 seconds. In addition, the status LED on the back of the knee joint slowly flashes yellow. The following functions are deactivated in overheating mode: •... -
Page 24: Cleaning The Knee Joint With 2R69=280 Axon Tube Adapter With Torsion
2) Promptly rinse the knee joint and AXON tube adapter with clear fresh water. For the cleaning instructions for the other components, see the instructions for use included with these compo nents. 3) Dry the components with a soft cloth. 4) Allow them to fully air dry in order to remove all residual moisture. -
Page 25: Trademarks
15.2 Trademarks All product names mentioned in this document are subject without restriction to the respective applicable trademark laws and are the property of the respective owners. All brands, trade names or company names may be registered trademarks and are the property of the respective owners. -
Page 26: Technical Data
Any changes or modifications not expressly approved by the party responsible for compliance could void the user’s authority to operate the equipment. Caution: Exposure to Radio Frequency Radiation. This device must not be co-located or operating in conjunction with any other antenna or transmit ter. - Page 27 Knee joint Protection rating IP66/IP68 Maximum water depth: 3 m Maximum time: 1 hour Water resistance Waterproof, corrosion-resistant, protected against penetration from jets of water Weight of the prosthesis without tube adapter Approx. 1700 g Information on the version of the software Accessible using the Cockpit app package Expected lifetime given compliance with pre...
- Page 28 Prosthesis battery Behaviour of the product during the charging The product is non-functional. process Operating time of the prosthesis with new, fully Approx. 5 days with average use charged battery at room temperature The following charging times apply only when the provided power supply unit and the provided USB cable are used: Charging time of the prosthesis battery Charge level after 1 hour charging time...
- Page 29 Charging adapter Transport in original packaging -25 °C/-13 °F to +70 °C/+158 °F 15% to 90% relative humidity, non-condensing Transport and storage between applications -25 °C/-13 °F to +70 °C/+158 °F (without packaging) 15% to 90% relative humidity, non-condensing Air pressure: 70 kPa to 106 kPa (-425 m to 3000 m without pressure equalisation) Operation 5 °C/+41 °F to +40 °C/+104 °F 15% to 90% relative humidity Air pressure: 70 kPa to 106 kPa (-425 m to 3000 m without pressure equalisation)
-
Page 30: Appendices
17 Appendices 17.1 Symbols Used In some jurisdictions it is not permiss YYYY – year of manufacture ible to dispose of these products with WW – week of manufacture unsorted household waste. Disposal UDI number (Unique Device Identifier) that is not in accordance with regula tions in your country can be harmful to Article number health and the environment. -
Page 31: Operating States/Error Signals
17.2 Operating states/error signals The prosthesis indicates operating states and error messages with vibration and acoustic signals, and by the illumination of the status LED and the Bluetooth LED above the charging recept acle. Illustration of the LED symbols LED is not lit LED is lit LED flashes LED flashes... -
Page 32: Signals For Operating States
Acoustic signals Text description Time of occur rence/meaning Two short tones in Bouncing pattern for sequence switching the MyModes recognised (whooey whooey) Volume can be changed in the app Rising tones Operational readiness after disconnecting the charging adapter (dah day doo dee) 17.2.1 Signals for operating states Charging adapter connected/disconnected Melody/sou... -
Page 33: Warnings/Error Signals
Melody Repeat LED Vibra Additional action per Event /sound tion formed – Changing settings using New setting was saved in the Cockpit app the knee joint. Mode switching using the Mode switching is per (whee) Cockpit app formed using the Cockpit app. -
Page 34: Status Signals
Melody/sou Repe Vibra Event/required action tion Stop activity and wait for the hydraulics to cool down. Automatic restart takes place as soon as the temperature drops sufficiently. Indicates safety mode activation (see page 22) Attempt to reset this error by connecting/discon necting the charging adapter. -
Page 35: Led Symbols On The Charging Adapter
Melody/sound Repeat Charge level Operating time with new rechargeable battery at room temperature – <20 %, Less than one day if the query takes place in the (wheeoo wop 2x, 4x repeated morning wop) 17.2.4 LED symbols on the charging adapter Charge level while charging 0%–20% 20%–40%... - Page 36 Event Required action inspected by an authorised Ottobock Service Centre. The O&P professional is your contact. – Prosthetic knee joint is charging Charging in progress with It will take longer to fully charge the prosthetic knee insufficient current! joint’s rechargeable battery. •...
-
Page 37: Directives And Manufacturer's Declaration
17.3 Directives and manufacturer’s declaration 17.3.1 Electromagnetic environment This product is designed for operation in the following electromagnetic environments: • Operation in a professional healthcare facility (e.g. hospital, etc.) • Operation in areas of home healthcare (e.g. use at home, use outdoors) The customer or user of the product must ensure that it is operated in such an environment. - Page 38 Phenomenon EMC basic standard Interference immunity test level Test procedure IEC 61000-4-11 Voltage drops 0% U ; 1 period 70% U ; 25/30 periods Single phase: at 0 degrees IEC 61000-4-11 Voltage interruptions 0% U ; 250/300 periods Interference resistance against wireless communication devices Test fre Frequency Radio ser...
- Page 39 Immunity to magnetic fields in close range Test frequency Modulation Interference immunity test level [A/m] 30 kHz 134.2 kHz Pulse modulation 2.1 kHz 13.56 MHz Pulse modulation 50 kHz...
- Page 40 Otto Bock Healthcare Products GmbH Brehmstraße 16 · 1110 Wien · Austria T +43-1 523 37 86 · F +43-1 523 22 64 info.austria@ottobock.com · www.ottobock.com...
Need help?
Do you have a question about the Genium X4 3B5-4-P and is the answer not in the manual?
Questions and answers