Table of Contents
Advertisement
Available languages
Available languages
Quick Links
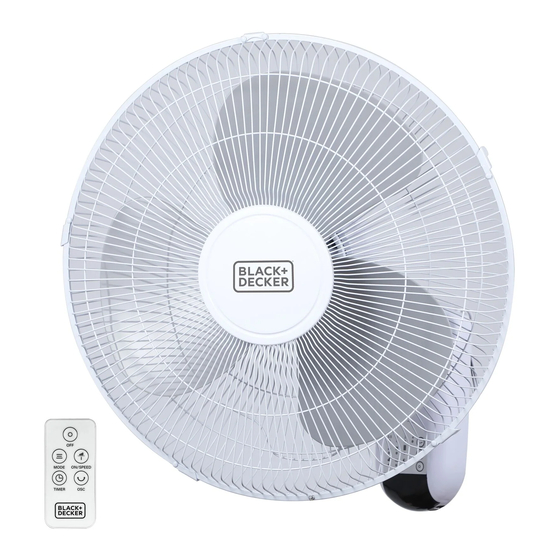
16 IN. WALL FAN
INSTRUCTION MANUAL
CATALOG NUMBER
BFWL16R
Thank you for choosing BLACK+DECKER!
PLEASE READ BEFORE RETURNING THIS PRODUCT FOR
ANY REASON.
If you have a question or experience a problem with your BLACK+DECKER
purchase, go to www.blackanddecker.com/instantanswers
If you can't find the answer or do not have access to the Internet, call
844-299-0879 from 10:30 a.m. to 6:30 p.m. EST Mon. - Fri. to speak with an
agent. Please have the catalog number available when you call.
SAVE THIS MANUAL FOR FUTURE REFERENCE.
Advertisement
Chapters
Table of Contents

Related Manuals for Black & Decker BFWL16R


Summary of Contents for Black & Decker BFWL16R
- Page 1 16 IN. WALL FAN INSTRUCTION MANUAL CATALOG NUMBER BFWL16R Thank you for choosing BLACK+DECKER! PLEASE READ BEFORE RETURNING THIS PRODUCT FOR ANY REASON. If you have a question or experience a problem with your BLACK+DECKER purchase, go to www.blackanddecker.com/instantanswers If you can’t find the answer or do not have access to the Internet, call 844-299-0879 from 10:30 a.m.
-
Page 2: Table Of Contents
CONTENTS SAFETY INFORMATION Important Safety Instructions .............................. 3 Electrical Requirements ...............................4 Power Supply Cord .................................4 Battery Information ................................5 SET UP & USE Parts & Features ..................................6 Fan Assembly ..............................7-8 Wall Installation ............................... 9 Operation of Your Fan ............................10-11 Control Panel ................................12 CLEANING &... -
Page 3: Safety Information
SAFETY INFORMATION DANGER WARNING CAUTION DANGER - Immediate hazards WARNING - Hazards or unsafe CAUTION - Hazards or unsafe which WILL result in severe practices which COULD result in practices which COULD result in personal injury or death severe personal injury or death minor personal injury IMPORTANT SAFETY INSTRUCTIONS WARNING... -
Page 4: Electrical Requirements
SAFETY INFORMATION ELECTRICAL REQUIREMENTS This appliance has a polarized plug (one blade is wider than the other). To reduce the risk of electric shock, this plug is intended to fit into a polarized outlet only one way. If the plug does not fit into the outlet, reverse the plug. If it still does not fit, contact a qualified electrician. -
Page 5: Battery Information
SAFETY INFORMATION BATTERY INFORMATION WARNING • Chemical Burn Hazard. Keep batteries away from children. This product contains a lithium button/coin cell battery. If a new or used lithium button/coin cell battery is swallowed or enters the body, it can cause severe internal burns and can lead to death in as little as 2 hours. -
Page 6: Set Up & Use
SET UP & USE PARTS & FEATURES Tilt Adjustment Knob (Not shown) Front Guard Base Remote Page 6... -
Page 7: Fan Assembly
SET UP & USE FAN ASSEMBLY WARNING: Never attempt to run the fan without the grill in place and properly secured. Failure to have the grill in place can result in serious injury. 1. Remove the rear grill plastic nut from the motor shaft pin by turning it clockwise, while holding the motor housing tightly. - Page 8 SET UP & USE Secure the fan blades by threading the spinner onto the end of the motor shaft. Turn the fan spinner counter-clockwise to tighten. 5. Attach the front grille to the rear grille with the hook clip centered on the top above the wire handle.
-
Page 9: Wall Installation
SET UP & USE WALL INSTALLATION Install your wall fan near a properly functioning wall outlet. 1. Secure Wall Bracket to the wall in the desired location by inserting 3 screws through the 3 holes in the wall bracket as shown. 3 screws are provided for use if suitable for the wall type the fan is being installed on. -
Page 10: Operation Of Your Fan
SET UP & USE OPERATION OF YOUR FAN TILT ADJUSTMENT To adjust the air flow upward or downward, push the grill section lightly to the desired direction. BATTERY INSTRUCTIONS (Batteries not included) The remote control requires a CR2025 Lithium Battery to operate. 1. - Page 11 SET UP & USE ON / SPEED • Press this button to turn the fan ON, as it will make an initial beep sound. The fan will begin to operate at low speed if it is the first time you have plugged it in. If the fan was plugged in previously, it will operate at the speed setting when last turned off.
-
Page 12: Control Panel
SET UP & USE CONTROL PANEL MEDIUM HIGH SPEED NORMAL NATURAL SLEEP • Press this button to turn the fan ON. The fan will begin to operate at low speed if it is the first time you have plugged it in. If the fan was plugged in previously, it will operate at the speed setting when last turned off. -
Page 13: Cleaning & Care
CLEANING & CARE CLEANING AND MAINTENANCE WARNING: Before cleaning and assembling, unplug the fan. • To ensure adequate air circulation to the motor, keep vents at the rear of the motor housing free of dust, debris, etc. Unplug fan before using a vacuum cleaner to clean these vents. -
Page 14: Troubleshooting & Warranty
TROUBLESHOOTING & WARRANTY BEFORE YOU CALL FOR SERVICE IF THE APPLIANCE FAILS TO OPERATE: A) Check to make sure that the appliance is plugged in securely. If it is not, remove the plug from the outlet, wait 10 seconds and plug it in again securely. B) Check for a blown circuit fuse or a tripped main circuit breaker. -
Page 15: Limited Warranty
TROUBLESHOOTING & WARRANTY LIMITED WARRANTY Any repair, replacement, or warranty service, REPAIR OR REPLACEMENT AS PROVIDED UNDER THIS WARRANTY IS THE EXCLUSIVE REMEDY OF and all questions about this product should be THE CUSTOMER; W Appliance Co. SHALL NOT BE directed to W Appliance Co. - Page 16 Scan for Warranty Support equitybrands.onsitesupport.io BLACK & DECKER, BLACK+DECKER, the BLACK & DECKER and BLACK+DECKER logos and product names are trademarks of The Black & Decker Corporation, used under license. All rights reserved. Product in this box may differ slightly from that pictured. Does not affect function.
- Page 17 VENTILADOR DE PARED 16”. MANUAL DE INSTRUCCIONES NÚMERO DE CATÁLOGO BFWL16R ¡Gracias por elegir BLACK+DECKER! POR FAVOR, LEA ESTE MANUAL ANTES DE DEVOLVER ESTE PRODUCTO POR CUALQUIER MOTIVO. Si tiene alguna pregunta o experimenta un problema con su compra de BLACK+DECKER, vaya a www.blackanddecker.com/instantanswers.
- Page 18 CONTENIDO INFORMACIÓN DE SEGURIDAD Instrucciones importantes de seguridad ........................19 Requisitos eléctricos ................................20 Cable de corriente .................................. 20 Información sobre la batería ...............................21 CONFIGURACIÓN Y USO Piezas y características .................................22 Instalación del ventilador ..........................23-24 Instalación en pared .............................25 Funcionamiento del ventilador ......................... 26-27 Panel de Control ..............................28 LIMPIEZA Y CUIDADO ..........................
-
Page 19: Información De Seguridad
INFORMACIÓN DE SEGURIDAD PELIGRO PRECAUCIÓN ADVERTENCIA ADVERTENCIA - Peligros o PELIGRO - Amenazas inmediatas PRECAUCIÓN - Peligros o prácticas prácticas inseguras que PUEDEN que RESULTARÁN en lesiones inseguras que PODRÍAN resultar en RESULTAR en lesiones personales personales graves o la muerte lesiones personales menores graves o la muerte INSTRUCCIONES IMPORTANTES DE SEGURIDAD... -
Page 20: Requisitos Eléctricos
INFORMACIÓN DE SEGURIDAD GUARDE ESTAS INSTRUCCIONES USO EXCLUSIVAMENTE DOMÉSTICO REQUISITOS ELÉCTRICOS Este aparato tiene un enchufe polarizado (una clavija es más ancha que la otra). Para reducir el riesgo de descarga eléctrica, este enchufe está diseñado para encajar en una toma de corriente polarizada sólo en un sentido. -
Page 21: Información Sobre La Batería
INFORMACIÓN DE SEGURIDAD INFORMACIÓN SOBRE LA BATERÍA ADVERTENCIA • Peligro de quemaduras químicas. Mantenga las pilas fuera del alcance de los niños. Este producto contiene una pila de botón/moneda de litio. Sí una pila de litio tipo botón/moneda nueva o usada se ingiere o entra en el cuerpo, puede causar quemaduras internas graves y provocar la muerte en tan sólo 2 horas. -
Page 22: Configuración Y Uso
CONFIGURACIÓN Y USO PIEZAS Y CARACTERÍSTICAS Perilla de ajuste de inclinación (No se muestra) Protector frontal Base Control remoto Page 22... -
Page 23: Instalación Del Ventilador
CONFIGURACIÓN Y USO ENSAMBLADO DEL VENTILADOR ADVERTENCIA: Nunca intente hacer funcionar el ventilador sin que la rejilla esté en su lugar y debidamente asegurada. El no tener la rejilla en su lugar puede resultar en lesiones graves. 1. Retire la tuerca de plástico de la rejilla trasera del pasador del eje del motor girándola en el sentido de las agujas del reloj, mientras sujeta firmemente la carcasa del motor. - Page 24 CONFIGURACIÓN Y USO Asegure las aspas del ventilador enroscando el rotor en el extremo del eje del motor. Gire el rotor del ventilador en sentido contrario a las agujas del reloj para apretarlo. Parrilla delantera Tuerca de plastico Cuchilla Apretar Parrilla trasera Aflojar Hilandero...
-
Page 25: Instalación En Pared
CONFIGURACIÓN Y USO INSTALACIÓN EN LA PARED Instale su ventilador de pared cerca de un tomacorriente de pared que funcione correctamente. 1. Fije el soporte de pared a la pared en la ubicación deseada insertando 3 tornillos a través de los 3 orificios en el soporte de pared como se muestra. Se incluyen 3 tornillos para utilizar si son adecuados para el tipo de pared en la que se está... -
Page 26: Funcionamiento Del Ventilador
CONFIGURACIÓN Y USO FUNCIONAMIENTO DE SU VENTILADOR AJUSTE DE LA INCLINACIÓN Para ajustar el flujo de aire hacia arriba o hacia abajo, empuje ligeramente la sección de la rejilla en la dirección deseada. INSTRUCCIONES PARA LAS PILAS (Batteries not included) El control remoto necesita una pila de litio CR2025 para funcionar. - Page 27 CONFIGURACIÓN Y USO ENCENDIDO/VELOCIDAD (ON/SPEED) • Pulse este botón para encender el ventilador, ya que emitirá un sonido inicial. El ventilador comenzará a funcionar a baja velocidad si es la primera vez que lo enchufa. Si el ventilador estaba enchufado anteriormente, funcionará a la velocidad ajustada la última vez que se apagó.
-
Page 28: Panel De Control
CONFIGURACIÓN Y USO PANEL DE CONTROL (CONTROL PANEL) MEDIUM HIGH SPEED NORMAL NATURAL SLEEP • Pulse este botón para encender el ventilador. El ventilador comenzará a funcionar a baja velocidad si es la primera vez que lo enchufa. si el ventilador se enchufó... -
Page 29: Limpieza Y Cuidado
LIMPIEZA Y CUIDADO LIMPIEZA Y MANTENIMIENTO ADVERTENCIA: Antes de limpiar y desmontar el ventilador, desenchúfelo. • Para garantizar una circulación de aire adecuada hacia el motor, mantenga las rejillas de ventilación de la parte trasera de la carcasa del motor libres de polvo, residuos, etc. Desenchufe el ventilador antes de utilizar un aspirador para limpiar estas rejillas. -
Page 30: Antes De Llamar Al Servicio Técnico
RESOLUCIÓN DE PROBLEMAS Y GARANTÍA ANTES DE LLAMAR AL SERVICIO TÉCNICO SI EL APARATO NO FUNCIONA: A) Compruebe que el aparato está bien enchufado. Si no lo está, desenchúfelo de la toma de corriente, espere 10 segundos y vuelva a enchufarlo firmemente. B) Compruebe si se ha fundido un fusible o se ha disparado el disyuntor principal. -
Page 31: Garantía Limitada
RESOLUCIÓN DE PROBLEMAS Y GARANTÍA GARANTÍA LIMITADA Cualquier reparación, recambio, o servicio REPAIR OR REPLACEMENT AS PROVIDED UNDER LA REPARACIÓN O EL REEMPLAZO SEGÚN LO de garantía, y todas las preguntas sobre este DISPUESTO BAJO ESTA GARANTÍA ES EL RECURSO producto deben ser dirigidas a W Appliance Co. - Page 32 Scan for Warranty Support equitybrands.onsitesupport.io BLACK & DECKER, BLACK + DECKER, los logotipos y nombres de productos de BLACK & DECKER y BLACK+DECKER son marcas comerciales de The Black & Decker Corporation, utilizadas bajo licencia. Reservados todos los derechos. El producto de esta caja puede diferir ligeramente del de la foto. No afecta al funcionamiento.
Need help?
Do you have a question about the BFWL16R and is the answer not in the manual?
Questions and answers