Table of Contents
Advertisement
Quick Links
WEEE Warning Message
Symbol for Separate Collection in European Countries
This symbol indicates that this product is to be collected
separately.
The following apply only to users in European countries:
This product is designated for separate collection at an
appropriate collection point. Do not dispose of as
household waste.
For more information, contact the retailer or the local
authorities in charge of waste management.
FCC STATEMENT
This device complies with Part 15 of the FCC Rules. Operation is subject to the following
two conditions:
(1) This device may not cause harmful interference, and
(2) This device must accept any interference received, including interference that may
cause undesired operation.
Note:
This equipment has been tested and found to comply with the limits for Class B digital
devices, pursuant to Part 15 of the FCC rules. These limits are designed to provide
reasonable protection against harmful interference in a residential installation. This
equipment generates uses and can radiate radio frequency energy and, if not installed
and used in accordance with the instructions, may cause harmful interference to radio
communications. However, there is no guarantee that interference will not occur in a
particular installation. If this equipment does cause harmful interference to radio or
television reception, which can be determined by turning the equipment off and on, the
user is encouraged to try to correct the interference by one or more of the following
measures:
•
Reorient or relocate the receiving antenna.
•
Increase the separation between the equipment and receiver.
•
Connect the equipment into an outlet on a circuit different from that to which the
receiver is connected.
Use of shielded cable is required to comply with Class B limits in Subpart B of Part 15 of
the FCC rules. Do not make any changes or modifications to the equipment unless
otherwise specified in the manual. If such changes or modifications should be made, you
could be required to stop operation of the equipment.
-
-
1
English
Advertisement
Table of Contents

Related Manuals for Genius D1212


Summary of Contents for Genius D1212
- Page 1 Connect the equipment into an outlet on a circuit different from that to which the receiver is connected. Use of shielded cable is required to comply with Class B limits in Subpart B of Part 15 of the FCC rules. Do not make any changes or modifications to the equipment unless otherwise specified in the manual.
- Page 2 The product and accessories that come with your camera may be different from those described in this manual. This is due to the fact that different retailers often specify slightly different product inclusions and accessories to suit their market requirements, customer demographics, and geographical preferences.
- Page 3 Swallowing batteries might cause poisoning. If the battery is accidentally swallowed, immediately consult a physician. Do not use the camera while you are walking, driving or riding a motorcycle. This might cause you to fall over or result in a traffic accident.
- Page 4 The camera may feel warm after long period of continuous use. This is normal and not a malfunction. If the battery is not to be used for a long period of time, remove it from the camera to prevent leakage or corrosion.
-
Page 5: Table Of Contents
2.2 I ............14 NSERTING THE BATTERY 2.3 C ............15 HARGING THE BATTERY 2.4 T ..........15 URNING ON FOR THE FIRST TIME 2.5 C ..............16 HANGING MODES 2.6 B ..............16 EFORE YOU START 2.6.1 Setting the date and time..........16 2.6.2... - Page 6 OUND ECORDING MODE 3.3.1 Icons................35 3.4 S ................35 ETUP MODE 3.4.1 Setting the date and time..........36 3.4.2 Setting the beep function ..........36 3.4.3 Setting the language............ 36 3.4.4 Auto Display Off............36 3.4.5 Auto Power Off ............37 3.4.6...
- Page 7 Memory (game) ............50 3.9.4 Gobang................ 51 4. RECORDING THE TV PROGRAM..........52 4.1 O ............52 PERATION INSTRUCTIONS 5. HOW TO PLAY A MOVIE AND VIEW PICTURES......53 5.1 I ........54 NSTALL EDIA ONVERTER 5.2 R UNNING THE...
-
Page 8: Introducing The Camera
• At least 200 MB of available disk space Note: A USB 1.1 port will enable you to transfer files to and from your host PC, but transfer speeds will be much faster with a USB 2.0 port. 1.2 Features The camera offers a variety of features and functions including: •... -
Page 9: Unpacking
English 1.3 Unpacking All the following items should be present in the camera package. If any item is missing or appears damaged, contact your dealer immediately. Digital Camera Camera Pouch Earphone Li-ion Battery DC-IN 5V Adaptor Battery DC-IN AV Cable... -
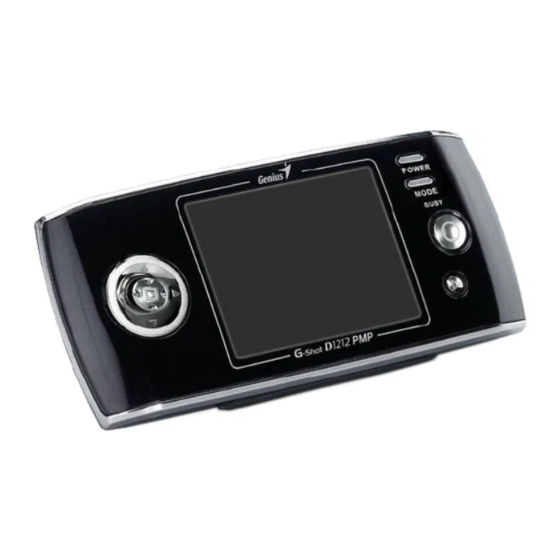
Page 10: About The Camera
English 1.4 About the camera Refer to the following diagrams to familiarize yourself with the buttons and controls of the camera. 1.4.1 Front view Indicator Mode Button Direction Power LCD screen Browse 1.4.2 Top view Microphone Earphones jack DC IN jack... -
Page 11: Back View
English 1.4.3 Back view Wrist Strap Flash Lens Buckle Holder Speaker Battery Cover... - Page 12 English See the table below for a description of each button’s function. Button Name Function Press to turn power on or off. When the camera is in work/standby Power status, the green indicator lights. When the camera is in “Flash charging”...
-
Page 13: Getting Started
English 2. Getting started Read this section to learn how to start using the digital camera. This section covers only basic functions, such as inserting the battery and memory card, turning on/off and initial setup. See later chapters for details about advanced functions. -
Page 14: Inserting The Battery
2.2 Inserting the battery. The camera is designed to use a rechargeable Li-ion battery. Note: Install the battery exactly as described here. Installing the batteries incorrectly could cause damage to the camera and possibly start a fire. Open the battery door. -
Page 15: Charging The Battery
Insert the battery into the charger as shown and connect the power supply to the charging unit and the outlet. The indicator on the charger will turn to red. It takes five hours to charge the battery from empty to full. When the charging is finished, the indicator on the charge will turn into green. -
Page 16: Changing Modes
Direction button to select a mode, and press the OK to enter when selected. Mode Button Direction button 2.6 Before you start Before you can use your camera there are some basic settings to configure in the following sections. 2.6.1 Setting the date and time 1. -
Page 17: Setting The Language
) or Mode button to exit the menu. 2.6.2 Setting the language Turn the camera on, and use Direction button (Left/Right button ) to setup the system, and then press OK Use the Direction button (Up/Down button ) to select the Language option. -
Page 18: Taking Pictures
Off, 5 seconds, 10 seconds, 30 second. Press the OK setting start self- capturing after selecting. Flash Refer to the section 3.1.2 “Setting the flash”. setting 2.7.2 Browsing Pictures Press Browse to enter the picture playback mode, and the last files will display on the LCD screen. -18-... - Page 19 OK to confirm. Press Direction button ( ), and the screen will appear the Setup menu under the Playback mode. (1) Use the Direction (Up/Down button ) to select the Delete option, and press the OK to enter.
- Page 20 (3) Use the Direction Up/Down button ) to select the Slide show option. Use the Direction (Left/Right button ) again to select 1s, 3s, or 5s, and press the OK to view the pictures automatically: (4) Use the Direction Up/Down button ) to select the DPOF option.
- Page 21 Press the Browse again to leave the playback mode and return to the Photo mode. ※ If there isn’t any saved picture in the camera memory or memory card, the screen will show “No files” message while using the Replay mode.
-
Page 22: Video Recording
English Possible number of shots (still image) The table below shows the approximate number of shots that you can take at each setting based on internal memory and SD memory card. SD Memory Card Resolution Quality 32MB 64MB 128MB 256MB 512MB... -
Page 23: Video Playback
160min 277min 478min 898min sec. 28sec. * The data shows the standard testing results. The actual capacity varies according to the shooting conditions and settings 2.8.2 Video playback Ensure the digital camera is in Video mode. Press the Browse to enter the video playback mode, and the last file will... - Page 24 Direction (Left/Right button ) to fast reverse/forward (2x, 4x, 8x). (Note: Fast Forward and Fast Reverse is only supported when playing AVI format files. Fast Forward and Fast Reverse are not supported during playback of ASF and MOV format files).
-
Page 25: Sound Recording
Press Browse again to exit the playback mode and return to Video mode. ※ If there isn’t any saved video in the camera memory or memory card, the screen will show “No files” message while using the Replay mode. 2.9 Sound recording 2.9.1... - Page 26 English Press the OK to start recording. Press the OK again to stop recording. The camera will save the sound file automatically with the built-in file name. -26-...
-
Page 27: Playing The Sound File
Press Browse again to exit the playback mode and return to Sound recording mode. ※ If there isn’t any saved recording in the camera memory or memory card, the screen will show “No files” message while using the Replay mode. -
Page 28: Connecting To A Computer
English 2.10 Connecting to a computer Read this section carefully to learn how to transfer files to a PC. Use the supplied USB cable to connect the digital camera to the computer. 2.10.1 Mass Storage The digital camera has a mass storage function which is the same as a card reader. -
Page 29: Pc Camera
This digital camera can work as a PC camera or web camera. Use the USB cable to connect the digital camera to the computer as shown above. When the digital camera is connected to the PC by USB cable, the digital camera will automatically pop up two function modes Mass Storage and PC Camera for choosing to connect the computer by USB. -
Page 30: Using The Camera
English 3. Using the camera Read this section to learn how to use the camera. 3.1 Photo mode Use the Photo mode to capture pictures, and store them in internal memory or on an SD card. 3.1.1 Icons The following screen shows the photo mode icons and their symbols. -
Page 31: Setting The Flash
) again to leave the menu. 3.1.4 Quality The Quality option lets you setup the quality of the captured picture. A larger size picture contains more content; therefore it takes more memory space. While in Photo mode, press the Direction (ENTER button ) to enter the Setup menu. -
Page 32: White Balance
Press the Direction (ENTER button ) again to leave the menu, 3.1.6 Color effect The camera can capture standard color images, black and white images or sepia tone images. While in Photo mode, press the Direction (ENTER button ) to enter the Setup menu. -
Page 33: Video Recorder Mode
) to select if the date stamp is displayed. Press the Direction (ENTER button ) again to exit the menu, 3.2 Video recorder mode Use this mode to capture video clips, and store them in internal memory or on an SD card. 3.2.1 Icons Use the following picture to familiarize yourself with the Video mode icons and symbols. -
Page 34: Setting The Size
Refer to “3.1.6 Color effect” section. 3.2.6 File format While in Photo mode, press Direction (ENTER button ) to enter the Setup menu to adjust the file format. Use the Direction Up/Down button ) to select the File Format option. -
Page 35: Sound Recording Mode
English 3.3 Sound Recording mode Use the Sound Recording mode to record the sound files, and then save them in the internal memory or SD card. 3.3.1 Icons Use the following picture to familiarize yourself with the Sound Recording mode icons and symbols. -
Page 36: Setting The Date And Time
Refer to the section 2.6.2 “Setting the language”. 3.4.4 Auto Display Off Use the auto power off function to set a period of inactivity after which the camera will switch the LCD screen off. Turn the camera on, and use Direction (Left/Right button... -
Page 37: Auto Power Off
Note: Convert the demo movie and picture files to the format supported by this camera before saving them in the camera. Refer to chapter 5 “How to play a movie and browse pictures”. Please save the converted movie and picture files or the folder with converted movie and picture files in the DEMO folder of the camera, or the camera can’t execute... -
Page 38: Tv Standard
) or Mode button to exit the menu. 3.4.8 Defaultl Use this option to reset all settings to the factory default. Turn the camera on, and use Direction (Left/Right button ) for system setup, and then press OK to enter Setup mode. Use the Direction (Up/Down button ) to select the Default option, and the screen appears as below. -
Page 39: Memory Status
English 3.4.9 Memory Status Turn the camera on, and use Direction (Left/Right button ) for system setup, and then press OK to enter Setup mode. Use Direction (Up/Down button ) to select the Memory Status option. The screen appears as follow. Press OK to display the current storage status. -
Page 40: Fm Radio Mode
English 3.5 FM Radio mode Use FM Radio to receive radio from frequency FM76~108MHz, and save them in the internal memory or on a SD card. 3.5.1 Sound recording icon Use the following picture to familiarize yourself with the FM Radio mode icons and symbols. - Page 41 ), and the camera will start searching for the station frequency automatically. Press OK to stop receiving the frequency during this process. When finishing auto search, the camera will save the station automatically. Use the Direction (Left/Right button ) to select the station searched automatically.
-
Page 42: Music Player Mode
English 3.6 Music Player mode Use the Music player mode to play music in mp3, wav format in the internal memory or on a SD card. 3.6.1 Icons Use the following picture to familiarize yourself with the Music Player mode icons and symbols. - Page 43 ) to adjust the volume. While playing music, long press the Direction (ENTER button ) to switch the EQ: Normal, Pop, Classical, Rock and Bass. Short press the Direction ( ) to switch the repeat modes for playing music: Play in Order...
-
Page 44: Movie Player Mode
MUSIC folder of the camera, or the music player can’t find music files. 3.7 Movie player mode Use the Movie player mode to play the movie in AVI, ASF or MOV format in the internal memory or on a SD card. 3.7.1... - Page 45 (2x, 4x, 8x). Press OK to pause playing, and press Browse to return to the menu for selecting movies. (Note: Fast Forward and Fast Reverse is only supported when playing AVI format files. Fast Forward and Fast Reverse are...
-
Page 46: Photo Viewer Mode
Note: Convert the movie files to the format supported by this camera before saving them in the camera, such as AVI and ASV (converting to AVI file format is highly suggested). Please refer to chapter 5 “How to play a movie and browse pictures”. Please save the converted movie files or the folder with converted movie files in the MOVIE folder of the camera, or the picture viewer can’t find the movie files. -
Page 47: Game Mode
Note: Convert the picture files to the format JPEG supported by this camera before saving them in the camera. Please refer to chapter 5 “How to play a movie and browse pictures”. Please save the converted picture files or the folder with converted picture files in the PHOTO folder of the camera, or the picture viewer can’t find the picture files. -
Page 48: Boxman
If you take the wrong step, you can press OK to undo the previous action. When you push all the boxes to the locations marked with a little ball, you win. The screen will appear “Next map”, and you can go to the next map. -
Page 49: Tetris
The upper right of the game screen will appear the shape of next block. The area at the bottom of the game screen will appear the score you get. When the score of each level reaches 1500, the screen will show “Next level” for the next level (the falling speed of the blocks become faster). -
Page 50: Memory (Game)
If different, the previous two pictures will be covered again when opening the third picture. You will win the game when all the pictures are erased. The screen will appear message “You win”, and then return to the Memory menu. -
Page 51: Gobang
English 3.9.4 Gobang The Gobang game is designed to develop your thinking ability by aligning five pieces in a line. Use Direction (Left/Right button ) to scroll through the Game mode, and press to enter the Game menu. Use the Direction (Up/Down button ) to select the Gobang option. -
Page 52: Recording The Tv Program
OK to confirm. The display of pictures by the screen and the playing of the sound by the speaker are synchronized with the external audio/video. Press OK and the camera will start recording. -
Page 53: How To Play A Movie And View Pictures
English 5. How to play a movie and view pictures If you want to see a movie or picture any time, you can use the camera as a portable media player to see movies or pictures at any time. Before seeing the movies and pictures, you have to convert the current movie or picture files into the formats supported by the camera. -
Page 54: Install Arcsoft Media Converter
English 5.1 Install ArcSoft Media Converter The installation process is as follows: 1. Insert the CD-ROM and double click on the installation file “Setup.exe”. The Welcome screen appears, then click Next. 2. Click Yes to accept the license agreement. -54-... - Page 55 3. Select the installation folder and click Next. The default installation folder is C:\Program Files\ArcSoft\MediaConverter. In addition, you can click Browse to select another installation folder. 4. Choose Start Menu folder and click Next. You can input your favorite Start Menu folder.
- Page 56 English 5. Click Next to install ArcSoft Media Converter on your computer. When finished installing, the following screen appears. Click Finish, and you can use the ArcSoft Media Converter. -56-...
-
Page 57: Running The Arcsoft Media Converter And Converting Files
Click the drop down arrow of “Files of type” to choose the file types you want to display. b. You can use the highlighted file to make sure if it’s the file you want to convert. If the AutoPlay is selected, the preview windows will start replaying the file... - Page 58 English 3. Repeat the steps 1 and 2 until you add all the files you want to convert. Except for the above method, you can directly drag the files to the file list of ArcSoft MediaConverter. Group files The files you select will list in the application window. You can group the files by name, size or file format.
- Page 59 If you select the “Optimize for the selected device” option, the application will convert photo files by resolution 320 x 240 and quality 100.The selectable resolutions include 320 x 240, 640 x 480, 800 x 600 and 1024 x 768. The range of Quality setting is 0~100.
- Page 60 English -60-...
- Page 61 Video setting (Suggest to use default value) When converting video files, you can setup the following seven parameters: Resolution: 320 x 240, 352 x 240, 352 x 288, VGA (640 x 480) [Default], 720 x 480, 720 x 576 File Format: MPEG-4 coded AVI files...
-
Page 62: Playing The Converted Files
In this case, the application will ask if you want to convert that file or skip to convert the other files. The screen will also show one dialog box to notify you to group them in the folder you choose when the conversion is finished. -
Page 63: Installing Software And Drivers
SD device. You will only need to install a driver for the camera if your operating system is Windows 98SE. Windows XP/ME/2000 is plug and play and do not require a driver to be manually loaded. -
Page 64: Presto ! Video Works 6
InstallMgr.exe under the root directory on the CD. Press the install button and follow the on screen instructions. After application is started, you can find more information on Presto! Video Works 6 in the help files. 6.3 Presto! Mr. Photo 3 Presto! Mr. - Page 65 English Click "I accept the agreement" to accept the conditions of Software License Agreement and click "Next" to continue. Click "Browse" to select the folder location and click "Next" to continue.
- Page 66 English Click "Browse" if you want to select a different program folder or click "Next" to continue. Enter the additional tasks setup screen and press "Next" to continue. Enter the main program setup screen and press "Install" to start the installation.
- Page 67 English During the installation, press "Cancel" if you want to stop setup. 10. The following screen will appear after the installation is completed. Click "Finish" to complete the installation.
-
Page 68: Troubleshooting
7.1 Problems and remedies The camera is down and can’t be operated while using. Please check The camera the contact of battery, and restart the camera. If the camera cannot be is down restarted, please make sure if improper operation damaged the camera. -
Page 69: Appendix
Resolution: 4048 x 3040 (firmware interpolation) 2592 x 1944, 2048x1536, 1280 x 960, 800x600 Quality: Fine, Normal, Basic Movie clips MPEG-4 (AVI, ASF, MOV) 640 x 480 30 fps/320 x 240 30 fps Audio Support for audio playback Zoom 4x digital zoom TFT screen 2.5-inch LTPS...
Need help?
Do you have a question about the D1212 and is the answer not in the manual?
Questions and answers