Table of Contents
Advertisement
WEEE Warning Message
Symbol for Separate Collection in European Countries
This symbol indicates that this product is to be collected
separately.
The following apply only to users in European countries:
This product is designated for separate collection at
an appropriate collection point. Do not dispose of as
household waste.
For more information, contact the retailer or the local
authorities in charge of waste management.
FCC STATEMENT
This device complies with Part 15 of the FCC Rules. Operation is subject to the following
two conditions:
(1) This device may not cause harmful interference, and
(2) This device must accept any interference received, including interference that may
cause undesired operation.
Note:
This equipment has been tested and found to comply with the limits for Class B digital
devices, pursuant to Part 15 of the FCC rules. These limits are designed to provide
reasonable protection against harmful interference in a residential installation. This
equipment generates uses and can radiate radio frequency energy and, if not installed and
used in accordance with the instructions, may cause harmful interference to radio
communications. However, there is no guarantee that interference will not occur in a
particular installation. If this equipment does cause harmful interference to radio or television
reception, which can be determined by turning the equipment off and on, the user is
encouraged to try to correct the interference by one or more of the following measures:
•
Reorient or relocate the receiving antenna.
•
Increase the separation between the equipment and receiver.
•
Connect the equipment into an outlet on a circuit different from that to which the
receiver is connected.
-1-
English
Advertisement
Table of Contents

Subscribe to Our Youtube Channel
Related Manuals for Genius G-Shot D1211


Summary of Contents for Genius G-Shot D1211
- Page 1 For more information, contact the retailer or the local authorities in charge of waste management. FCC STATEMENT This device complies with Part 15 of the FCC Rules. Operation is subject to the following two conditions: (1) This device may not cause harmful interference, and (2) This device must accept any interference received, including interference that may cause undesired operation.
- Page 2 English Use of shielded cable is required to comply with Class B limits in Subpart B of Part 15 of the FCC rules. Do not make any changes or modifications to the equipment unless otherwise specified in the manual. If such changes or modifications should be made, you could be required to stop operation of the equipment.
- Page 3 This might cause damage to the person’s eyesight. Do not subject the LCD monitor to impact. This might damage the glass on the screen or cause the internal fluid to leak. If the internal fluid enters your eyes or comes into contact with your body or clothes, rinse with fresh water.
- Page 4 The battery may feel warm after long period of continuous use of the camera or the flash. This is normal and not a malfunction.
- Page 5 The camera may feel warm after long period of continuous use. This is normal and not a malfunction. If the battery is not to be used for a long period of time, remove it from the camera to prevent leakage or corrosion.
-
Page 6: Table Of Contents
GETTING STARTED ____________________________________________ 12 Installing the wrist strap _______________________________________ 12 Loading the batteries _________________________________________ 12 Inserting the memory card _____________________________________ 13 Turning on for the first time _____________________________________ 14 Changing modes_____________________________________________ 15 Before you start______________________________________________ 15 Setting the date and time ___________________________________________ 15... - Page 7 Date Display _____________________________________________________ 33 Movie menu ________________________________________________ 33 Video size _______________________________________________________ 33 Video quality _____________________________________________________ 34 Possible recording time / sec (video clip) _______________________________ 34 White balance ____________________________________________________ 35 EV _____________________________________________________________ 35 Icon display ______________________________________________________ 35 Playback menu ______________________________________________ 36...
-
Page 8: Introducting The Camera
English INTRODUCTING THE CAMERA Read this section to learn about the features and functions of the camera. This chapter also covers system requirements, package contents, and front and rear views. System requirements The camera requires a PC with the following specifications: Windows XP, 2000, ME, 98SE operating system Intel Pentium Ⅲ500 MHz CPU or higher... -
Page 9: Package Contents
English Package Contents All the following items should be present in the camera package. If any item is missing or appears damaged, contact your dealer immediately. CD-ROM (containing Digital camera Camera pouch the driver) Wrist strap USB/ AV-out cable Batteries... -
Page 10: About The Camera
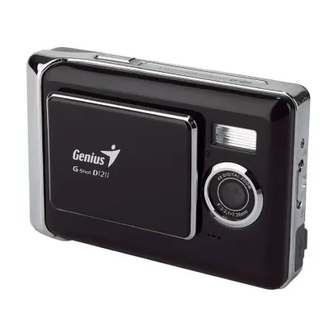
English About the camera Front view (1) Shutter button (6) Microphone (2) Sliding power (ON/ OFF) cover (7) Tripod socket (3) Self-timer lamp (8) Memory card slot (4) Flash (9) Battery cover (5) Lens... -
Page 11: Back View
(7) Set/ function button (2) Status indicator (8) Browse button (3) LCD display (9) Mode selector button (4) Up shift selector button (10) Macro catch (5) Down shift selector button (11) USB port cover (6) Wrist strap mount (12) USB socket... -
Page 12: Getting Started
When using your digital camera, if the battery charge is weaker than 2.3V(one mark on the battery level icon), you will not be able to operate the flash; if the battery charge is weaker than 2.2V (red on the battery level icon), the camera will turn off automatically. -
Page 13: Inserting The Memory Card
Note: Before using, please insert your SD memory card into the memory card slot on the bottom of the camera. If the card is full or contains other data, you can access Format in “Setup mode” using the Mode Selector button to format your memory card. -
Page 14: Turning On For The First Time
This product accepts SD memory cards of sizes between 32MB to 1GB. The memory card will not slide fully into its slot if it is incorrectly inserted. Do not apply excessive force when inserting the memory card to prevent causing damage. -
Page 15: Changing Modes
“Movie mode”, “Setup mode”, ”PC mode”, “Games mode” and other features. Press and hold on to the Mode selector button for two seconds to access the modes Main menu. Use the Up/ Down selection buttons to highlight the options then press the Set/ Function button to confirm. -
Page 16: Setting The Language
Main menu. Use the Up/ Down selection buttons to highlight the options then press the Set/ Function button to confirm. Use the Up selection button to enter into the second level of the system then use the Down selection button to select Language option. Press the Set/ Function button to confirm. -
Page 17: Taking Your First Video
English Taking your first video Before shooting your first video, please ensure the you have read “Before you start”. To shoot a video clip: 1. Switch on the camera and ensure that it is in the Video mode. 2. Use the LCD to frame the video. -
Page 18: Using The Camera
English USING THE CAMERA Using the Shutter button All of the buttons are found on the top or back of the camera. Back View Up shift button Down shift button Set/ function button Browse button Mode selector button Front view... - Page 19 English Please see the table below for the functions of each icon and symbol. Button Description Features ● Up/ Down shift selector buttons control Up shift the zoom in Photo mode. selector ● Up/ Down shift selector buttons stop the playback of video clips in Video mode.
-
Page 20: About The Indicators
You may decide not to display icons on the LCD screen by following the instructions below. Ensure that you are either in Photo mode or Video mode. If you are in neither, please select either mode from the modes Main menu. -
Page 21: Photo Mode
English Photo mode Use Photo mode to capture still pictures and store them in the internal memory or on an SD card. icon indicates Photo mode. Icons in Photo mode Please see the table below for the functions of the icons. -
Page 22: Setting The Flash
The macro function enables you to capture images of subjects very close to the lens. In Macro mode you can focus on subjects as close as 17 cm. When the Macro mode is not in use, the minimum focal distance is 19 cm. Use Macro mode for subjects 17-19 cm from the camera. -
Page 23: Video Mode
English Video Mode Use Video mode to capture video clips and store them in the internal memory or on an SD card. icon indicates Video mode. Icons in Video mode Use the following diagram to familiarize yourself with the Video mode icons and symbols. -
Page 24: Playback Mode
Viewing pictures and videos To view pictures and videos: Switch on the camera and ensure that it is in the Playback mode. The most recent picture or video clip will be displayed on the LCD display. Navigate using the Up shift selector/ Down shift selector buttons to select images and video clips stored in the memory card. -
Page 25: Using Thumbnails Mode
(except Browse button) to terminate the slideshow. PC Mode You can use USB mode to connect to a host PC. Before connecting to a printer or PC, please see “Installing software and drivers”. After the camera is connected to a computer via the USB cable, the camera can be set to either the USB Mass Storage and Video camera options. -
Page 26: Video Camera Mode
When the USB icon showing the connection to the PC is displayed on the LCD, please link the camera with the PC via the USB cable provided. When the set up is completed, an icon will appear under My Computer in the form of a removable hard disk. -
Page 27: Game Mode
Got some free time to kill? Use the Game Mode to keep yourself entertained whenever you are bored. The camera comes with four games pre-installed for your enjoyment. Turn on the camera, use the Up/Down Arrow button to go to the Game menu, press the OK/Function button to enter the Game Mode. -
Page 28: Tetris
OK/Function button once will pause the game; press it again to resume. The next block to fall will be displayed on the top left hand corner of the screen, and your score will be on the top right hand corner. When a row has been completely filled, it will be removed, and the rows above will descend and your score increases. - Page 29 Up/Down Arrow button to move the grid horizontally. Use the Browse button to move it down, and the Mode Selection button to move it up. Place your piece (Black) in the desired grid by pressing the OK/Function button. When you have made your move, your opponent (the camera) will place its piece (White) on the board as well.
-
Page 30: Using The Setup Menus
Mode selector button Photo resolution Use the image size option to set the size of the image captured. Bigger images contain more detail and therefore use more memory space. To set the image resolution: Switch the camera on and ensure that it is in Photo mode. -
Page 31: Possible Number Of Shots (Still Image)
Press the Mode selector button to confirm and exit the menu. Possible number of shots (still image) The table below shows the approximate number of shots that you can take at each setting based on internal memory and SD memory card. -
Page 32: Self-Timer
Use the exposure compensation (EV) setting to change the exposure for your pictures. Usually this value would be set to zero, but you might want to increase the exposure to light up a subject with strong back lighting, or decrease the exposure if taking a picture of something very bright. -
Page 33: Date Display
Use the Up shift selector button to select: Image Only or Full Display Press the Mode selector button to confirm and exit the menu. Date Display Use the time function to control turning the date/ time stamping on or off when taking a picture. To set date display: Turn the camera on and ensure that it is in Photo mode. -
Page 34: Video Quality
Press the Mode selector button. Use the Down shift selector button to navigate until the Video size option is highlighted. Use the Up shift selector button to confirm, select one of the two video sizes: 640 x 480, 320 x 240. -
Page 35: White Balance
Use the white balance option to correct color for different lighting conditions. When white balance is set to Auto, the camera automatically compensates for different lighting conditions. You can also set white balance to any of these options: Sunny, Tungsten, or Fluorescent. -
Page 36: Playback Menu
Note: Once deleted, files cannot be recovered so make sure that you have a backup before you delete. Delete all Use the Delete all function to delete all the files on either the memory card or the camera’s internal memory. To delete all the files: Turn the camera on and ensure that it is in Playback mode. -
Page 37: Dpof
You can also select how many copies print and whether to include the date and time. DPOF requires a memory card. When all images to be printed are tagged, remove the memory card and take it to an image studio for printing, or use it with a DPOF compatible printer. -
Page 38: Setup Menu
Only when the printer supports DPS, then you can use this print interface to print the pictures. In the process of printing, if error messages occur on the LCD display, please refer to the list for troubleshooting in the Appendix. -
Page 39: Auto-Power Off
1. Turn the camera on and ensure that it is in Setup mode. 2. Use the Up shift selector button to select option and use the Down shift selector button to format. 3. Press Set/ Function button to access the menu, press the Up/ Down shift selector button to confirm or cancel. -
Page 40: Osd Language
Although different countries use different TV systems, setting up the TV systems can help you prevent differences in the display of color TVs that result from dissimilar TV systems. Turn the camera on and ensure that it is in Setup mode. -
Page 41: Default
To reset factory default settings: Turn the camera on and ensure that it is in Setup mode. Use the Up shift selector button to select option and use the Down shift selector button to select the factory settings. Press Set/ Function button to access the menu, press the Up/ Down shift selector button to select or cancel. -
Page 42: Installing Software And Drivers
English Installing software and drivers Drivers When the camera is connected to the PC, the camera can be used as either a Mass Storage or a computer-based video camera. Mass storage The digital camera offers Mass Storage function as a card reader device. You can treat this digital camera as an SD card or mass storage device. -
Page 43: Installing The Driver
If the CD-ROM doesn’t automatically boot, use Windows Explorer to execute the InstallMgr.exe file in the root directory. Click the install button to install the driver. Follow the on-screen instructions. Use “Connecting to the PC” to connect the camera to the computer via the USB cable provided. -
Page 44: Presto! Video Works 6
If the CD does not auto-run, use Windows file manager to run the executable InstallMgr.exe under the root directory on the CD. Press the install button and follow the on screen instructions. After application is started, you can find more information on Presto! Mr. Photo 3 in the help files. -
Page 45: Appendix A: Specifications
DPI:1280 x 960, 2048 x 1536, 2592 x 1944, 4048 x 3040 (firmware interpolation) Movie clips AVI (Motion JPEG), suitable sound formats Movie:320 x 240 (30fps max), 640 x 480 (23 fps max) PC camera:320 x 240 (15fps max), 640 x 480 (14fps max) Zoom 4x digital zoom TFT screen 2.4-inch High definition TFT display (480x234 plain) -
Page 46: Appendix B: Troubleshooting
88.5 x 28.5 x 59 mm Weight Approximately 88 g without batteries Appendix B: Troubleshooting Refer to the symptoms and measures listed below before sending the camera for repairs. If the problem persists, contact your local reseller or service center. Power Supply Symptom... - Page 47 English Shooting Symptom Cause Measure The batteries are running Replace with a new set of low. batteries. The power is not on. Turn the power on. Press the Mode selector The camera is not in button for two seconds to shooting mode.
- Page 48 English Symptom Cause Measure The image was captured in The image is too Set the flash to something a dark place while set to no dark. other than flash off mode. flash. Playback Symptom Cause Measure Press the Mode selector It is not set to playback Cannot playback.
- Page 49 About connecting to your computer/software Symptom Cause Measure Check whether the hard disk has a The free space on space for running Windows, and if the the hard disk in your drive for loading image files has a...
Need help?
Do you have a question about the G-Shot D1211 and is the answer not in the manual?
Questions and answers