Advertisement
Quick Links
This design and instruction booklet is subject to copyright.
Included Hardware
56
8x30mm Dowel
112
8x16mm Screw
Tools Required
Customer Help Line:
+27 087 740 2101
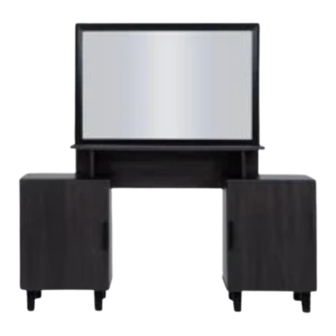
BURSA BRS PEDESTAL
ASSEMBLY MANUAL
(Please note there are other hardware not represented but will be found in the box)
13
Confirmat Screw
8
8x30mm Screw
Allen Key
M4-size
are made using manufacturer authorised parts.
ESTIMATED ASSEMBLE TIME: 1h:45min
www.Fairprice.co.za
32
PIN & CAM
16
100mm Bursa Leg
NOTE
CAUTION
WARNING
1/4
8
35mm POT HINGE
64
Panel Pin
Advertisement

Related Manuals for FAIR PRICE BURSA BRS PEDESTAL 8-459


Summary of Contents for FAIR PRICE BURSA BRS PEDESTAL 8-459
- Page 1 Customer Help Line: +27 087 740 2101 This design and instruction booklet is subject to copyright. www.Fairprice.co.za BURSA BRS PEDESTAL ASSEMBLY MANUAL Included Hardware (Please note there are other hardware not represented but will be found in the box) 8x30mm Dowel Confirmat Screw PIN &...
- Page 2 Customer Help Line: +27 087 740 2101 This design and instruction booklet is subject to copyright. www.Fairprice.co.za PARTS LIST PARTS LIST PART NAME QUANTITY WIDTH DEPTH SIDE BOTTOM SHELF STRECHER DOOR BACKING DRESSER TOP DRESSER UP RIGHT...
- Page 3 Customer Help Line: +27 087 740 2101 This design and instruction booklet is subject to copyright. www.Fairprice.co.za ASSEMBLY IDENTIFY THE TOP (PART 1), WITH A SCREW DRIVER FASTEN THE 4 PINS (c) AND ON THE TWO PRE- DRILLED HOLES INSERT 2 DOWELS BY HAND PLEASE REPEAT THIS STEP FOR THE BOTTOM (PART 3) WITH THE TOP AND BOTTOM PREPARED IDENTIFY THE SIDES (PART 2) AND ATTACH THE TWO TOGETHER GUIDED BY THE PINS AND DOWELS ON...
- Page 4 Customer Help Line: +27 087 740 2101 This design and instruction booklet is subject to copyright. www.Fairprice.co.za ASSEMBLY Hinge adjustment POSITION THE DOOR (PART 6) PARALLEL TO THE SIDE, THEN ALIGN THE HINGES WITH THE HOLES DRILLED ON TO THE SIDES (PART 2) WITH A SCREW DRIVER AND 8X16mm SCREWS (e) FASTEN ON THE HINGES ON TO THE SIDES (PART 2) ONCE DONE ADJUST THE DOOR (PART 6) SQUARE WITH THE INFORMATION ON THE RIGHT ONCE THE DOOR IS SQUARE THE UNIT IS COMPLETE."...
Need help?
Do you have a question about the BURSA BRS PEDESTAL 8-459 and is the answer not in the manual?
Questions and answers